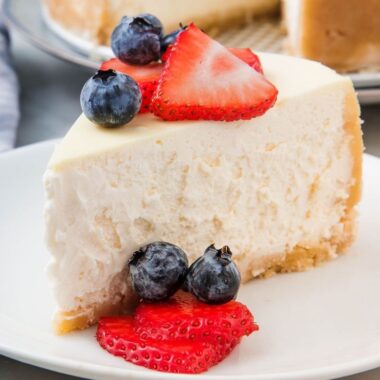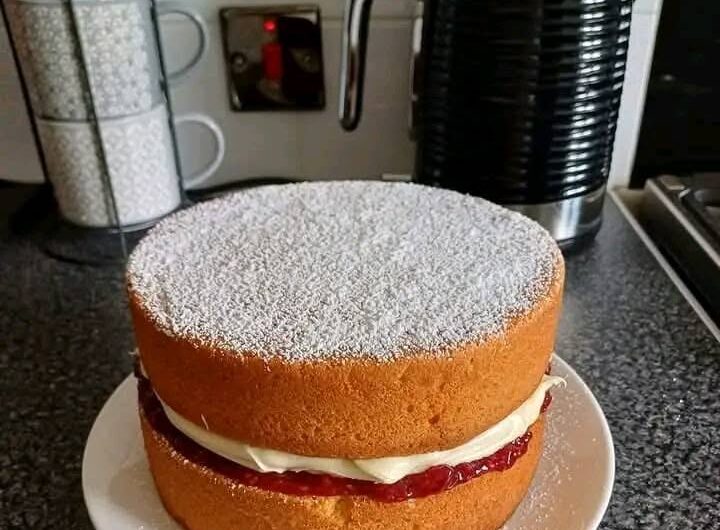
Victoria Sponge Cake is a classic British dessert — two soft sponge layers filled with jam and buttercream, simple in concept but elegant in execution. This version brings that same classic into the air fryer, using hot air circulation to deliver a golden exterior and a soft, airy interior in a fraction of the time a traditional oven bake would take, with no preheating required.
What makes this approach work so well is that the air fryer’s circulating hot air cooks the sponge evenly, without hot spots or uneven browning, while dramatically cutting down the total time involved — from over an hour in a conventional oven to just 26 minutes of actual cooking. The full recipe, including prep, cooking, and cooling, comes together in about 41 minutes and yields 12 servings.
This is also a recipe with real structure to it: a proper sponge batter, a two-stage bake with a temperature drop partway through, a strawberry buttercream made separately, and a jam-and-buttercream assembly. Understanding how these pieces fit together makes the process feel much more manageable.
Understanding the Key Ingredients
Before getting into the workflow, it helps to understand what each ingredient in this cake is doing.
Self-raising flour already contains baking powder, which is what gives the sponge its rise and helps it stay light and airy — the defining texture of a proper Victoria sponge.
Caster sugar is finely ground, which allows it to dissolve easily into the batter, contributing to a smooth texture and a fine, even crumb.
Lemon curd, mixed directly into the batter, adds a subtle tanginess that plays against the sweetness of the jam and buttercream, giving the finished cake more depth than sugar alone would provide.
Butter, used at room temperature, is what gives the sponge its richness and moist, tender crumb.
Eggs provide structure, helping the batter rise and hold its shape. Room-temperature eggs mix into the batter more easily than cold ones.
Vanilla essence adds a warm, aromatic note that ties the sponge, jam, and buttercream together.
Skimmed milk balances the fat content from the butter and helps achieve the right batter consistency — not too thick — while keeping the finished cake light.
Extra virgin olive oil, used in a small amount, adds moisture and a touch of richness, helping the crumb stay tender.
Strawberry jam is the traditional Victoria sponge filling, providing sweetness and fruitiness against the plainer sponge.
Strawberry buttercream — made from butter, icing sugar, strawberry food coloring, single cream, vanilla essence, and maple syrup — adds a creamy, rich, visually appealing pink layer that complements the jam.
Understanding the Two-Stage Bake
One detail worth calling out specifically: this cake isn’t baked at a single constant temperature. It starts at 180°C (360°F) for the first 10 minutes, then drops to 160°C (320°F) for the remaining 16 minutes.
This two-stage approach mirrors what a conventional oven bake often does instinctively — starting hotter to kick off the rise and set the structure, then dropping the temperature to let the interior finish cooking through without over-browning the top or drying out the edges. In the more concentrated heat of an air fryer, this temperature drop is what allows the sponge to cook evenly all the way through without burning on the outside.
Mise en Place: Setting Up Before You Bake
Bring your butter, eggs, and milk to room temperature before you start. Cold ingredients can result in a lumpy batter and an uneven texture, so this is worth planning for ahead of time rather than trying to fix mid-mixing.
Prep your cake pans before you make the batter. Lightly grease the pans and dust them with flour — or line the bottoms with parchment paper for extra insurance against sticking — so they’re ready the moment your batter is mixed.
Have your buttercream ingredients measured separately, since the buttercream comes together while the cakes are cooling, and it helps to not be searching for ingredients at that stage.
Workflow: How Everything Comes Together
Making the Cake Batter
In a mixing bowl, add the room-temperature butter and caster sugar. Using a hand mixer, beat together until light and fluffy. Crack in the eggs, add the vanilla essence and olive oil, and mix well. Once the mixture is creamy, add the lemon curd, self-raising flour, and skimmed milk. Stir gently with a wooden spoon to combine, keeping the batter smooth but not too thick — if it feels too thick, add a little more milk.
Preparing the Cake Pans
Lightly grease the cake pans with olive oil spray and dust with flour. Pour the batter evenly between the two pans, smoothing the surface with the back of a spoon.
Cooking in the Air Fryer
Place one cake pan at a time in the air fryer. Set to 180°C (360°F) and cook for 10 minutes. After 10 minutes, reduce the temperature to 160°C (320°F) and cook for an additional 16 minutes. Once cooked, remove from the air fryer and allow to cool.
Making the Buttercream
While the cakes cool, beat the butter and icing sugar together using a hand mixer until smooth. Add the strawberry food coloring, single cream, vanilla essence, and maple syrup, and continue mixing until creamy and fluffy. Refrigerate the buttercream while the cakes finish cooling.
Assembling the Cake
Once the cakes are fully cooled, slice off the tops to create flat surfaces. Spread a generous layer of strawberry jam on one cake layer, then spread the strawberry buttercream on top of the jam. Place the second cake layer on top to sandwich the filling together.
Chilling and Serving
Place the assembled cake in the fridge for about an hour to set. Once chilled, slice and serve.
Why the Air Fryer Works So Well for This Cake
Making a Victoria Sponge in the air fryer comes with a handful of genuine advantages over the traditional oven method:
- No preheating required, which saves time before you’ve even started baking.
- Faster cooking overall, cutting the process down from over an hour to just 26 minutes of actual bake time.
- Effortless cleanup, since air fryers are generally easier to clean than a full oven.
- Even cooking, thanks to the circulating hot air, which avoids hot spots or uneven browning.
Getting the Texture Right
- Use room-temperature ingredients throughout. Cold butter, eggs, or milk can result in a lumpy batter and uneven texture.
- Don’t overmix once the flour goes in. Mix gently with a wooden spoon — overmixing develops the flour too much and can lead to a dense cake instead of a light, airy one.
- Grease and flour your pans properly, or line them with parchment paper, to prevent sticking and ensure clean release once baked.
- Check for doneness properly. The cake is done when it’s golden brown on top and springs back when lightly touched. A toothpick inserted into the center should come out clean.
- Let the cake cool completely before assembling. This is essential — assembling with warm cake layers will cause the buttercream to melt rather than hold its shape.
Air Fryer Victoria Sponge Cake
Description
A classic British Victoria Sponge Cake — two soft sponge layers filled with strawberry jam and strawberry buttercream — made entirely in the air fryer. Light, fluffy, and golden, with no oven or preheating required.
Duration
- Total Time: 41 minutes (including prep, cooking, and cooling)
- Servings: 12
Ingredients
For the Sponge Cake:
- 400g self-raising flour
- 450g caster sugar
- 50g lemon curd
- 200g butter, room temperature
- 4 medium eggs
- 1 tablespoon vanilla essence
- 480ml skimmed milk
- 1 tablespoon extra virgin olive oil
- 4 tablespoons strawberry jam
For the Strawberry Buttercream:
- 115g butter
- 210g icing sugar
- ½ teaspoon strawberry food coloring
- 1 tablespoon single cream
- 1 teaspoon vanilla essence
- 1 teaspoon maple syrup
Instructions
- In a mixing bowl, add the room-temperature butter and caster sugar. Using a hand mixer, beat together until light and fluffy. Crack in the eggs, add the vanilla essence and olive oil, and mix well.
- Once the mixture is creamy, add the lemon curd, self-raising flour, and skimmed milk. Stir gently with a wooden spoon to combine, keeping the batter smooth but not too thick. If too thick, add a little more milk.
- Lightly grease the cake pans with olive oil spray and dust with flour. Pour the batter evenly between the two pans, smoothing the surface with the back of a spoon.
- Place one cake pan at a time in the air fryer. Set to 180°C (360°F) and cook for 10 minutes. Reduce the temperature to 160°C (320°F) and cook for an additional 16 minutes. Remove and allow to cool.
- While the cakes cool, beat the butter and icing sugar together with a hand mixer until smooth. Add the strawberry food coloring, single cream, vanilla essence, and maple syrup, mixing until creamy and fluffy. Refrigerate while the cakes cool.
- Once the cakes are fully cooled, slice off the tops to create flat surfaces. Spread a generous layer of strawberry jam on one cake layer, then spread the strawberry buttercream on top. Place the second cake layer on top to sandwich the filling together.
- Place the assembled cake in the fridge for about an hour to set. Slice and serve.
Notes
- Make sure butter, eggs, and milk are at room temperature before starting — cold ingredients can result in a lumpy batter and uneven texture.
- Mix gently once the flour is added; overmixing can result in a dense cake.
- Grease and flour the cake pans thoroughly, or line with parchment paper, to prevent sticking.
- The cake is done when golden brown on top and springs back when lightly touched, or when a toothpick inserted in the center comes out clean.
- Allow the cake to cool completely before assembling, or the buttercream will melt when applied.
- Nutrition (per serving): Calories: 608kcal | Carbohydrates: 89g | Protein: 8g | Fat: 25g | Saturated Fat: 15g | Cholesterol: 113mg | Sodium: 242mg | Fiber: 1g | Sugar: 63g
Medical Disclaimer: The nutritional information provided with this recipe is for general informational purposes only and is not intended as medical or dietary advice. It should not be used to diagnose, treat, cure, or prevent any disease or health condition, and it is not a substitute for professional medical guidance. Nutritional values are approximate and may vary based on specific ingredients, brands, and portion sizes used. Individuals with allergies, dietary restrictions, or medical conditions — including dairy, egg, or gluten sensitivities — should consult a qualified healthcare provider or registered dietitian before making changes to their diet. Reliance on any information provided in this recipe is solely at your own risk.