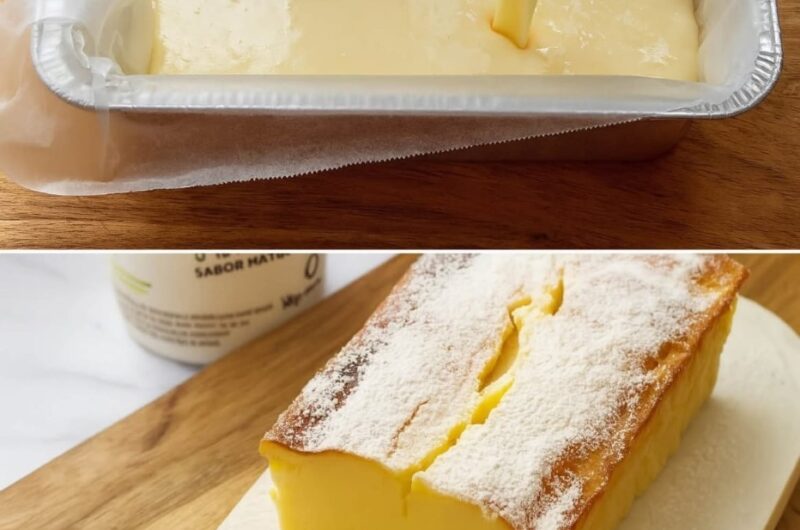
This cake is built around a simple swap: Greek yogurt stands in for heavy butter or cream, keeping the calorie count lower while still delivering a soft, moist, bakery-style result. The batter comes together in two bowls — dry ingredients whisked separately, wet ingredients whisked separately — before being combined gently and baked. There’s no complicated technique involved, but a few specific details, like not overmixing and not overbaking, make a real difference in the final texture.
Greek yogurt does more than just replace fat in this recipe. It adds moisture without excessive fat, extra protein, a tender texture, and a slight tang that balances the sweetness — all qualities that a traditional butter-based cake wouldn’t naturally have.
Understanding the Batter
Since this recipe splits into distinct wet and dry components before combining, it helps to understand what each part contributes:
The dry ingredients — flour, baking powder, baking soda, and salt — are whisked together separately first. Mixing these on their own helps the cake rise evenly once combined with the wet mixture.
The wet ingredients — Greek yogurt, eggs, a sweetener of choice, milk, oil, and vanilla extract — are whisked together until smooth and creamy. The yogurt is the foundation here, providing moisture and protein in place of butter or cream.
Optional add-ins, such as lemon zest, cinnamon, blueberries, chocolate chips, or chopped nuts, are folded in last, after the wet and dry mixtures have been combined.
Kitchen Workflow: The Order That Actually Saves Time
Here’s the most efficient order to work through this recipe:
Step 1 — Preheat the oven and prep the pan. Preheat your oven to 175°C (350°F). Lightly grease your cake pan or line it with parchment paper to prevent sticking and make cleanup easier.
Step 2 — Mix the dry ingredients. In a medium bowl, whisk together the flour, baking powder, baking soda, and salt. Set this aside.
Step 3 — Combine the wet ingredients. In a large bowl, whisk together the Greek yogurt, eggs, sweetener, milk, oil, and vanilla extract until smooth and creamy. Avoid overmixing at this stage — you only need a smooth consistency.
Step 4 — Combine wet and dry mixtures. Gradually add the dry ingredients into the wet mixture, using a spatula or whisk to gently combine. Stop mixing as soon as no dry flour remains — overmixing at this stage develops gluten and can make the cake dense or rubbery.
Step 5 — Add optional flavors. Fold in any optional ingredients, such as lemon zest, cinnamon, blueberries, or chocolate chips, keeping additions moderate so the cake stays light and balanced.
Step 6 — Transfer to the pan. Pour the batter into the prepared pan, spreading it evenly with a spatula. Tap the pan lightly on the counter to remove large air bubbles.
Preparing the dry and wet ingredients as two separate mixtures before combining is what allows the final mixing step to be as brief as possible — since the goal is to combine them with minimal stirring, having both fully prepared in advance means there’s no extra mixing needed once they meet.
Component Organization: Setting Up Your Station
A simple two-bowl setup supports this recipe well:
- A medium bowl — for whisking the dry ingredients together
- A large bowl — for whisking the wet ingredients together, and for holding the final combined batter
- A whisk — for both the dry and wet mixtures
- A spatula — for gently combining the wet and dry mixtures and for folding in any optional add-ins
- A cake pan or loaf pan, greased or lined with parchment — ready before you start mixing
- Parchment paper — for lining the pan if preferred over greasing
Having both the dry and wet mixtures fully prepared before combining them means the final mixing step — the one where overmixing risk is highest — can be kept as brief and gentle as possible.
Step-by-Step Assembly Strategy
Assembly here is really about combining the two mixtures with restraint:
- Add the dry ingredient mixture gradually into the wet mixture, rather than dumping it all in at once — this makes it easier to combine gently and stop as soon as everything is incorporated.
- Use a spatula or whisk with light, deliberate strokes rather than vigorous stirring, since the goal is simply to eliminate dry flour pockets, not to develop a perfectly uniform batter through extended mixing.
- Fold in any optional add-ins after the base batter is combined, using gentle folding motions to distribute them evenly without deflating the batter.
- Pour the finished batter into the prepared pan and spread it evenly with a spatula.
- Tap the pan lightly on the counter before baking to release any large air bubbles trapped in the batter.
Baking Instructions
Bake for 28–35 minutes, depending on your oven and pan type. The cake is ready when the top looks lightly golden, the center springs back when touched, and a toothpick inserted in the center comes out mostly clean.
Avoid overbaking, since yogurt cakes dry out quickly if left too long in the oven. Because ovens vary, it’s worth checking early — starting around the 28-minute mark rather than waiting for the full range to pass.
Cooling Instructions
Let the cake cool in the pan for 10 minutes, then transfer it to a wire rack. Cooling fully helps the texture settle and prevents crumbling when the cake is sliced.
Serving Ideas
This cake can be served:
- Plain
- With fresh berries
- With a dusting of powdered sweetener
- With a spoon of extra Greek yogurt
- With cinnamon and honey
- With sliced bananas
For a healthier dessert overall, pairing it with fruit instead of frosting keeps the calorie count lower while still adding flavor and visual appeal.
Healthy Variations
Lemon Greek Yogurt Cake: Add 2 tablespoons of lemon juice and 1 tablespoon of lemon zest for a fresh, bright version.
Chocolate Greek Yogurt Cake: Replace ¼ cup of the flour with unsweetened cocoa powder, and add mini dark chocolate chips for extra richness.
Berry Yogurt Cake: Fold in blueberries, raspberries, or strawberries. Fresh berries add both moisture and natural sweetness.
High-Protein Version: Replace part of the flour with vanilla protein powder — for example, 1 cup flour plus ½ cup protein powder. You may need extra milk, since protein powder absorbs more moisture than flour.
Tips for the Best Texture
Use thick Greek yogurt. Thin yogurt can make the batter watery; if your yogurt contains excess liquid, stir it first before adding it to the batter.
Bring ingredients to room temperature. Eggs and yogurt mix more evenly when they aren’t cold, which improves both texture and baking consistency.
Do not overmix. A gentle batter creates a softer cake — overmixing is one of the most common mistakes when making this style of cake.
Check for doneness early. Every oven is different, so it’s worth starting to check around the 28-minute mark rather than assuming the full bake time is needed.
Common Mistakes to Avoid
Cake too dense: This can result from overmixing, using too much flour, or using expired baking powder.
Cake too dry: This can result from overbaking, not using enough yogurt, or a batter that was too thick to begin with.
Cake sinks in the middle: This can happen if the oven was opened too early, if the cake was underbaked, or if there was too much liquid in the batter.
Simple Frosting Option
For a light topping, mix ½ cup Greek yogurt, 1 tablespoon honey, and a few drops of vanilla together, then spread lightly over the cooled cake. This keeps the dessert lower in calories than a traditional buttercream frosting while still adding a touch of sweetness and creaminess.
Storage Strategy
Refrigerator: Store in an airtight container for up to 5 days. Because the cake contains yogurt, refrigeration helps keep it fresh longer.
Freezer: Wrap slices individually and freeze for up to 2 months. Thaw overnight in the refrigerator, or at room temperature for about 1 hour.
Practical Notes for Best Results
- Whisk the dry and wet ingredients separately first, so the final combining step can be brief and gentle.
- Stop mixing as soon as no dry flour remains — this single habit prevents the most common texture problems with this style of cake.
- Use thick, well-stirred Greek yogurt for the best batter consistency.
- Bring the eggs and yogurt to room temperature before mixing for more even results.
- Check for doneness starting around the 28-minute mark, since yogurt cakes dry out quickly if left in the oven too long.
- Let the cake cool fully before slicing to help the texture settle and prevent crumbling.
Part 2: Straightforward Recipe Card
Low-Calorie Greek Yogurt Cake
Description: A soft, moist, lightly sweet cake made with Greek yogurt instead of heavy butter or cream. Lower in calories while still tasting rich and satisfying — perfect as a breakfast cake, afternoon snack, or light dessert.
Servings: 10 slices
Ingredients:
Dry ingredients:
- 1 ½ cups all-purpose flour
- 1 teaspoon baking powder
- ½ teaspoon baking soda
- ¼ teaspoon salt
Wet ingredients:
- 1 cup nonfat or low-fat Greek yogurt
- 2 large eggs
- ⅓ cup honey, maple syrup, or granulated sweetener
- ¼ cup milk of choice
- 2 tablespoons light olive oil or melted coconut oil
- 1 teaspoon vanilla extract
Optional add-ins (choose one or combine a few):
- 1 tablespoon lemon zest
- ½ teaspoon cinnamon
- ½ cup blueberries
- ¼ cup mini dark chocolate chips
- 2 tablespoons chopped nuts
Instructions:
- Preheat your oven to 175°C (350°F). Lightly grease your cake pan or line it with parchment paper.
- In a medium bowl, whisk together the flour, baking powder, baking soda, and salt. Set aside.
- In a large bowl, whisk together the Greek yogurt, eggs, sweetener, milk, oil, and vanilla extract until smooth and creamy. Do not overmix.
- Gradually add the dry ingredients into the wet mixture, using a spatula or whisk to gently combine. Stop mixing as soon as no dry flour remains.
- Fold in any optional add-ins, keeping additions moderate so the cake stays light and balanced.
- Pour the batter into the prepared pan. Spread evenly with a spatula, and tap the pan lightly on the counter to remove large air bubbles.
- Bake for 28–35 minutes, until the top looks lightly golden, the center springs back when touched, and a toothpick inserted in the center comes out mostly clean. Avoid overbaking.
- Let the cake cool in the pan for 10 minutes, then transfer it to a wire rack to cool fully before slicing.
Notes:
- Estimated nutrition per slice (based on 10 slices): 140–170 calories, 7–9g protein, 3–5g fat, 18–22g carbohydrates. Nutrition varies depending on substitutions and toppings.
- Simple frosting option: mix ½ cup Greek yogurt, 1 tablespoon honey, and a few drops of vanilla, then spread lightly over the cooled cake for a lower-calorie alternative to buttercream.
- Storage: refrigerate in an airtight container for up to 5 days, or freeze individually wrapped slices for up to 2 months.
Medical Disclaimer: The nutritional and dietary information provided in this document is for general informational and educational purposes only and is not intended as, and should not be substituted for, professional medical or nutritional advice, diagnosis, or treatment. Nutritional values are estimated and may vary based on specific brands, ingredient substitutions, and portion sizes used. Individuals with food allergies, dietary restrictions, or medical conditions—including but not limited to gluten sensitivities, egg allergies, or dairy allergies—should consult a qualified healthcare provider or registered dietitian before making changes to their diet. Reliance on any information provided in this document is solely at your own risk.