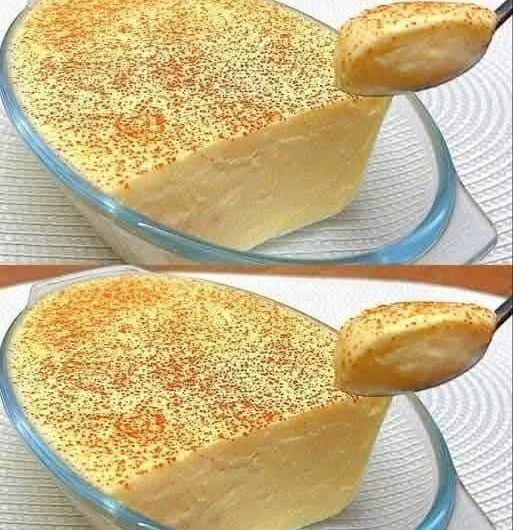
This dessert works on a simple idea: pair something rich with something bright, and let them balance each other out. Ricotta cheese brings a delicate creaminess, whipped cream adds airiness, and fresh citrus — orange, lemon, and optionally lime — cuts through both with acidity and aroma. Layered over a buttery biscuit base and finished with a citrus syrup, it turns into something that feels elegant without asking for complicated technique.
It’s the kind of dessert that suits a lot of occasions. Served in individual glasses, it looks put-together for a dinner party, but the actual preparation is closer to a no-bake layered dessert — mix, whip, fold, layer, chill. The main thing this recipe asks for is patience during the chilling stage, since that’s when the flavors and textures really come together.
Mise En Place: Getting Organized Before You Assemble
Because this dessert is built in distinct layers, having each component ready before you start assembling makes the process much smoother.
The biscuit base station. Crushed butter biscuits or graham crackers, melted butter, and brown sugar, ready to be mixed together.
The citrus syrup station. Fresh orange juice, lemon juice, sugar, and finely grated orange zest, measured out for the saucepan.
The ricotta cream station. Whole milk ricotta cheese, powdered sugar, honey, vanilla extract, orange zest, lemon zest, fresh orange juice, fresh lemon juice, and a pinch of salt.
The whipped cream station. Heavy whipping cream, kept chilled until you’re ready to whip it.
Garnishes, prepped separately. Fresh orange slices, candied lemon peel, chopped pistachios, fresh mint leaves, or white chocolate shavings — whichever combination you’re using.
Equipment. Mixing bowls, an electric mixer or whisk, a citrus grater or zester, a small saucepan, serving glasses or dessert bowls, a spatula, and refrigerator space to chill everything.
Since the syrup needs time to cool and the assembled dessert needs at least 2 hours to chill, it helps to think about timing early — make the syrup and biscuit base first, since both benefit from resting before the final assembly.
Workflow: How the Process Flows
- Prepare the biscuit layer. Mix crushed biscuits with melted butter and brown sugar until the crumbs resemble wet sand and hold together slightly when pressed. Divide among serving glasses, press gently into a compact base, and refrigerate while you prepare the rest.
- Make the citrus syrup. Combine orange juice, lemon juice, sugar, and orange zest in a small saucepan over medium-low heat, stirring until the sugar dissolves. Simmer gently for 5 to 7 minutes until slightly reduced and lightly thickened but still pourable. Remove from heat and let cool completely before using.
- Prepare the ricotta mixture. Beat the ricotta cheese until smooth and creamy — this step matters, since ricotta can start out slightly grainy. Add powdered sugar, honey, vanilla, both zests, both juices, and a pinch of salt, mixing until fully combined and aromatic. Taste and adjust sweetness if needed.
- Whip the cream. In a chilled bowl, whip the heavy cream until soft peaks form, being careful not to overwhip, which can make it grainy or overly stiff. Gently fold the whipped cream into the ricotta mixture in several additions, folding slowly to preserve the airy texture.
- Assemble the dessert. Remove the glasses from the refrigerator, add a layer of ricotta cream over the biscuit base, drizzle a small amount of citrus syrup on top, and repeat the layers until the glasses are nearly full, finishing with a final layer of cream.
- Chill. Cover with plastic wrap and refrigerate for at least 2 hours, which lets the biscuit layer soften slightly and allows the citrus flavors to become more pronounced.
Why Technique Matters Here
A few steps in this recipe are easy to rush, but they’re exactly where the final texture is decided.
Beating the ricotta thoroughly. Ricotta straight from the container can have a slightly grainy texture. Beating it until smooth before adding the other ingredients is what turns it into the silky base this dessert depends on.
Not overwhipping the cream. Whipped cream that goes past soft peaks starts to turn grainy or overly stiff, which makes it harder to fold smoothly into the ricotta mixture and can leave the final texture less light.
Folding gently, not stirring. Folding the whipped cream into the ricotta mixture in stages, rather than mixing it in all at once, is what keeps the final cream light and airy instead of deflated.
Cooling the syrup completely. Using warm syrup would start to melt the cream layers as you assemble the dessert, so letting it cool fully before drizzling is a small step that protects the final texture.
Understanding the Texture and Flavor Balance
This dessert layers three distinct textures on top of each other: a slightly crunchy biscuit base, a smooth, rich ricotta cream, and a citrus syrup that adds both brightness and moisture between the layers. The flavor mirrors that same balance — creamy and sweet, but cut by natural acidity from the lemon and orange juice, with the zest intensifying the aroma and giving the whole dessert a vibrant, fresh character rather than a heavy one.
Approved Variations
This base recipe adapts easily into a few different directions:
Berry Citrus Ricotta Dessert. Add fresh strawberries, blueberries, or raspberries between the layers for extra freshness and color.
Chocolate Citrus Version. Mix white chocolate into the ricotta cream for a richer, sweeter finish.
Nutty Mediterranean Style. Include toasted almonds or pistachios between the layers for added crunch and flavor.
Tropical Citrus Dessert. Add mango or pineapple pieces along with lime zest for a tropical twist.
Garnishing Ideas
Right before serving, a few finishing touches can elevate the presentation: thin orange slices add freshness and color, chopped pistachios bring crunch, white chocolate shavings add richness, and mint leaves contribute a refreshing aroma. Candied citrus peel is another option for a more sophisticated presentation.
Serving Suggestions
This dessert pairs well with:
- Hot coffee
- Espresso
- Herbal tea
- Sparkling water with lemon
- Fresh fruit platters
It works nicely as a lighter finish after pasta dishes, grilled meals, or a Mediterranean-style dinner.
Storage Instructions
Store the dessert covered in the refrigerator for up to 3 days. Freezing isn’t recommended, since the ricotta and whipped cream can separate after thawing. If you’re preparing this ahead of time, add garnishes shortly before serving to keep them fresh and preserve their texture.
Why This Dessert Works for Different Occasions
Because it’s served in individual glasses and comes together with straightforward mixing and layering rather than any baking, this dessert scales easily for both small, casual servings and larger dinner parties. It’s light enough to follow a heavier meal, but rich enough on its own to feel like a genuine dessert rather than an afterthought.
Citrus Ricotta Cream Dessert
Description: A smooth, creamy, and refreshing layered dessert combining rich ricotta cheese with bright citrus flavors from orange and lemon, built over a buttery biscuit base and finished with a citrus syrup.
Duration:
- Preparation Time: 25 minutes
- Chilling Time: 2 hours
- Total Time: Approximately 2 hours 25 minutes
- Servings: 6
Ingredients:
For the Ricotta Cream:
- 2 cups whole milk ricotta cheese
- 1 cup heavy whipping cream
- ⅓ cup powdered sugar
- 3 tablespoons honey
- 1 teaspoon vanilla extract
- Zest of 1 orange
- Zest of 1 lemon
- 1 tablespoon fresh orange juice
- 1 tablespoon fresh lemon juice
- Pinch of salt
For the Citrus Syrup:
- ½ cup fresh orange juice
- 2 tablespoons lemon juice
- 3 tablespoons sugar
- 1 teaspoon finely grated orange zest
For the Layers:
- 1½ cups crushed butter biscuits or graham crackers
- 2 tablespoons melted butter
- 1 tablespoon brown sugar
Optional Garnishes:
- Fresh orange slices
- Candied lemon peel
- Chopped pistachios
- Fresh mint leaves
- White chocolate shavings
Instructions:
- Mix the crushed biscuits with melted butter and brown sugar until crumbs resemble wet sand and hold together when pressed. Divide among serving glasses, press gently to form a base layer, and refrigerate.
- In a small saucepan, combine the orange juice, lemon juice, sugar, and orange zest for the syrup. Heat over medium-low, stirring until the sugar dissolves, then simmer 5–7 minutes until slightly reduced. Remove from heat and let cool completely.
- Beat the ricotta cheese until smooth and creamy. Add powdered sugar, honey, vanilla, both zests, both juices, and a pinch of salt, mixing until fully combined. Taste and adjust sweetness if needed.
- Whip the chilled heavy cream until soft peaks form, being careful not to overwhip. Gently fold the whipped cream into the ricotta mixture in several additions.
- Remove the glasses from the refrigerator. Add a layer of ricotta cream over the biscuit base, drizzle with citrus syrup, and repeat until the glasses are nearly full, finishing with a layer of cream.
- Cover with plastic wrap and refrigerate for at least 2 hours before serving.
- Garnish as desired just before serving.
Notes:
- Beat the ricotta thoroughly before adding other ingredients to eliminate graininess.
- Avoid overwhipping the cream, and fold it into the ricotta gently to preserve airiness.
- Let the citrus syrup cool completely before using, to protect the texture of the layers.
- Store covered in the refrigerator for up to 3 days; do not freeze, as the ricotta and whipped cream may separate after thawing.
- Add garnishes shortly before serving if preparing ahead of time.
Medical Disclaimer: This content is provided for general informational and educational purposes only and is not intended as, and should not be substituted for, professional medical, nutritional, or dietary advice. If you have specific dietary restrictions, food allergies, or health conditions, consult a qualified healthcare provider or registered dietitian before making changes to your diet. The author and publisher assume no responsibility for any adverse effects resulting from the preparation or consumption of this recipe.