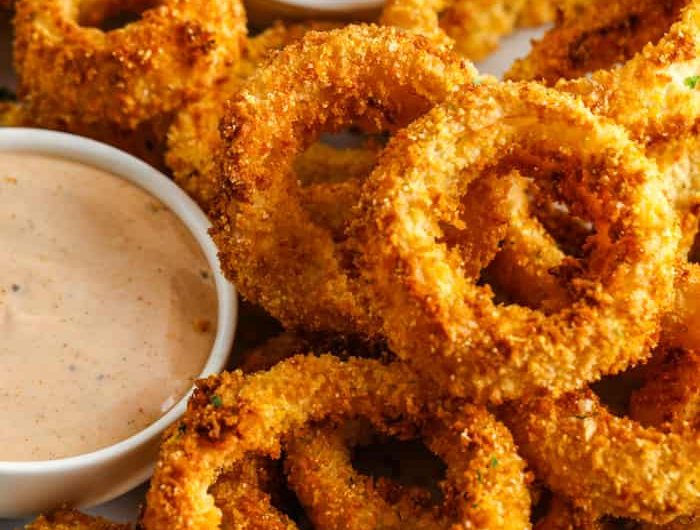
Crispy fried onions are usually a deep-fry job — hot oil, careful batches, and a fair amount of cleanup afterward. This recipe strips that down to just two ingredients, onions and a tablespoon of oil, and uses the air fryer’s dry heat combined with a two-stage temperature approach to get a similar crispy, golden result. No batter, no flour, no submerging anything in oil — just thinly sliced onion rings, a light coating of oil, and patient, staged cooking.
What makes this method work is the temperature sequencing: a short initial blast at a higher heat to kick off browning, followed by a longer stretch at a lower temperature that slowly dries and crisps the onions without burning them. It’s a simple enough process that the real skill involved is really just patience and attentiveness during the mixing intervals.
Mise En Place: Getting Organized Before You Start
This is about as minimal a prep list as a recipe gets, but a little organization still helps the process go smoothly.
The onions. 2 medium to large yellow onions, or about 1 pound total.
The oil. 1 tablespoon of cooking oil.
Equipment. An air fryer, and a mandolin slicer if you have one — since even, thin slices are what allow the onions to cook and crisp consistently.
Having the onions peeled and sliced before you turn on the air fryer means you’re not scrambling to finish prep while the basket is already heating.
Workflow: How the Process Flows
- Slice the onions. Peel and cut the onions into thin round slices.
- Oil and separate. Drizzle oil over the slices, then gently separate them into individual rings.
- Initial high-heat fry. Place the onion rings in the air fryer basket and fry at 300°F for 10 minutes, gently mixing the rings every 5 minutes.
- Lower the temperature. Reduce the heat to 240°F and continue cooking, mixing gently every 5 minutes. This stage takes about 15 to 18 minutes at 240°F to reach the desired color and texture.
Why the Two-Stage Temperature Matters
Starting at a higher temperature (300°F) for the first 10 minutes gives the onions a head start on browning and helps drive off some of their initial moisture quickly. If the onions stayed at this higher heat for the entire cook, though, they’d likely burn on the outside before the inside had a chance to dry out and crisp properly.
That’s why the temperature drops to 240°F for the remainder of the cooking time. This lower, more sustained heat lets the onions continue drying out and crisping gradually, giving you more control over the final color and texture without the risk of scorching that a longer stretch at the higher temperature would bring.
Why Mixing at Intervals Is Necessary
Gently mixing the onion rings every 5 minutes, at both temperature stages, keeps them from cooking unevenly. Onion slices near the edges or bottom of the basket are exposed to more direct heat than ones stacked in the middle, so redistributing them periodically helps everything reach a similar level of crispiness by the end, rather than ending up with some rings perfectly done and others still soft or undercooked.
Handling this gently, rather than tossing vigorously, also matters — thin onion slices become fragile as they dry out and crisp, and rough handling partway through cooking can break them apart before they’ve finished.
Choosing Between Yellow and Red Onions
Either yellow or red onions work for this recipe, but they don’t produce identical results. Red onions will result in a darker color once fried compared to yellow onions, so if you’re going for a lighter, more classic golden fried-onion look, yellow onions are the better choice. If a deeper color doesn’t bother you — or you simply have red onions on hand — they’ll still crisp up using the same method and timing.
Adjusting for Batch Size
The timing given in this recipe is calibrated for about 1 pound of onions. If you’re working with a larger batch, the timing described won’t necessarily hold — instead, keep frying and checking every 5 minutes at 240°F until the onions reach the color and texture you’re after. Because a bigger batch means more onion volume competing for the same airflow inside the basket, it’s reasonable to expect the process to take somewhat longer than the times listed for a smaller batch.
Why Slice Thickness Affects the Outcome
Cutting the onions into thin, even rounds is what allows them to dry out and crisp within a reasonable cooking time. Thicker slices retain more moisture and will take considerably longer to reach the same texture, if they crisp evenly at all — a mandolin slicer helps keep the thickness consistent across the whole batch, which is part of why it’s listed as useful equipment alongside the air fryer itself.
What “Done” Looks Like
Since this recipe doesn’t rely on an internal temperature check the way meat does, doneness here is really a matter of color and texture — the onions should reach a golden (or, for red onion, a darker) color and a crisp, dried texture rather than anything soft or limp. Because individual air fryers vary and batch sizes differ, checking every 5 minutes during the 240°F stage, rather than relying strictly on the clock, is the more reliable way to catch the right moment to stop.
Nutritional Information (Approximate, Whole Recipe)
- Calories: 200 kcal
- Carbohydrates: 43.2 g
- Protein: 5.2 g
- Fat: 2.2 g
- Saturated Fat: 0.4 g
- Potassium: 707 mg
- Fiber: 10.3 g
- Sugar: 19.3 g
- Calcium: 105 mg
- Iron: 1 mg
Air Fryer Crispy Fried Onions
Description: Thin, crispy fried onion rings made in the air fryer with just onions and a touch of oil — no deep frying required.
Ingredients:
- 2 medium to large yellow onions (about 1 lb)
- 1 tablespoon cooking oil
Instructions:
- Peel and cut the onion into thin round slices.
- Drizzle oil over the slices, then gently separate them into individual rings.
- Place the onion rings in the air fryer basket. Fry at 300°F for 10 minutes, gently mixing the rings every 5 minutes.
- Lower the temperature to 240°F and continue cooking, gently mixing every 5 minutes. This will take about 15–18 minutes at 240°F to reach the desired color and texture.
Notes:
- You may use either red or yellow onion; red onion will result in a darker color of the fried onion.
- Cooking times may vary depending on the quantity of onion in the air fryer. The times above are for about 1 lb of onion. For a larger batch, continue frying and checking every 5-minute interval at 240°F until the desired color and texture is reached.
Medical Disclaimer: This content is provided for general informational and educational purposes only and is not intended as, and should not be substituted for, professional medical, nutritional, or dietary advice. If you have specific dietary restrictions, food allergies, or health conditions, consult a qualified healthcare provider or registered dietitian before making changes to your diet. The author and publisher assume no responsibility for any adverse effects resulting from the preparation or consumption of this recipe.