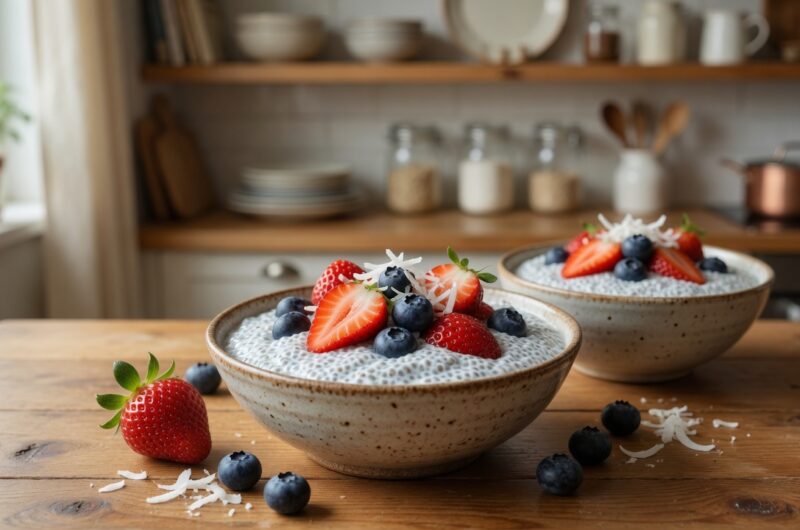
Chia pudding is one of the easiest breakfast or snack options you can make with minimal ingredients. This recipe uses just three basic items that you probably have in your pantry already. The chia seeds absorb the liquid and create a thick, pudding-like texture overnight. You get a filling, nutritious meal without any cooking required.
What Are Chia Seeds
Chia seeds are tiny black or white seeds that come from a plant in the mint family. These small seeds pack serious nutritional power despite their size. When soaked in liquid, they absorb up to twelve times their weight and form a gel coating. This gel creates the pudding texture that makes them perfect for easy breakfast recipes. They have been eaten for centuries and are now popular in modern healthy eating.
Nutritional Benefits of Chia Seeds
Chia seeds provide an impressive amount of fiber, with most of the carbohydrates coming from dietary fiber. Each serving contains omega-3 fatty acids that support heart and brain health. They offer plant-based protein, making them useful for vegetarian and vegan diets. The seeds also provide calcium, magnesium, and phosphorus for bone health. Despite being small, they deliver significant nutrition in every spoonful.
Why This Recipe Works
Three ingredients are all you need to make a satisfying breakfast pudding. Chia seeds provide the texture and nutrition while milk adds creaminess and volume. Sweetener is optional but adds pleasant flavor that makes this feel like a treat. The simplicity means you can prepare it quickly before bed for breakfast the next morning. No special equipment or cooking skills are required.
Choosing Your Milk
Any type of milk works in this recipe, giving you flexibility based on dietary needs. Almond milk is popular for its mild flavor and low calorie content. Coconut milk makes the pudding creamier and adds tropical flavor. Regular dairy milk works perfectly if you do not avoid dairy. Oat milk, soy milk, cashew milk, or any other plant milk all create good results.
Almond Milk Benefits
Almond milk keeps this recipe dairy-free and relatively low in calories. Most commercial almond milk contains added vitamins and minerals like calcium and vitamin D. The mild, slightly nutty flavor does not overpower the taste of chia seeds. Unsweetened almond milk lets you control the sugar content yourself. It blends smoothly with chia seeds and creates a pleasant, light pudding.
Sweetener Options
Honey is a natural sweetener that dissolves easily into cold mixtures. Maple syrup provides similar sweetness with a different flavor profile. Agave nectar works for those avoiding honey. Sugar-free sweeteners like stevia or monk fruit keep the recipe low in sugar. You can also skip sweetener entirely and rely on sweet toppings like fruit for flavor.
Adjusting Sweetness Levels
The recipe calls for one tablespoon of sweetener, but this is completely adjustable. Start with less if you prefer mildly sweet foods or plan to add sweet toppings. Add more if you like dessert-level sweetness in your breakfast. Taste the mixture before refrigerating to check if the sweetness suits your preference. Remember that toppings will add additional sweetness too.
The Soaking Process
Chia seeds need time to absorb liquid and soften properly. The initial mixing distributes the seeds evenly throughout the milk. Letting it settle for a few minutes then mixing again prevents clumping. The seeds continue absorbing liquid during refrigeration, thickening into pudding consistency. A minimum of two hours is needed, though overnight works best for full absorption.
Preventing Clumps
Clumped chia seeds create an unpleasant texture with dry seed clusters. Mixing thoroughly right after combining ingredients helps separate the seeds. Waiting two to three minutes lets them start absorbing liquid and becoming sticky. The second mixing breaks apart any seeds that stuck together initially. This two-step mixing process ensures smooth, evenly textured pudding.
Overnight Versus Two Hours
Refrigerating overnight gives chia seeds maximum time to absorb liquid fully. The texture becomes thicker and more pudding-like with longer soaking. Two hours creates edible pudding but the seeds might still have slight crunch. Four to six hours hits a good middle ground between quick and optimal. Make it based on when you want to eat it.
Storage Container Choices
Mason jars work perfectly for making and storing chia pudding. The jar lets you mix, store, and eat from the same container. Clear glass lets you see the pudding texture and check if it has thickened properly. Small Tupperware containers also work well and stack easily in the fridge. Any container with a lid that seals keeps the pudding fresh.
Making Multiple Servings
This single-serving recipe scales up easily for meal prep. Make several jars at once for grab-and-go breakfasts throughout the week. The ratio stays the same regardless of how many servings you prepare. Individual portions in separate jars make morning routines faster. You can prepare five different jars with different toppings for variety.
Topping Ideas
Fresh strawberries are classic and add natural sweetness and vitamin C. Sliced bananas make the pudding more filling and add potassium. Blueberries, raspberries, or blackberries all work beautifully. Mango chunks add tropical flavor and bright color. Mix different fruits together for varied flavors and textures in each bite.
Beyond Fresh Fruit
Nuts and seeds add crunch and extra protein to creamy chia pudding. Sliced almonds, chopped walnuts, or pecans provide healthy fats. A spoonful of nut butter swirled in adds richness. Granola sprinkled on top gives you crunchy texture contrast. Coconut flakes, either raw or toasted, add tropical flavor and texture.
Flavor Variations
Add cocoa powder to the base mixture for chocolate chia pudding. Vanilla extract enhances the overall flavor with just a quarter teaspoon. Cinnamon mixed in before soaking adds warm spice notes. Matcha powder creates green tea flavored pudding packed with antioxidants. Pumpkin puree and pumpkin spice make a fall-inspired version.
Protein Boosting Options
Stir protein powder into the milk before adding chia seeds for extra protein. Greek yogurt layered with chia pudding adds creaminess and protein. Collagen peptides dissolve easily and boost protein content without changing flavor. Hemp seeds sprinkled on top add complete plant protein. These additions make the pudding more filling and better for muscle recovery.
Texture Preferences
Some people prefer thick, spoonable pudding while others like it more liquid. Use less milk for thicker pudding or more milk for thinner consistency. The two-tablespoon amount of chia seeds can be adjusted too. More seeds create thicker pudding while fewer seeds make it more drinkable. Experiment to find your ideal texture.
Temperature Serving Options
Chia pudding is typically served cold straight from the refrigerator. The cool temperature feels refreshing, especially in warm weather. Some people prefer letting it sit at room temperature for ten minutes before eating. You can also warm it gently in the microwave if you prefer warm breakfast. The texture changes slightly when warmed but still tastes good.
Meal Prep Benefits
Preparing chia pudding ahead saves precious morning time. You can make a week’s worth in less than fifteen minutes total. Having healthy breakfast ready to eat prevents reaching for less nutritious quick options. The pudding stays fresh in the fridge for up to five days. This makes it perfect for busy schedules and hectic mornings.
Freezing for Longer Storage
Chia pudding freezes well in individual portions for up to one month. Use freezer-safe containers and leave some room for expansion. Thaw overnight in the refrigerator before you plan to eat it. The texture may be slightly different after freezing but still perfectly edible. Frozen pudding works best when you make large batches and want to preserve them.
Budget-Friendly Breakfast
Chia seeds cost more per pound than some foods but you use very little per serving. A bag of chia seeds makes dozens of servings, bringing the per-serving cost down. Almond milk is affordable, especially store brands or homemade versions. Optional sweetener adds minimal cost. This breakfast costs far less than buying prepared pudding or eating out.
Blood Sugar Management
The high fiber content in chia seeds helps slow sugar absorption. This prevents the blood sugar spikes that come from high-sugar breakfasts. The protein and healthy fats also contribute to stable energy levels. Using minimal sweetener keeps the glycemic impact low. This makes chia pudding a smart choice for people managing diabetes or blood sugar.
Digestive Health Support
Chia seeds contain mostly soluble fiber that supports healthy digestion. The fiber feeds beneficial gut bacteria and promotes regularity. The gel-like texture is gentle on the digestive system. Starting with smaller amounts of chia helps your system adjust if you are not used to high fiber. Drinking plenty of water with chia seeds aids digestion.
Energy for Active Lifestyles
The combination of protein, fiber, and healthy fats provides sustained energy. Athletes in ancient cultures used chia seeds for endurance. The omega-3 fats support muscle recovery after workouts. The protein helps repair and build muscle tissue. Having chia pudding before or after exercise fuels your body effectively.
Portion Control Made Easy
Single-serving recipes naturally control portions and prevent overeating. You know exactly how much you are consuming when you make individual jars. The fiber and protein help you feel satisfied without needing huge portions. Two tablespoons of chia seeds expand significantly, making a small amount quite filling. This built-in portion control supports weight management goals.
Reducing Food Waste
Making only what you will eat within five days prevents waste. The simple ingredients have long shelf lives in your pantry. Chia seeds stay fresh for months when stored properly in a cool, dry place. Almond milk lasts a week or more in the refrigerator. Using what you have and eating it all eliminates throwing away spoiled food.
Morning Time Savings
Having breakfast prepared the night before saves fifteen to twenty minutes in the morning. You grab the jar from the fridge, add toppings, and eat. No cooking, no extensive prep, no cleanup beyond rinsing one jar. Those saved minutes add up over a week or month. The convenience makes it easier to eat healthy instead of skipping breakfast.
Eating at Your Desk
Chia pudding in a jar with a lid travels perfectly to work or school. It does not need reheating or special equipment to enjoy. The pudding stays fresh for hours even without refrigeration, though cold is better. Eating a nutritious breakfast at your desk beats vending machine options. The portable nature makes healthy eating more accessible.
Satisfying Sweet Cravings
The pudding-like texture and optional sweetener satisfy dessert cravings healthily. You get something creamy and sweet without empty calories. The fiber and protein make it actually filling unlike many desserts. Eating this instead of high-sugar snacks provides nutrition along with satisfaction. It works as a healthy dessert or afternoon snack.
Comparing to Store-Bought
Pre-made chia pudding from stores often costs three to five dollars per serving. Making it yourself costs less than one dollar per serving. Store versions may contain preservatives, excess sugar, or unwanted additives. Homemade lets you control every ingredient and customize to your taste. The quality is usually better when you make it fresh yourself.
Teaching Healthy Habits
Making simple recipes like this builds cooking confidence. Even non-cooks can successfully make chia pudding. Starting with easy recipes creates momentum to try more complex cooking. Learning to prepare healthy food empowers you to eat better. These basic skills serve you for life and improve overall health.
Seasonal Adaptations
Top with fresh berries in summer when they are abundant and cheap. Use sliced apples and cinnamon in fall for seasonal flavor. Winter citrus fruits like oranges or grapefruit add brightness. Spring brings fresh strawberries back into season. Adapting to seasonal produce keeps the recipe interesting year-round and saves money.
Hydration Benefits
Chia seeds help you stay hydrated by holding water in your digestive system. The gel that forms retains liquid longer than just drinking water. This sustained hydration benefits athletic performance and overall health. Eating chia pudding contributes to your daily fluid intake. The combination of solid food and absorbed liquid hydrates effectively.
Omega-3 Content
Chia seeds are one of the best plant sources of omega-3 fatty acids. These healthy fats reduce inflammation throughout the body. Omega-3s support brain health, heart health, and joint function. Getting omega-3s from plants works well for people who do not eat fish. Two tablespoons of chia seeds provide a significant omega-3 boost.
Calcium for Bones
Chia seeds contain more calcium per serving than many dairy products. The fortified almond milk adds even more calcium to this recipe. Adequate calcium intake supports strong bones and teeth. This matters especially for people who avoid dairy products. Getting calcium from plant sources diversifies your nutrient intake.
Antioxidant Properties
Chia seeds contain antioxidants that protect cells from damage. These compounds help fight inflammation and support immune function. Antioxidants from whole foods are more effective than supplements. Adding antioxidant-rich berries as toppings increases the benefits further. Regular consumption of antioxidant foods supports long-term health.
Weight Management Support
The fiber in chia pudding helps you feel full for hours. Feeling satisfied reduces snacking and overall calorie intake throughout the day. The protein also contributes to satiety and prevents hunger. Despite being filling, the calorie count remains reasonable. This combination makes it useful for maintaining or losing weight.
Stable Pantry Ingredients
Keeping chia seeds, shelf-stable almond milk, and honey on hand means you can always make this. These ingredients do not spoil quickly like fresh produce. You can make chia pudding even when you have not been grocery shopping recently. Having reliable breakfast ingredients reduces stress and decision fatigue. Stock these items for easy meal prep anytime.
Customization Freedom
No two people have to make this recipe exactly the same way. Your milk choice, sweetener type, and toppings create your unique version. Make it chocolatey, fruity, nutty, or plain based on mood. Change it up daily or find your favorite combination and stick with it. The flexibility prevents breakfast boredom.
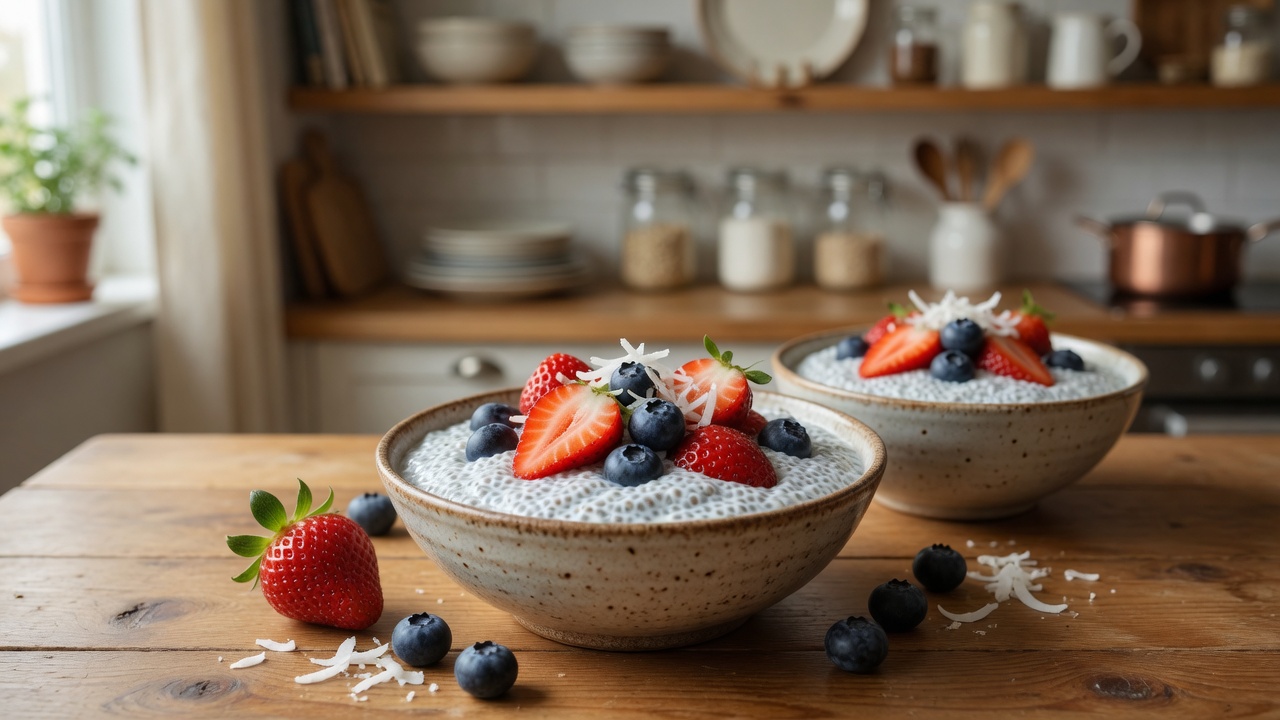
3 Ingredient Chia Pudding
A simple, healthy pudding made with chia seeds, almond milk, and optional sweetener. No cooking required – just mix and refrigerate overnight for a nutritious breakfast or snack packed with fiber, protein, and omega-3s. Top with fresh fruit for added flavor and nutrients.
1
servings5
minutes2
hours198
kcal2
hours5
minutesIngredients
2 tablespoons chia seeds
½ cup almond milk (or any milk of choice)
1 tablespoon honey (or other sweetener, optional)
- For Topping:
Fresh strawberries or fruit of choice
Instructions
- Pour chia seeds, almond milk, and honey (if using) into a jar or container. Mix thoroughly until all ingredients are well combined.
- Let the mixture settle for two to three minutes, then mix again very thoroughly to break up any clumps. Make sure no chia seeds are stuck together.
- Cover the jar with a lid and refrigerate for at least two hours or overnight. The chia seeds will absorb the liquid and create a thick, pudding-like consistency.
- When ready to eat, give the pudding a quick stir if needed. Top with fresh strawberries or your favorite fruit.
- Enjoy cold straight from the refrigerator.
Nutrition Facts (per serving)
- Calories: 198kcal
- Fat: 9g
- Carbohydrates: 28g
- Fiber: 9g
- Sugar: 17g
- Protein: 5g
- Iron: 2mg