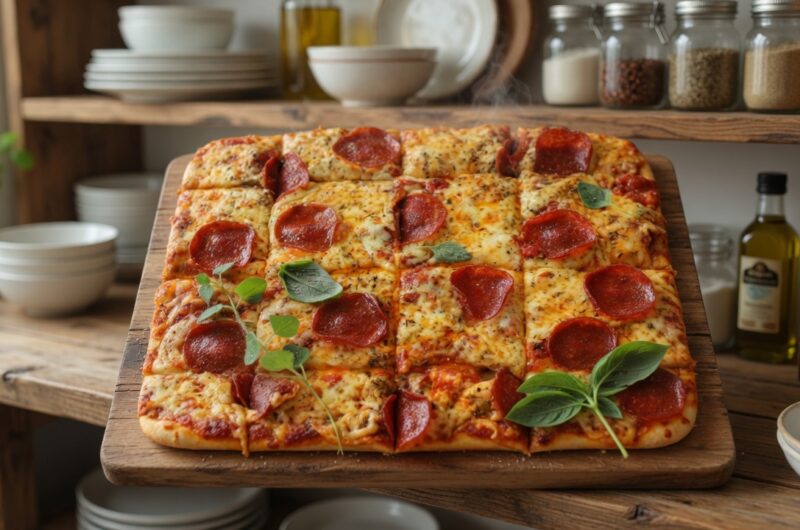
This gluten-free pizza recipe is a simple way to make homemade pizza with a soft, flavorful crust and your favorite toppings. The dough uses 1:1 gluten-free flour and Greek yogurt, so there is no need for traditional wheat flour. Onion powder, garlic powder, baking powder, and a pinch of salt add flavor to the base.
The crust is spread into a sheet pan, baked until set, topped with marinara sauce, cheese, pepperoni, and fresh herbs, then baked again until hot and golden. It makes about 20 small squares, making it useful for family meals, gatherings, or casual dinners.
Why Make This Gluten-Free Pizza
Making pizza at home gives you control over the ingredients, toppings, and crust thickness. This version is especially useful when you want a gluten-free pizza that does not require complicated dough preparation. Greek yogurt helps create a soft dough that can be mixed and kneaded by hand.
The finished crust is thin, making it easy to cut into squares for serving. You can keep the toppings simple with marinara and mozzarella or add pepperoni and fresh herbs. The recipe is also straightforward enough for a busy weeknight when you want homemade pizza without a long preparation process.
Greek Yogurt Pizza Dough
The main feature of this pizza is the Greek yogurt dough. Instead of using yeast, the recipe combines Greek yogurt with 1:1 gluten-free flour and baking powder. This makes the preparation quicker because there is no rising period before the dough goes into the oven.
Onion powder and garlic powder give the crust a savory flavor, while salt rounds out the mixture. The dough is kneaded by hand until all the ingredients come together into a ball. Once combined, it is ready to spread onto the prepared sheet pan.
Choosing Gluten-Free Flour
Use a 1:1 gluten-free flour blend as specified in the recipe. A blend designed as a direct replacement for regular flour is useful because it is formulated for general baking and cooking. The recipe lists 2 cups of 1:1 gluten-free flour, so measure that amount before combining it with the Greek yogurt.
Different gluten-free blends can have slightly different textures, but keeping the listed ingredient amount unchanged gives you the intended starting point. Make sure the flour is labeled gluten-free if you are preparing the pizza for someone who needs to avoid gluten.
Using Greek Yogurt
Greek yogurt provides moisture and helps bind the gluten-free flour into a workable dough. Use the listed 2 cups of Greek yogurt and combine it directly with the dry ingredients. Because Greek yogurt can vary in thickness between brands, mix everything thoroughly with your hands until a dough ball forms.
Avoid adding extra ingredients simply to change the texture before the mixture has been fully combined. Once kneaded, the dough should be suitable for pressing and spreading across the greased sheet pan. Its simple ingredient list is one of the reasons this pizza is convenient to prepare.
Adding Garlic and Onion Flavor
A plain gluten-free crust can sometimes taste mild, so this recipe uses onion powder and garlic powder directly in the dough. Two teaspoons of onion powder and two teaspoons of garlic powder add savory flavor throughout the crust rather than only on top. Since the powders are mixed into the dough, each piece receives some seasoning.
This is particularly helpful when the pizza is cut into small squares. The seasonings also pair naturally with marinara sauce, mozzarella, pepperoni, basil, and oregano, creating a familiar pizza flavor without making the preparation complicated.
Baking Powder for the Dough
Baking powder helps the crust develop a lighter texture as it bakes. The recipe uses 4 teaspoons, which are mixed with the gluten-free flour, Greek yogurt, onion powder, garlic powder, and salt. Since this pizza does not use yeast, there is no need to wait for the dough to rise.
Make sure the baking powder is evenly distributed through the flour before the dough is spread into the pan. Mixing the ingredients thoroughly helps prevent concentrated pockets of seasoning or baking powder and gives the crust a more consistent texture from edge to edge.
Preparing the Sheet Pan
A sheet pan is important because this recipe creates a thin crust rather than a thick, round pizza base. The recommended pan is approximately 17 by 13 inches. Before adding the dough, preheat the oven to 375°F and drizzle avocado oil over the pan.
Spread the oil across the surface so the dough does not stick easily. The oil also adds a little richness to the crust as it bakes. If your pan is a slightly different size, remember that the thickness of the dough can change, so keep an eye on the crust during the first baking stage.
Spreading the Pizza Dough
Once the dough has formed, transfer it to the greased sheet pan and spread it evenly. The dough is intended to make a thin crust, so use your hands to press it across the pan rather than leaving it in a thick mound. Work carefully toward the edges until you have an even layer.
Keeping the thickness consistent helps the crust bake at a similar rate throughout. An uneven base can result in some areas becoming more cooked than others. Take a little extra time during this stage because an even crust makes the finished pizza easier to cut and serve.
First Bake for the Crust
Before adding the toppings, drizzle avocado oil over the surface of the spread dough and distribute it evenly. Place the pan into the preheated 375°F oven and bake the crust for 10 to 13 minutes. This first baking stage helps the dough set before the sauce, cheese, pepperoni, and herbs are added. The exact timing can vary slightly depending on the oven and the thickness of the dough. Watch the crust during the final minutes and remove it when it has baked enough to support the toppings. Avoid rushing this stage because the base needs to be partially cooked before the second bake.
Choosing Pizza Toppings
The topping list is flexible, which makes this gluten-free pizza easy to adapt to different preferences. The original options include marinara sauce, shredded organic grass-fed mozzarella, pepperoni, fresh basil, and oregano. Spread the marinara over the baked crust, then add the cheese and pepperoni as desired. Fresh herbs can be added with the other toppings to provide a fresh flavor. The recipe describes these toppings as optional, so you can adjust their amounts to suit your taste. However, keeping the listed ingredient choices preserves the intended flavor combination of a classic homemade pizza.
Marinara Sauce
Marinara sauce provides the tomato base that brings the pizza together. The recipe uses Cucina Moderna Robust Marinara as the stated choice, but the ingredient itself is marinara sauce. Spread it across the partially baked crust rather than leaving large areas uncovered. A moderate layer helps keep the pizza flavorful without making the thin crust overly wet. Since the base is thin, avoid using more sauce than necessary. The tomato flavor works well with mozzarella, pepperoni, basil, and oregano. Once the sauce is spread, add the remaining toppings before returning the pizza to the oven.
Cheese and Pepperoni
Shredded mozzarella creates the familiar melted cheese layer on this pizza. The recipe specifies organic grass-fed mozzarella, while pepperoni adds a savory topping for those who want it. Spread the cheese across the sauce so it melts evenly during the second bake. Add pepperoni according to your preference, making sure the pieces are distributed rather than piled in one area. The balance between tomato sauce, melted cheese, and pepperoni works especially well with the garlic and onion seasoning in the crust. Fresh basil and oregano can add another layer of flavor once the toppings are arranged.
Fresh Herbs for Flavor
Fresh basil and oregano are simple additions that can make homemade pizza taste fresh and fragrant. They work naturally with tomato sauce and mozzarella and complement the savory crust. Add them according to your preference because the recipe lists them as optional toppings. If you enjoy a stronger herb flavor, use a little more; if you prefer the cheese and pepperoni to stand out, use less. Fresh herbs are particularly useful when you want to keep the topping list simple. They can also add a fresh contrast to the richer flavors of cheese and pepperoni.
Second Baking Stage
After the crust has been baked for 10 to 13 minutes, remove the pan from the oven and add the desired toppings. Return the pizza to the oven and bake for another 20 to 25 minutes. This second stage allows the cheese to melt, the toppings to heat through, and the crust to finish baking. Keep an eye on the pizza near the end of the cooking time. The exact result can vary depending on your oven and topping amounts. When the pizza has cooked through and the toppings look properly baked, remove the pan and prepare it for serving.
How to Serve Pizza Squares
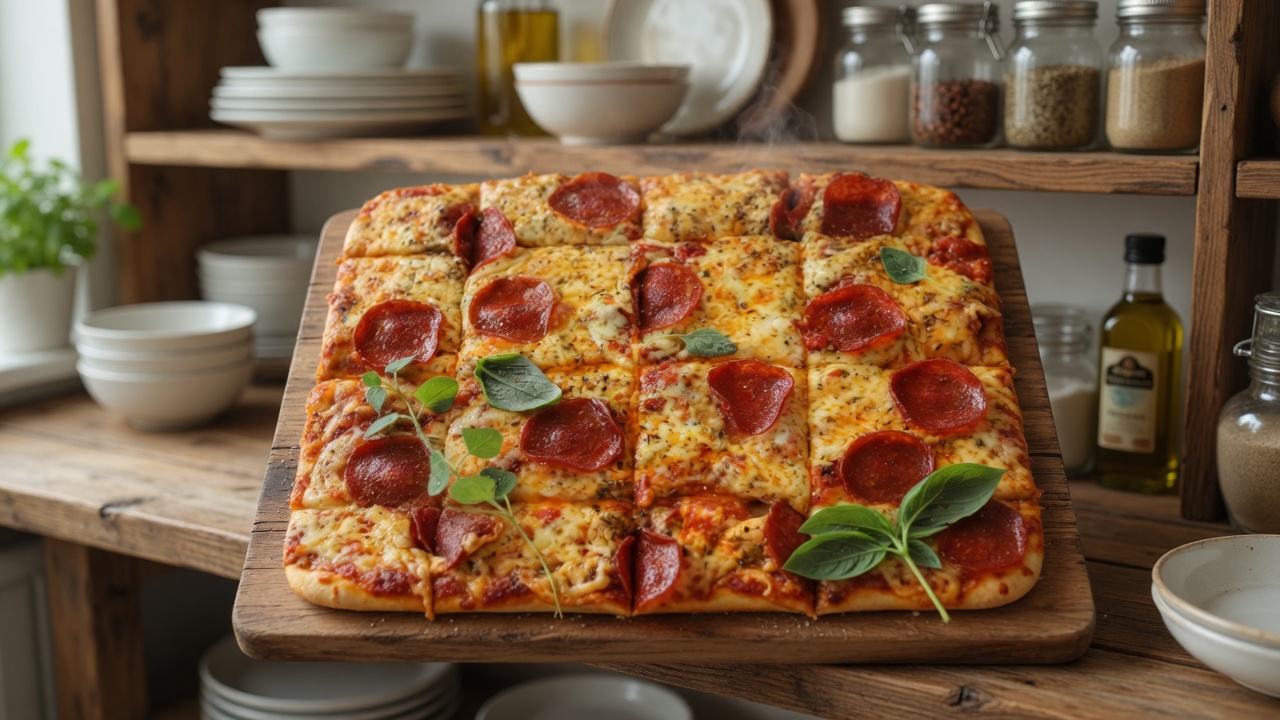
This recipe is designed to make approximately 20 squares, so it is easy to serve as individual portions. Let the pizza rest briefly after removing it from the oven so the melted cheese and toppings settle slightly. Use a pizza cutter or sharp knife to divide the sheet-pan pizza into squares. Smaller pieces work well for parties, family meals, lunch boxes, or casual snacks. Since the crust is thin, the squares are easy to pick up and serve. Arrange them on a plate or serving board and add fresh herbs if desired before bringing them to the table.
Making the Pizza for a Family Meal
Sheet-pan pizza is useful when several people want to eat together because the entire batch cooks in one pan. Instead of preparing individual round pizzas, you spread the dough across one large surface and cut it into squares after baking. This saves time during serving and gives everyone a similar portion. The topping choices can also be adjusted within the pan if different people prefer different flavors. For example, pepperoni can be placed on only part of the pizza while the remaining area stays simple with marinara and cheese. This makes the recipe flexible without changing the basic dough.
Gluten-Free Kitchen Tips
When preparing gluten-free pizza, ingredient labels and kitchen surfaces matter if the pizza is being made for someone with a strict gluten-free requirement. Use gluten-free flour and check packaged toppings such as marinara sauce, cheese, and pepperoni according to your needs. Clean the work surface and utensils before preparing the dough to reduce the risk of cross-contact. A dedicated or thoroughly cleaned sheet pan can also be helpful. These practical steps do not change the recipe itself, but they can make preparation more suitable for a gluten-free household. Always follow the ingredient manufacturer’s labeling and your dietary requirements.
Notes for the Best Texture
The dough should be fully combined before you spread it onto the pan. If you try to spread a mixture that has not formed properly, the crust may cook unevenly. Press the dough into a thin, consistent layer so the first and second baking stages work as intended. Use enough avocado oil to grease the pan and lightly coat the dough surface. Avoid adding excessive toppings because a thin crust has less structure than a thick pizza base. The listed 10 to 13 minute first bake followed by 20 to 25 minutes with toppings gives you a useful guide for achieving a properly baked sheet-pan pizza.
Adjusting the Toppings
The topping section is intentionally flexible, so you can choose the amount that suits your household. Marinara sauce, shredded mozzarella, pepperoni, fresh basil, and oregano all work together, but you do not need to cover the crust with a heavy layer. A thin crust can become softer when overloaded with wet or heavy toppings. Spread the sauce evenly and distribute the cheese and pepperoni across the surface. Add fresh herbs according to taste. Keeping the toppings balanced allows the crust to remain noticeable while still giving every pizza square the familiar combination of tomato, cheese, and herbs.
Cooking Time and Portion Size
The complete recipe takes about 40 minutes, including preparation and baking. Preparation requires around 5 minutes, while cooking takes approximately 35 minutes across the two baking stages. The recipe makes about 20 squares, depending on how you cut the sheet-pan pizza. This makes it suitable for serving several people as part of a meal or as a party-style snack. Because the dough does not require yeast or a resting period, most of the total time is spent in the oven. That makes the recipe convenient when you want homemade gluten-free pizza without a long wait.
Sheet Pan Pizza High-Protein
A thin and easy Sheet Pan Pizza High-Protein made with 1:1 gluten-free flour and Greek yogurt, topped with marinara sauce, shredded cheese, pepperoni, fresh basil, and oregano.
20
squares5
minutes35
minutes40
minutesIngredients
- Pizza Dough:
2 cups 1:1 gluten-free flour
2 cups Greek yogurt
2 teaspoons onion powder
2 teaspoons garlic powder
4 teaspoons baking powder
Pinch of salt
Avocado oil
- Toppings:
Marinara sauce
Shredded cheese
Pepperoni
Fresh basil and oregano
Instructions
- Preheat the oven to 375°F and drizzle avocado oil over the sheet pan. Mix the gluten-free flour, Greek yogurt, onion powder, garlic powder, baking powder, and salt by hand until a dough ball forms.
- Spread the dough evenly across the greased sheet pan to create a thin crust, then drizzle and spread avocado oil over the top.
- Bake the crust for 10 to 13 minutes.
- Remove the pan, add marinara sauce, shredded cheese, pepperoni, basil, and oregano as desired, then bake for another 20 to 25 minutes.
- Remove from the oven, cut into approximately 20 squares, and serve warm.
Equipment
- Approximately 17 × 13-inch sheet pan
- Mixing bowl
Notes
- Keep the crust thin and spread it as evenly as possible across the sheet pan.
- Use a 1:1 gluten-free flour blend as specified.
- The toppings can be adjusted to personal preference.
- Avoid overloading the thin crust with sauce or toppings.
- Check packaged ingredients for gluten-free labeling when required.
- Let the pizza rest briefly before cutting it into squares.