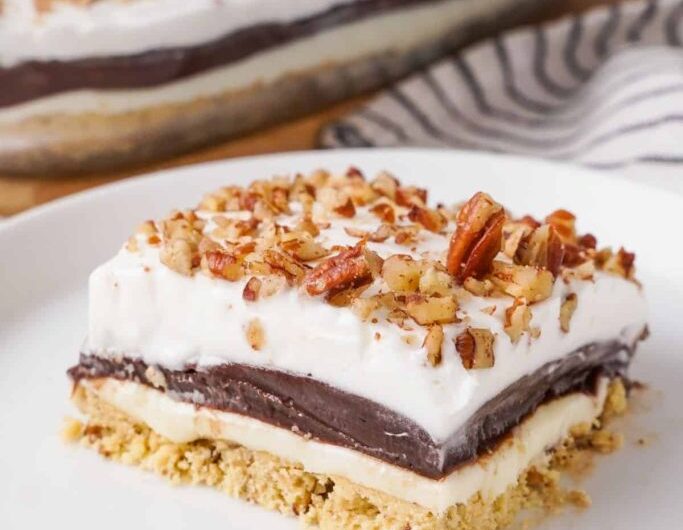
This is a stovetop custard, meaning the whole dessert comes together on the stove rather than in the oven — no baking required at all. That makes it a good option on warm days when turning on the oven isn’t appealing, or any time you want a make-ahead dessert that doesn’t demand much active attention once it’s chilling.
The final texture is smooth and custardy, closer to a rich pudding than a cake, with a deep chocolate flavor that comes from a combination of cocoa powder and finely chopped dark chocolate. Because it’s a cooked custard rather than a set gelatin dessert, the technique is what determines the final texture — getting the base smooth, tempering the eggs properly, and cooking it just long enough to thicken without scrambling.
The ingredient list is straightforward — whole milk, cream, sugar, cornstarch, cocoa powder, dark chocolate, egg yolks, vanilla, and a touch of butter — and most of it is likely already in your kitchen. The real work is in the process, not in sourcing anything unusual.
Prep and Setup
Getting everything measured and within reach before you start whisking makes this recipe move much more smoothly, since several steps happen back-to-back without much pause:
- Dry ingredients for the base: sugar, cornstarch, cocoa powder, and salt, ready to be whisked together in a medium saucepan while it’s off the heat.
- Dairy: whole milk and heavy cream, measured and ready to pour in slowly.
- Egg yolks: separated ahead of time and placed in a small bowl for tempering.
- Chocolate: dark chocolate, finely chopped, so it melts smoothly once added to the hot custard.
- Vanilla extract and butter: measured and set aside for the finishing stage.
- Serving glasses or a large bowl: ready for the finished custard to be poured into.
- Plastic wrap: on hand for covering the custard directly on its surface, to prevent a skin from forming as it chills.
- Toppings, if using: whipped cream, chocolate shavings or curls, cocoa powder for dusting, fresh berries, or crushed biscuits or cookies.
Workflow: How the Steps Actually Flow
1. Whisk the dry ingredients together off the heat. Sugar, cornstarch, cocoa powder, and salt go into a medium saucepan before any heat is applied. Whisking them together thoroughly at this stage is what prevents lumps later — this step shouldn’t be rushed.
2. Add the dairy slowly, whisking constantly. Pouring in the milk and cream gradually while whisking keeps the mixture smooth and glossy rather than clumping around the dry ingredients.
3. Temper the egg yolks. In a separate small bowl, lightly whisk the yolks, then very slowly add about ½ cup of the chocolate milk mixture into them while whisking continuously. This step exists specifically to prevent the eggs from scrambling — adding hot liquid to raw yolks too quickly would cook them into curds rather than incorporating them smoothly. Once tempered, the yolk mixture goes back into the saucepan with the rest of the base.
4. Cook the custard over medium heat, stirring constantly. Using a whisk or silicone spatula, keep the mixture moving the entire time. After 5–7 minutes, it will noticeably thicken. The target consistency is pudding-like — thick enough to coat the back of a spoon.
5. Remove from heat and add the chocolate, butter, and vanilla immediately. Stir gently until everything melts into a smooth, shiny custard. Doing this off the heat prevents the chocolate from scorching or the custard from overcooking.
6. Pour into serving glasses or a bowl and smooth the tops. This is your last chance to adjust the presentation before the custard sets.
7. Cover with plastic wrap directly on the surface. Pressing the wrap right onto the custard (not just over the top of the container) prevents a skin from forming as it chills.
8. Refrigerate until fully set. At least 2–4 hours.
Component Organization: What Each Ingredient Is Doing
- Base and thickening: sugar, cornstarch, salt, whole milk, and heavy cream. Cornstarch is the primary thickener here, giving the custard its pudding-like body once cooked.
- Chocolate flavor: cocoa powder and finely chopped dark chocolate. The cocoa powder is whisked in early as part of the dry base, while the chopped chocolate is added at the end, melted directly into the hot custard for a deeper, richer chocolate finish.
- Richness and set: egg yolks. Tempered in carefully, they add richness and help the custard set into its final texture.
- Finishing touches: vanilla extract and butter (optional). Added at the very end, off the heat, for flavor and extra silkiness.
Serving Suggestions
- A swirl of whipped cream on top.
- Chocolate shavings for an elegant finish.
- A light dusting of cocoa powder.
- Fresh berries or crushed biscuits or cookies, for texture and contrast.
Serve chilled for the best texture and flavor.
Pro Tips for Perfect Custard
- Use high-quality chocolate. It makes a noticeable difference in the final flavor.
- Stir constantly while cooking. This prevents scorching on the bottom of the pan.
- For extra richness, replace ¼ cup of the milk with more cream.
- For a sweeter custard, add 1–2 tablespoons of extra sugar.
Variations You Can Try
- Mocha Custard: add 1 teaspoon of instant coffee to the base.
- Orange Chocolate: stir in ½ teaspoon of orange zest.
- Dairy-Free: use almond milk and coconut cream in place of the dairy, along with dairy-free chocolate.
Step-by-Step Assembly Strategy
- In a medium saucepan, off the heat, whisk together sugar, cornstarch, cocoa powder, and salt.
- Slowly pour in the milk and cream while whisking constantly, until smooth and glossy.
- Lightly whisk the egg yolks in a small bowl, then slowly add ½ cup of the chocolate milk mixture into the yolks while whisking continuously.
- Pour the tempered yolk mixture back into the saucepan.
- Cook over medium heat, stirring constantly, for 5–7 minutes until thickened to a pudding-like consistency that coats the back of a spoon.
- Remove from heat and immediately stir in the chopped dark chocolate, butter (if using), and vanilla extract until smooth and shiny.
- Pour into serving glasses or a large bowl and smooth the tops.
- Cover with plastic wrap directly on the surface.
- Refrigerate for at least 2–4 hours, until fully set.
- Add toppings of choice before serving.
No-Bake Chocolate Custard Delight
Description: A silky, creamy dessert with deep chocolate flavor. Smooth and custardy with a luxurious mouthfeel, this no-bake dessert requires no oven at all and comes together with easy ingredients you likely already have. Great for warm days, make-ahead dinners, or celebrations.
Duration:
- Prep Time: 20 minutes
- Chilling Time: 2–4 hours
- Total Time: About 2½–4½ hours
- Servings: 6–8
Ingredients:
For the Chocolate Custard
- 2 cups whole milk
- ½ cup heavy cream
- ½ cup granulated sugar
- 3 tablespoons cornstarch
- ¼ teaspoon salt
- 3 tablespoons unsweetened cocoa powder
- 120 g (4 oz) dark chocolate, finely chopped
- 2 large egg yolks
- 1½ teaspoons vanilla extract
- 1 tablespoon butter (optional, for extra silkiness)
Optional Toppings
- Whipped cream
- Chocolate shavings or curls
- Cocoa powder (for dusting)
- Fresh berries
- Crushed biscuits or cookies
Instructions:
- In a medium saucepan (off the heat), whisk together the sugar, cornstarch, cocoa powder, and salt. Take your time whisking to ensure no lumps later.
- Slowly pour in the milk and cream while whisking constantly, until the mixture is completely smooth and glossy.
- In a small bowl, lightly whisk the egg yolks. Very slowly add ½ cup of the chocolate milk mixture into the yolks while whisking continuously, to prevent the eggs from scrambling.
- Once tempered, pour the yolk mixture back into the saucepan.
- Place the saucepan over medium heat. Stir constantly with a whisk or silicone spatula. After 5–7 minutes, the mixture will thicken noticeably. Cook until it reaches a pudding-like consistency that coats the back of a spoon.
- Remove the pan from heat and immediately add the chopped dark chocolate, butter (if using), and vanilla extract. Stir gently until everything melts into a smooth, shiny custard.
- Pour the custard into serving glasses or a large bowl. Smooth the tops with a spoon.
- Cover with plastic wrap directly touching the surface (to prevent a skin from forming).
- Refrigerate for at least 2–4 hours, until fully set.
- Before serving, add your favorite toppings: a swirl of whipped cream, chocolate shavings for elegance, or a light dusting of cocoa powder. Serve chilled for the best texture and flavor.
Notes:
- Use high-quality chocolate — it makes a big difference.
- Stir constantly while cooking to avoid scorching.
- For extra richness, replace ¼ cup of milk with more cream.
- Want it sweeter? Add 1–2 tablespoons extra sugar.
- Variations: Mocha Custard (add 1 tsp instant coffee), Orange Chocolate (stir in ½ tsp orange zest), Dairy-Free (use almond milk, coconut cream, and dairy-free chocolate).
Medical Disclaimer: This recipe and the accompanying content are provided for general informational and culinary purposes only and are not intended as medical, nutritional, or dietary advice. Nutritional needs vary from person to person, and individuals with food allergies, intolerances, medical conditions, or specific dietary requirements should consult a qualified healthcare professional or registered dietitian before preparing or consuming this recipe. Cooking times and temperatures may vary depending on individual equipment; always ensure food is cooked to a safe internal temperature before serving. The creator of this content assumes no liability for any adverse reactions, allergic responses, or health outcomes resulting from the preparation or consumption of this recipe.