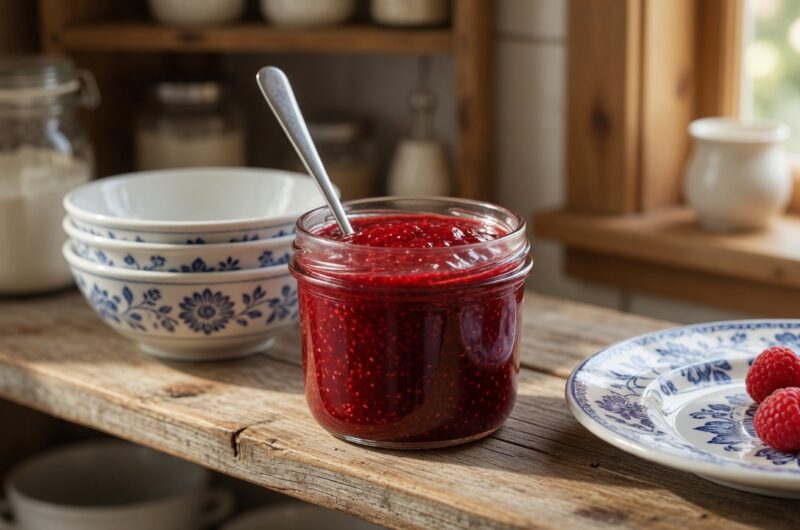
Making jam at home does not have to take hours of your time or require fancy equipment. This simple chia seed jam comes together in just ten minutes on your stovetop. You get all the fruity sweetness you love without the long cooking process or massive amounts of added sugar. The chia seeds do the thickening work naturally, giving you a healthier spread that tastes fresh and vibrant.
Why Chia Seeds Work as a Thickener
Chia seeds have a special quality that makes them perfect for jam making. When these tiny seeds meet liquid, they form a gel-like coating around themselves. This natural thickening happens without heat or chemical additives. You only need a couple of tablespoons to turn cooked fruit into a spreadable consistency. The seeds also add fiber, omega-3 fatty acids, and protein to your jam.
Fresh or Frozen Fruit Both Work
You can use whatever fruit you have on hand for this recipe. Fresh berries from the farmers market work beautifully during summer months. Frozen fruit is equally good and often more budget-friendly year-round. The cooking process breaks down the fruit either way, so texture differences between fresh and frozen disappear. This flexibility means you can make jam any time of year without worrying about what is in season.
Best Fruits for This Recipe
Juicy fruits give the best results for chia jam. Strawberries, blueberries, raspberries, and blackberries are classic choices that always turn out well. Stone fruits like peaches, plums, and apricots make delicious variations. Cherries create a rich, deep-colored spread. Even tropical options like pineapple and kiwi work, though they make a thinner, more sauce-like jam.
The Cooking Process is Simple
You start by heating your chosen fruit in a saucepan over medium-high heat. Stir it occasionally as it warms up and begins to break down. The fruit will release its natural juices and start bubbling. Use the back of a spoon or a potato masher to break down the fruit to whatever texture you prefer. Some people like chunky jam with visible fruit pieces, while others prefer it completely smooth.
Adding the Chia Seeds and Lemon
Once your fruit breaks down, you stir in the chia seeds and fresh lemon juice. The lemon juice brightens the fruit flavor and adds a touch of tartness that balances the sweetness. Mix everything together well so the chia seeds distribute evenly throughout the jam. This ensures your jam thickens uniformly instead of having clumpy spots.
Sweetener is Optional
The beauty of making your own jam is controlling the sweetness level. Some fruits naturally contain enough sugar and need no added sweetener at all. Others, like raspberries or tart cherries, might benefit from a tablespoon or two of honey or maple syrup. Always taste your jam before adding sweetener. You can add more, but you cannot take it away once it is stirred in.
The Cooling Period Matters
After you remove the pan from heat, let the jam sit for five minutes. This cooling time is when the magic happens. The chia seeds fully absorb the fruit juices and the mixture thickens considerably. What looks thin and runny on the stove will transform into proper jam consistency as it cools. Resist the urge to add more chia seeds before this resting period.
Storage Options for Your Jam
This homemade jam keeps well in a sealed container in the refrigerator for up to one week. The chia seeds continue to absorb moisture during storage, so your jam might get slightly thicker over time. For longer storage, freeze your jam in small containers or ice cube trays for up to three months. Thaw frozen jam in the refrigerator overnight before using.
Ways to Use Chia Seed Jam
Spread this jam on morning toast or English muffins for a quick breakfast. Swirl it into plain yogurt or oatmeal for added flavor without refined sugar. Use it as a filling for homemade pastries or thumbprint cookies. It also makes a great topping for pancakes, waffles, or French toast. You can even stir it into smoothies for extra fruit flavor.
Adjusting Texture and Consistency
Different fruits produce different jam textures based on their natural pectin and water content. Strawberries make a thicker jam, while pineapple creates something closer to a fruit sauce. If your jam seems too thin, add another tablespoon of chia seeds and let it sit longer. If it gets too thick, stir in a tablespoon of water or fruit juice to loosen it up.
Flavor Variations to Try
The basic recipe is delicious on its own, but you can customize it endlessly. Add half a teaspoon of vanilla extract for depth and warmth. Stir in some lemon zest along with the juice for extra citrus punch. A pinch of cinnamon works beautifully with berry or stone fruit jams. Ginger adds a spicy kick that pairs well with peach or plum.
Comparing Homemade to Store Bought
Commercial jams typically contain more sugar than fruit. The first ingredient on most jam labels is sugar, not fruit. Homemade chia jam flips this ratio, making fruit the star ingredient. You also avoid artificial preservatives, colors, and thickeners found in many store-bought options. The fresh fruit flavor really shines through in homemade versions.
Cost Savings of Making Your Own
A jar of fancy low-sugar or organic jam can cost five to eight dollars at the grocery store. Making your own costs a fraction of that, especially when you use frozen fruit on sale. A bag of chia seeds lasts for many batches since you only use two tablespoons per recipe. Over time, the savings really add up if you eat jam regularly.
Health Benefits Beyond Less Sugar
Chia seeds bring impressive nutritional benefits to your jam. They contain high amounts of fiber, which helps with digestion and keeps you feeling full longer. The omega-3 fatty acids support heart and brain health. You also get calcium, magnesium, and antioxidants. Regular jam offers calories and sugar but very little nutrition beyond that.
Perfect for Special Diets
This recipe fits into many different eating plans. It works for vegan diets when you use maple syrup instead of honey. People avoiding gluten can enjoy it without worry. It fits into paleo eating when sweetened with honey or left unsweetened. The low sugar content makes it suitable for those watching their sugar intake or managing blood sugar levels.
Getting Kids Involved
Making chia jam is a great cooking project for children. The recipe is simple enough for young helpers to participate safely. Kids can wash fruit, measure ingredients, and stir the mixture. They love watching the chia seeds transform the cooked fruit into jam. When children help make their food, they often feel more excited about eating it.
Troubleshooting Common Issues
If your jam turns out too seedy, try grinding half the chia seeds before adding them. Use a coffee grinder or mortar and pestle to create chia powder. If the jam tastes bland, add more lemon juice or a tiny pinch of salt to brighten the flavors. Too tart means you need more sweetener. Too sweet can be balanced with extra lemon juice.
Mixing Different Fruits Together
You do not have to stick to one type of fruit per batch. Mixed berry jam using strawberries, blueberries, and raspberries is delicious. Try peach-raspberry or strawberry-rhubarb combinations. Pineapple and mango make a tropical blend. Mixing fruits lets you create custom flavor combinations you cannot find in stores.
The Science Behind Chia Gel
Chia seeds can absorb up to twelve times their weight in liquid. The outer coating of each seed contains soluble fiber that becomes gelatinous when wet. This creates the thick, sticky texture that makes jam spreadable. Unlike pectin-based thickening that requires specific cooking times and temperatures, chia thickening works at any temperature, even cold.
Reducing Food Waste
This recipe helps use up fruit that is getting too ripe to eat fresh. Those soft strawberries or brown-spotted bananas work perfectly in jam. Frozen fruit that got freezer-burned can still make tasty jam since you cook it down anyway. Making jam extends the life of fruit that might otherwise go to waste.
Gift-Giving Ideas
Homemade chia jam makes a thoughtful gift for friends and family. Pour it into small mason jars and add a fabric cover with ribbon. Create custom labels with the flavor and date. Package it with homemade bread or scones for a complete breakfast gift. People appreciate receiving something homemade that took thought and effort.
Seasonal Jam Making
Making jam with seasonal fruit captures flavors at their peak. Summer berry jam tastes like sunshine preserved in a jar. Fall apple or pear jam with cinnamon feels cozy and warm. Winter citrus jam brightens cold months. Spring brings strawberries and apricots. Following the seasons means you always work with the most flavorful, affordable fruit.
No Special Equipment Needed
You do not need a candy thermometer, canning pot, or any specialized tools for this recipe. A regular saucepan, spoon, and something to mash the fruit are all you need. No water bath canning or worrying about proper seals. The simple approach makes jam accessible to everyone, even those with minimal kitchen equipment.
Understanding Sweetness Levels
Different fruits contain different amounts of natural sugar. Blueberries and sweet cherries need little to no added sweetener. Cranberries and sour cherries definitely need help. Taste your fruit before cooking if you are unsure. Remember that cooking concentrates flavors, so fruit that tastes mildly sweet raw will taste sweeter cooked down.
Texture Preferences
Some people prefer smooth, spreadable jam without any chunks. Others like seeing and tasting distinct pieces of fruit. Your mashing technique controls the final texture. Mash vigorously for smooth jam. Use a light hand for chunkier results. You can even leave some fruit pieces whole while mashing others for varied texture.
Lemon Juice Purpose
The lemon juice does more than add tartness. It helps preserve the bright color of your fruit and prevents browning. The acidity balances the sweetness and makes fruit flavors taste more vibrant. It also helps the chia seeds gel properly. Even if your fruit is already tart, a little lemon juice improves the overall flavor.
Batch Size Flexibility
This recipe uses two cups of fruit, but you can easily scale it up or down. Use one cup of fruit with one tablespoon of chia seeds for a smaller batch. Double or triple the recipe for larger amounts, though you may need to cook it slightly longer. The beauty of not using pectin means you can make any amount you want.
Room Temperature Fruit Works Too
If you forget to thaw your frozen fruit or your fresh fruit is still cold from the refrigerator, that is fine. It just takes a few extra minutes of cooking time to heat through and break down. Room temperature fruit cooks slightly faster but the end result tastes the same. Do not stress about bringing ingredients to specific temperatures.
Avoiding Artificial Ingredients
Reading ingredient labels on commercial jam can be shocking. Many contain high fructose corn syrup, artificial colors, and chemical preservatives. Some use artificial sweeteners that leave strange aftertastes. Making your own means you know exactly what goes into your food. Real fruit, real sweetener, real ingredients.
Building Confidence in the Kitchen
Successfully making jam builds cooking confidence. If you can make this recipe work, you can handle many other simple cooking projects. The quick results give you immediate satisfaction. You learn important skills like tasting and adjusting seasonings, controlling heat, and understanding how ingredients work together. These skills transfer to countless other recipes.
Magic Chia Jam
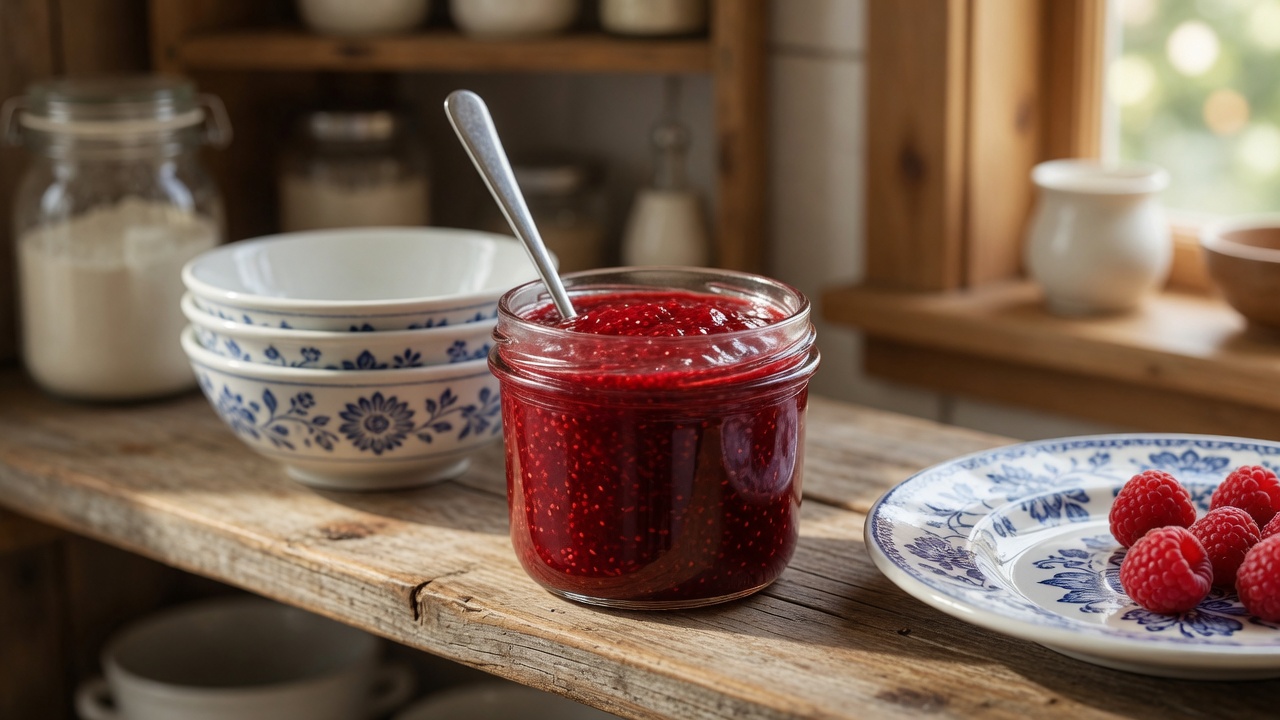
This quick homemade fruit jam uses chia seeds for natural thickening instead of loads of sugar. Ready in ten minutes with fresh or frozen fruit, it delivers pure fruit flavor with added nutrition. Perfect for toast, yogurt, oatmeal, or anywhere you enjoy jam.
1
minute9
minutes10
minutesIngredients
2 cups fresh or frozen fruit (strawberries, blueberries, raspberries, blackberries, cherries, peaches, apricots, plums, pineapple, or kiwi)
2 tablespoons chia seeds
1 tablespoon freshly-squeezed lemon juice
1 to 2 tablespoons honey or maple syrup (optional, only if needed)
Instructions
- Place fruit in a small saucepan over medium-high heat and stir occasionally until fruit heats through and starts to bubble and break down. Mash the fruit with a spoon or potato masher to your preferred texture.
- Mix in the chia seeds and lemon juice until everything combines well. Taste the mixture and add one or two tablespoons of sweetener if your fruit needs it.
- Take the pan off the heat and let the jam cool for five minutes. The jam will get much thicker as it sits and cools down.
- Stir the jam one more time before using. Serve right away or transfer to a sealed container.
- Store in the refrigerator for up to one week or freeze for up to three months.
Notes
- Fruit Selection: Choose juicy fruits for best results. Berries, stone fruits, and tropical fruits all work well. Different fruits create different textures and sweetness levels.
- Sweetener Adjustments: Tart fruits like raspberries or sour cherries need more sweetener than naturally sweet fruits like blueberries. Always taste before adding sweetener.
- Texture Variations: Watery fruits like pineapple make thinner jam while fruits like strawberries make thicker spreads. Add extra chia seeds if you want thicker consistency.
- Optional Add-ins: Try half a teaspoon of vanilla extract, lemon zest for tanginess, or spices like cinnamon, ginger, or nutmeg for flavor variations.
- Lemon Juice: Skip the lemon juice if your fruit is already very tart. It helps brighten flavors and preserve color in most fruits.