Making a soft and fluffy gluten-free bread recipe at home requires a slightly different approach from baking traditional wheat bread. Gluten-free bread dough does not behave like ordinary yeast dough because there is no gluten network to create the familiar stretchy, elastic texture. Instead, this recipe produces a thick, sticky, batter-like dough that rises directly in the loaf pan before baking into a tender homemade loaf with a golden crust and soft interior.
This homemade gluten-free bread uses an all-purpose gluten-free flour blend together with xanthan gum, instant yeast, cream of tartar, warm milk, butter, apple cider vinegar, and egg whites. Each ingredient contributes to the loaf’s structure, moisture, rise, or flavor. Because gluten-free baking depends heavily on ingredient ratios, following the measurements carefully is particularly important when you want consistent results.
Why You Prefer This Recipe
A dependable loaf of gluten-free sandwich bread can be useful for toast, sandwiches, breakfast, or serving alongside meals. This recipe is designed to produce a soft crumb rather than the dry, crumbly texture sometimes associated with homemade gluten-free bread. It also uses straightforward ingredients and a stand mixer, so there is no hand-kneading or complicated bread-shaping technique to master.
Another advantage is that the process is predictable once you understand what the dough should look like. You are not waiting for an elastic ball of dough to form. Instead, the mixture remains thick and sticky. After approximately three minutes of mixing, it goes directly into the prepared loaf pan, where it rises by roughly 50 percent before baking.
Understanding Gluten-Free Bread Dough
The most important thing to understand before starting is that gluten-free yeast bread dough looks different from conventional bread dough. Wheat dough becomes stretchy because gluten proteins form an elastic network during mixing and kneading. A gluten-free flour mixture cannot create that same network, so trying to knead this batter like ordinary bread dough would not improve the loaf.
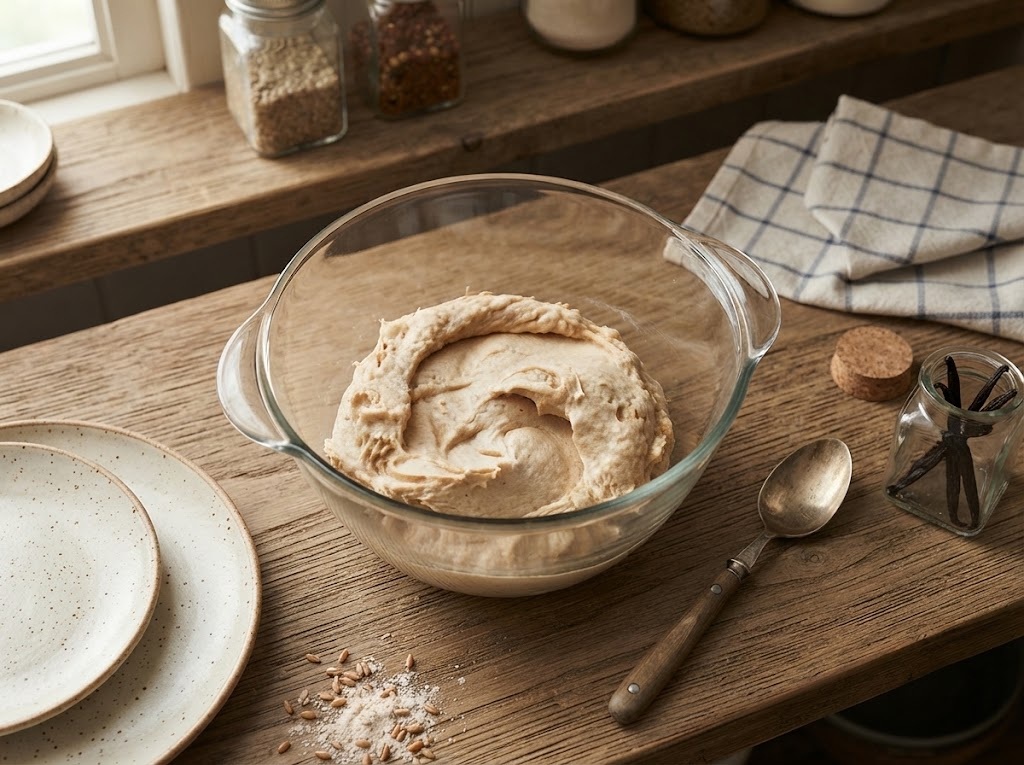
The correct consistency is closer to a very thick batter. It should be sticky and soft rather than firm enough to handle comfortably with your hands. This is normal and should not be corrected by adding unnecessary flour. Adding too much flour in an attempt to create traditional dough can make the finished gluten-free bread dry, dense, and less likely to rise properly.
Why Accurate Measurements Matter
Precision is particularly important when preparing easy gluten-free bread. Small differences in the amount of flour or liquid can noticeably change the texture because gluten-free flours and starches absorb moisture differently. The supplied recipe therefore recommends measuring ingredients by weight whenever possible rather than relying entirely on cups and spoons.
A digital kitchen scale can be especially useful for the gluten-free flour blend, yeast, salt, butter, and egg whites because gram measurements are provided for these ingredients. Accurate measurements help preserve the intended balance between moisture and structure and make it easier to reproduce the same loaf the next time you bake it.
Choosing the Right Gluten-Free Flour Blend
The recipe uses 3 cups (420 g) all-purpose gluten-free flour blend, with Better Batter provided as an example. A quality gluten-free flour blend is important because it forms the main structural base of the bread. Different commercial blends contain different combinations of flours and starches, so they do not necessarily behave identically.
For best results, use a comparable all-purpose blend intended for gluten-free baking. If you are preparing the bread for someone who must strictly avoid gluten, verify that the specific flour blend and other packaged ingredients meet their dietary requirements. Cross-contact can occur during manufacturing, so ingredient labels are important for people with celiac disease or significant gluten sensitivity.
The Importance of Xanthan Gum
Three teaspoons of xanthan gum are included only if the gluten-free flour blend does not already contain it. Xanthan gum is especially useful in yeast bread because it helps bind the ingredients together and provides some of the structural support normally supplied by gluten.
Before measuring the xanthan gum, check the ingredient label on your flour blend. If xanthan gum is already included, follow the recipe’s instruction not to add the separate quantity. If the flour blend does not contain it, do not simply omit it, because the source identifies xanthan gum as important for holding the loaf together and reducing crumbling.
How Instant Yeast Helps the Bread Rise
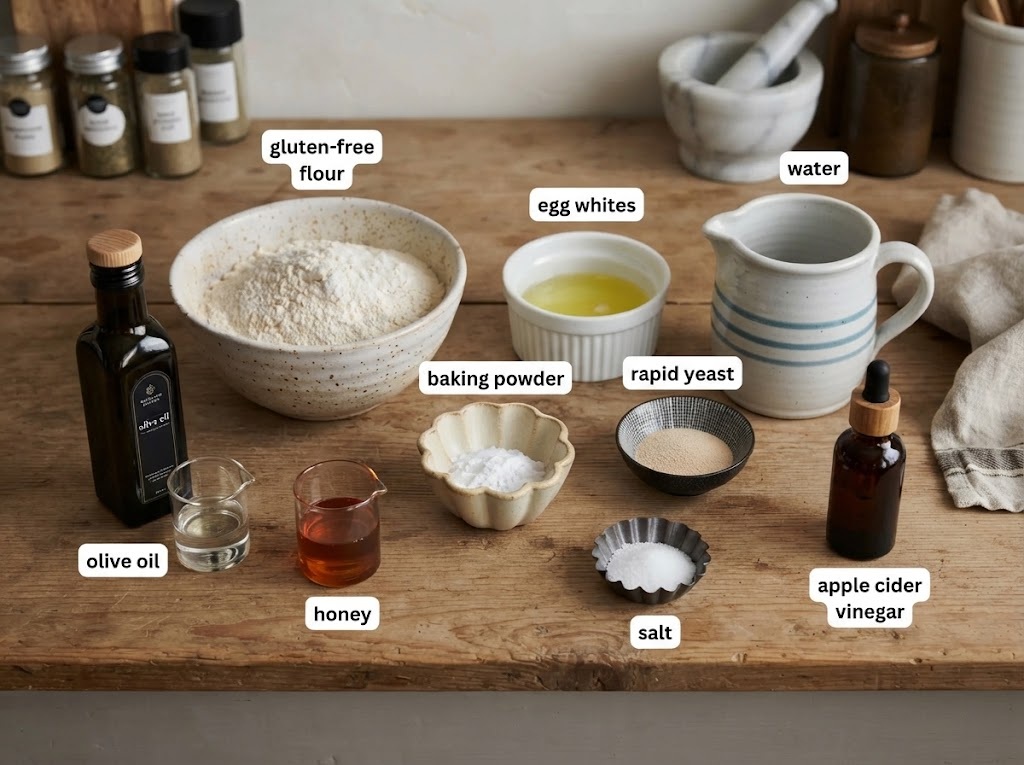
The recipe contains 2½ teaspoons (8 g) instant yeast. Yeast produces the gas that expands the batter and creates a lighter interior. Because this is instant yeast, it is mixed directly with the dry ingredients rather than being separately proofed in water before use.
Gluten-free bread needs enough structure to capture the gas produced by the yeast without becoming overproofed. That is why the rising instructions are based on the loaf increasing by approximately 50 percent rather than doubling in size. Allowing the batter to rise far beyond the recommended point may weaken the structure and increase the chance that the loaf will sink.
What Cream of Tartar Does
A quarter teaspoon of cream of tartar is included with the dry ingredients. Although it is used in a much smaller quantity than the flour or yeast, it contributes to the overall formulation of the loaf and works alongside the other ingredients in creating the intended structure.
Measure this ingredient carefully rather than estimating. Gluten-free baking formulas are generally less forgiving of unnecessary changes than many conventional bread recipes. Since your instructions specifically require the original ingredients to remain unchanged, the cream of tartar has been retained at exactly the supplied quantity in the recipe card.
Sugar and Salt in Gluten-Free Bread
The dry ingredients also contain 2 tablespoons (25 g) granulated sugar and 2 teaspoons (12 g) kosher salt. Sugar contributes flavor and supports yeast activity, while salt balances the overall flavor of the loaf. Both should be distributed evenly through the flour mixture before the wet ingredients are introduced.
Whisking the dry ingredients thoroughly is a small but worthwhile step. Yeast, xanthan gum, salt, sugar, and cream of tartar are all used in relatively small quantities compared with the flour. Even distribution helps prevent concentrated pockets and promotes more consistent flavor and rising throughout the loaf.
Why the Milk Should Be Warm
The recipe calls for 1½ cups (12 ounces) of warm milk at approximately 95°F. The temperature matters because the liquid should be warm enough to support yeast activity without becoming excessively hot.
Very hot liquid can damage yeast, while cold milk can slow the rising process. A temperature near the specified 95°F provides gentle warmth. If you use a kitchen thermometer, you can check the milk before adding it. This is particularly useful when making yeast bread because judging liquid temperature only by touch can be inconsistent.
Melted Butter Adds Moisture and Flavor
Four tablespoons, or 56 grams, of unsalted butter are melted and then cooled before being incorporated into the batter. Butter contributes richness and moisture, helping produce a softer finished loaf while adding familiar homemade bread flavor.
Allowing the melted butter to cool is important because very hot butter should not be poured directly into a yeast-based mixture. It can be prepared before you begin combining the dry ingredients so it has enough time to lose excess heat while the other ingredients are measured.
Why Apple Cider Vinegar Is Included
One teaspoon of apple cider vinegar is added with the wet ingredients. In this formulation, the vinegar contributes to the texture and helps support a tender crumb. The quantity is small enough that the finished loaf should not be thought of as vinegar-flavored bread.
The vinegar goes directly into the stand mixer bowl along with the warm milk, cooled melted butter, and room-temperature egg whites. There is no separate reaction or preparation required. Keeping the process straightforward also reduces the number of bowls and steps needed to prepare the loaf.
Egg Whites Add Structure and Lightness
The recipe uses 2 egg whites (50 g) at room temperature. Egg whites help provide structure and contribute to the lighter texture of the bread without introducing the additional richness of whole eggs. They are incorporated directly into the flour mixture with the remaining wet ingredients.
Bringing the egg whites to room temperature before mixing helps them combine more smoothly with the other ingredients. Because a gram measurement is provided, weighing the whites can also improve consistency when eggs vary significantly in size.
Preparing the Loaf Pan
Prepare a 9 × 5-inch loaf pan before mixing the dough by greasing or lining it. Having the pan ready allows the thick batter to be transferred immediately after mixing rather than sitting in the bowl while you prepare your baking equipment.
The source also notes that a tall, narrow Pullman-style loaf pan can encourage more even baking and create slices particularly suitable for sandwiches. Whatever pan you choose, the standard recipe specifies a 9 × 5-inch loaf pan, so that is the size used in the recipe card below.
How to Mix the Dry Ingredients
Place the gluten-free flour blend, xanthan gum if required, instant yeast, cream of tartar, granulated sugar, and kosher salt into the bowl of a stand mixer. Whisk these ingredients thoroughly before introducing any liquid.
This step distributes the smaller ingredients evenly through the large quantity of flour. Taking a minute to whisk thoroughly can help create a more uniform loaf because the yeast and structural ingredients are not concentrated in one area. Once the dry mixture looks even, the wet ingredients can be added.
Adding the Wet Ingredients
Add the warm milk, cooled melted butter, apple cider vinegar, and room-temperature egg whites directly to the dry ingredients. Fit the stand mixer with its paddle attachment and begin mixing on low speed.
Starting slowly prevents flour from flying out of the bowl and gives the dry ingredients time to absorb the liquid. As everything begins to combine, gradually increase the mixer speed. The mixture should become thick, smooth, and sticky rather than forming a traditional ball of dough.
Why This Bread Doesn’t Need Kneading
Traditional bread recipes often emphasize kneading because kneading develops gluten. Since this loaf is gluten-free, there is no wheat gluten network to develop through hand kneading. Instead, the stand mixer is used to thoroughly combine and aerate the batter.
Beat the mixture on medium-high speed for approximately 3 minutes. This helps incorporate air and creates a more uniform batter. When finished, it should still resemble thick, sticky batter. Do not keep adding flour in an attempt to make it easy to handle by hand; that is not the intended texture.
Shaping the Gluten-Free Loaf
Scrape the finished batter directly into the prepared loaf pan. Because the dough is sticky, a wet spatula is useful for smoothing the top. You are not shaping the loaf on a floured counter or rolling it into a traditional bread shape.
Try to distribute the batter evenly from end to end and smooth the surface without pressing out unnecessary air. Once the top looks even, cover the pan so the exposed batter does not dry while the yeast begins its work.
How Long Should Gluten-Free Bread Rise?
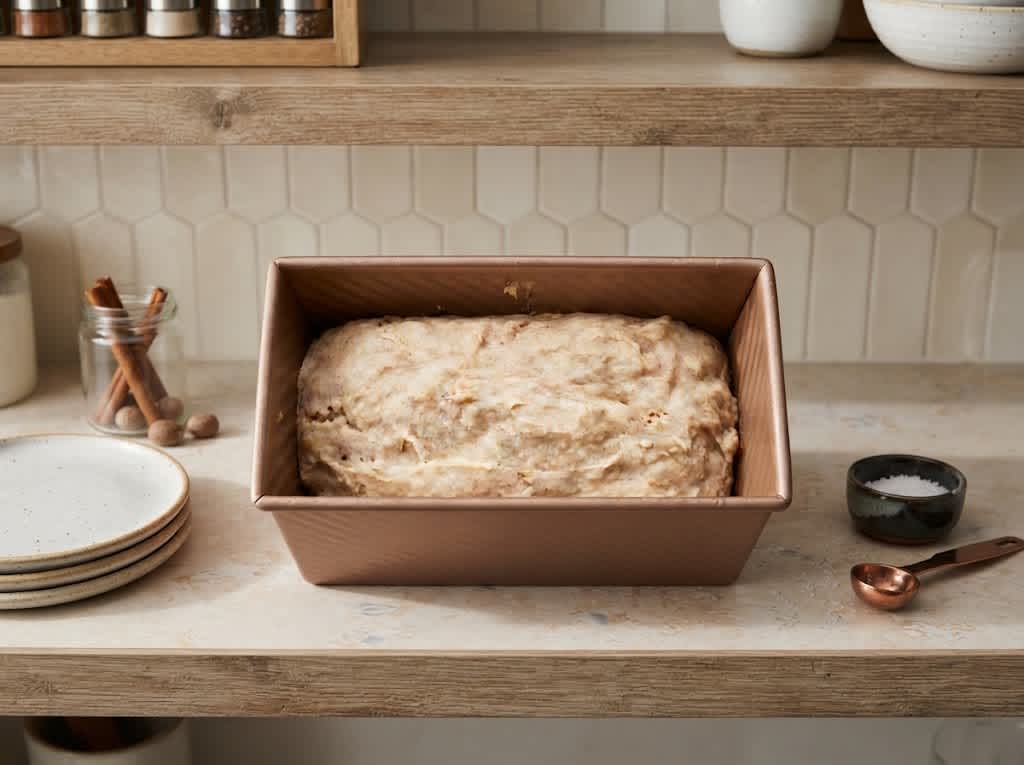
Cover the loaf and place it in a warm, draft-free location for approximately one hour, or until the dough has increased in size by roughly 50 percent. Unlike many wheat breads, you should not wait for this batter to double.
The exact rising time can vary because room temperature affects yeast activity. Instead of relying solely on the clock, pay attention to the increase in volume. The supplied notes also identify a pock-marked surface as an indication that the loaf has risen enough and should not continue proofing indefinitely.
Avoid Overproofing the Bread
Allowing bread to rise longer might seem like a way to produce a taller loaf, but with gluten-free bread, too much rising can have the opposite effect. If the structure becomes overextended before baking, it may not be strong enough to support itself and can collapse.
Watch the dough rather than automatically extending the rise. Once it has grown by approximately 50 percent and shows the visual signs described in the source, it is ready for baking. This controlled rise is one of the most important steps for creating a soft loaf that maintains its shape.
How to Bake Gluten-Free Bread
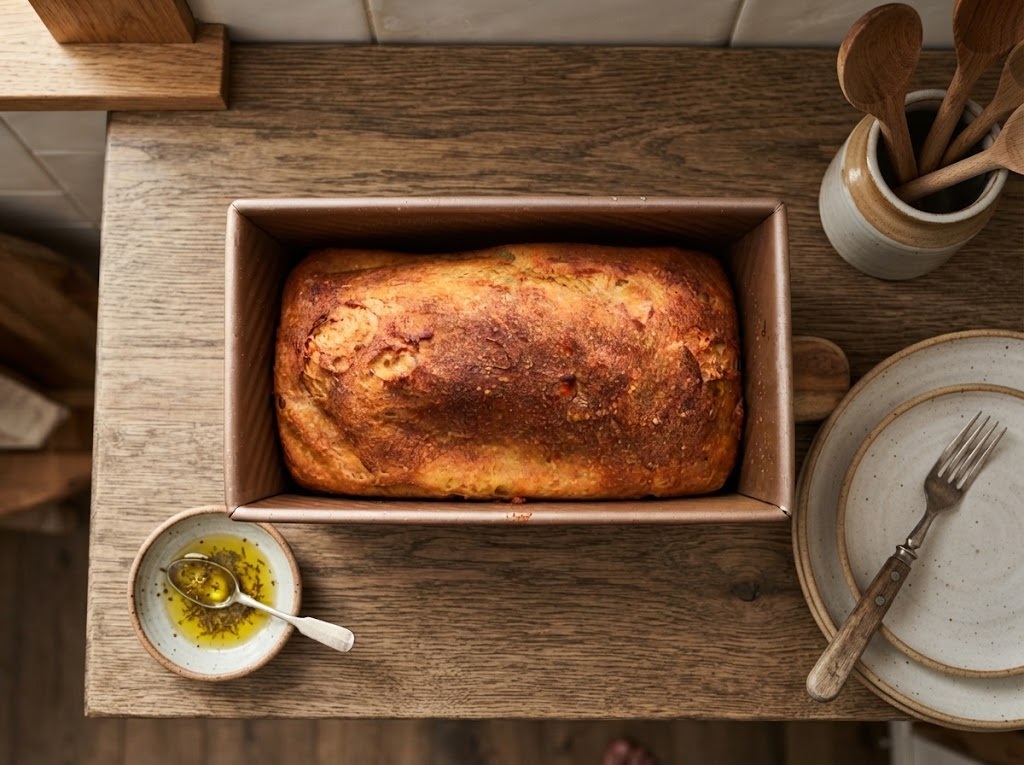
Preheat the oven to 375°F (190°C). Once the risen loaf is ready, bake it for approximately 50 minutes. The crust should become golden brown as the interior finishes cooking.
Because appearance alone does not always reveal whether gluten-free bread is fully baked, the recipe recommends checking the internal temperature with an instant-read thermometer. The center should reach approximately 200°F (93°C). This provides a more reliable doneness check than simply judging the color of the crust.
Why Internal Temperature Matters
One common problem with gluten-free bread is a center that looks baked from the outside but remains wet or gummy inside. Checking for an internal temperature of approximately 200°F helps confirm that the center has had enough time to bake.
Insert the thermometer into the center of the loaf without touching the pan. If the temperature is substantially below the target, the bread may need additional baking time. Oven performance varies, so the approximately 50-minute baking time should be considered alongside the internal-temperature check rather than treated as the only measure of doneness.
Cooling Is Part of the Baking Process
When the bread comes out of the oven, allow it to cool in the loaf pan for 10 minutes. Then remove it and place it on a wire rack until completely cool.
Waiting before slicing is particularly important with gluten-free bread. The interior continues to settle as the loaf cools, and cutting into it while it is still hot can compress the crumb or create the impression that the bread is gummy. Once fully cooled, use a serrated bread knife to cut clean slices.
Why Did My Gluten-Free Bread Turn Out Gummy?
A gummy center is one of the most common frustrations in homemade gluten-free bread. According to the supplied recipe, two likely causes are underbaking and too much liquid. Checking the loaf’s internal temperature before removing it from the oven can help prevent the first problem.
Accurate ingredient measurement helps address the second. Avoid casually adding extra milk because the batter appears thick; it is supposed to be considerably thicker and stickier than ordinary cake batter. Also resist slicing immediately after baking, since cooling completely is necessary for the crumb to set properly.
Why Didn’t My Gluten-Free Bread Rise?
If the loaf barely rises, the supplied troubleshooting guidance points to several possibilities. The wrong type or amount of yeast may have been used, the dough may have been too dry, or the yeast may have been exposed to excessive heat.
Use the specified instant yeast, measure accurately, and keep the milk around the recommended temperature. During proofing, choose a genuinely warm location rather than an excessively hot one. Yeast needs warmth, but too much heat can damage it and prevent the loaf from rising correctly.
Why Did the Loaf Sink?
A loaf that rises well and then collapses can be particularly disappointing. According to the supplied material, overproofing or excessive yeast can weaken the bread’s structure and cause it to fall. An oven that is too hot may also contribute by setting the crust before the interior has finished baking.
Measure the yeast accurately, stop proofing at approximately a 50-percent increase, and bake at the specified 375°F. These details work together to provide the developing loaf with enough support to rise and set without stretching its structure too far.
High-Altitude Baking Notes
The supplied recipe includes a general high-altitude adjustment. At higher elevations, slightly reducing the yeast and sugar can help prevent the dough from rising too aggressively, while a modestly higher baking temperature can help the bread’s structure set more quickly.
However, the source does not provide exact high-altitude quantities or a specific adjusted oven temperature. Those values should therefore not be invented. Bakers at significant altitude should treat this as general guidance and make adjustments appropriate to their particular elevation and baking environment.
Optional Sesame Seed Topping
Toasted sesame seeds are included as an optional topping. They can give the finished loaf a more traditional bakery-style appearance and add a mild nutty flavor to the crust.
Because sesame seeds are optional, the bread can be prepared successfully without them. They should also be avoided when serving someone with a sesame allergy. The standard bread itself depends on the flour blend, xanthan gum where required, yeast, cream of tartar, sugar, salt, milk, butter, vinegar, and egg whites rather than the topping.
Gluten Free Bread Recipe
An easy homemade gluten-free bread recipe with a soft, moist interior and golden crust
1
servings1
hour50
minutes1
hour50
minutesIngredients
3 cups (420 g) all-purpose gluten-free flour blend, such as Better Batter
3 teaspoons xanthan gum, if the flour blend does not already contain it
2½ teaspoons (8 g) instant yeast
¼ teaspoon cream of tartar
2 tablespoons (25 g) granulated sugar
2 teaspoons (12 g) kosher salt
1½ cups (12 oz) warm milk, around 95°F
4 tablespoons (56 g) unsalted butter, melted and cooled
1 teaspoon apple cider vinegar
2 egg whites (50 g), room temperature
Toasted sesame seeds, optional topping
Instructions
- Grease or line a 9 × 5-inch loaf pan.
- Add flour, xanthan gum, yeast, cream of tartar, sugar, and salt to a stand mixer bowl.
- Whisk the dry ingredients thoroughly.
- Add warm milk, cooled melted butter, apple cider vinegar, and egg whites.
- Mix on low speed until the ingredients begin to combine.
- Gradually increase to medium-high speed.
- Beat for approximately 3 minutes until thick and batter-like.
- Scrape the dough into the prepared loaf pan.
- Smooth the surface with a wet spatula.
- Cover and leave in a warm, draft-free place.
- Let rise for approximately 1 hour, or until about 50% larger.
- Preheat the oven to 375°F (190°C).
- Bake for approximately 50 minutes.
- Check that the center reaches about 200°F (93°C).
- Cool in the pan for 10 minutes.
- Transfer to a wire rack and cool completely before slicing.