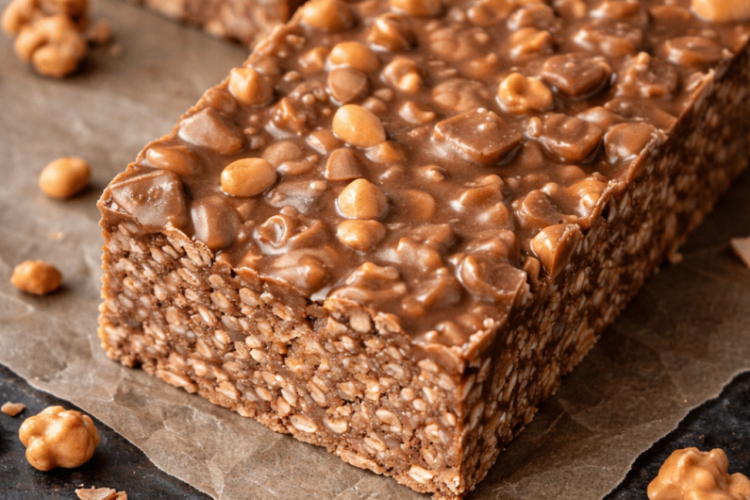
These are no-bake bars built around the classic pairing of chocolate and peanut butter, with crispy rice cereal folded in for crunch. Everything comes together on the stovetop and in the microwave — no oven needed — which makes this a good option on warm days or whenever you want a dessert without heating up the kitchen. The base is melted chocolate chips, peanut butter, maple syrup, and coconut oil, poured over crispy rice cereal, pressed into a pan, and chilled until firm.
The recipe yields about 13 servings from a single 8×8-inch pan, and it’s built to be easy to customize — different chocolate types, mix-ins, and toppings can all be layered onto the same base method without changing the core technique.
Getting Everything Ready
Because the chocolate mixture needs to be poured and pressed while still warm, having everything else prepped and within reach before you start melting anything makes the process much smoother.
Equipment to have ready:
- An 8×8-inch baking dish
- Parchment paper
- A microwave-safe bowl
- A large mixing bowl
- A spatula or the back of a spoon, for pressing the mixture into the pan
- A cutting board and knife, for slicing
Ingredients to have measured and ready:
- 1½ cups chocolate chips
- 1 cup creamy peanut butter
- 3 cups crispy rice cereal
- ½ cup pure maple syrup
- ¼ cup coconut oil
Optional toppings to have on hand: flaky sea salt, chopped peanuts, a drizzle of melted chocolate.
Lining the pan with parchment paper before you start — and leaving extra paper hanging over the sides — is worth doing early, since it’s what makes lifting the finished bars out clean and easy later.
Workflow: How the Process Comes Together
This recipe has a short, direct sequence, and each step depends on the one before it staying warm or evenly mixed:
- Line the pan first, before anything else, so it’s ready the moment the mixture is prepped.
- Melt the chocolate mixture. Chocolate chips, peanut butter, maple syrup, and coconut oil are melted together in the microwave in short intervals, stirring between each, until smooth and glossy.
- Coat the cereal. The warm chocolate mixture is poured over the crispy rice cereal and stirred until every piece is evenly covered.
- Press into the pan firmly and evenly while the mixture is still workable.
- Chill for 60–90 minutes until fully set and firm — this step can’t be rushed if you want clean slices.
- Slice and serve chilled, lifting the whole slab out by the parchment paper first.
Because the chocolate mixture firms up as it cools, working through steps 2 through 4 without long pauses in between helps keep everything easy to stir, pour, and press while it’s still pliable.
Approved Variations & Swaps
Based strictly on what’s built into this recipe, here are the adjustments it already allows for:
- Chocolate type: dark chocolate gives a richer taste, milk chocolate gives a sweeter flavor, and white chocolate gives a creamier twist — all as direct swaps for the standard chocolate chips.
- Dairy-free version: using dairy-free chocolate chips makes the whole recipe dairy-free.
- Peanut butter type: natural peanut butter can be used in place of standard creamy peanut butter, as long as it’s well stirred so the oil is fully incorporated.
- Sweetener swap: honey or a sugar-free syrup can replace the maple syrup.
- Cereal toasting: lightly toasting the crispy rice cereal in a dry skillet for 2–3 minutes before mixing adds extra flavor.
- Topping additions: flaky sea salt sprinkled on top before chilling balances the sweetness; chopped peanuts or almonds mixed in add extra crunch; a drizzle of melted chocolate on top adds a finishing touch.
- Firming up soft bars: if the bars turn out too soft, a little extra cereal can be mixed in to firm up the base mixture.
No other ingredient substitutions are specified in the source recipe, so changes beyond these listed swaps would go beyond what’s actually described here.
Step-by-Step Assembly Strategy
A handful of specific technique choices make the difference between bars that hold together cleanly and ones that fall apart or turn out unevenly textured.
Melt in short intervals, stirring each time. Microwaving the chocolate mixture in 30-second bursts, stirring after every interval, prevents the chocolate from scorching and ensures everything melts into a smooth, glossy mixture rather than separating.
Pour while the mixture is still warm. The chocolate mixture needs to be warm and fluid enough to coat every piece of cereal evenly — working quickly here, rather than letting it cool and thicken in the bowl, makes for more even coverage.
Stir gently but thoroughly. The goal is to coat every piece of cereal without crushing it, so a gentle folding motion works better than vigorous stirring.
Press firmly and evenly into the pan. Using a spatula or the back of a spoon to compact the mixture into a smooth, level surface is what gives the bars a clean, uniform shape once sliced — uneven pressing leads to bars that are thick in some spots and thin in others.
Respect the chilling time. A full 60 to 90 minutes in the refrigerator is what allows the bars to set firmly enough to slice cleanly. Cutting into them too early, before they’re fully set, is one of the most common reasons bars come out soft or crumbly.
Lift out by the parchment paper before slicing. Removing the whole slab at once, rather than trying to cut bars directly in the pan, makes for cleaner cuts and easier serving.
Slice with a clean, dry knife. Wiping the blade between cuts helps keep the edges of each bar neat rather than smeared with chocolate.
No-Bake Chocolate Peanut Butter Crunch Bars
Description: A rich, no-bake dessert combining melted chocolate, peanut butter, and crispy rice cereal, set in the refrigerator until firm. Perfect for a quick dessert, afternoon snack, lunchbox treat, or party platter, with easy customization through different chocolate types and toppings.
Duration:
- Servings: 13
- Calories: 250 kcal per serving
Ingredients
- 1½ cups chocolate chips
- 1 cup creamy peanut butter
- 3 cups crispy rice cereal
- ½ cup pure maple syrup
- ¼ cup coconut oil
Optional toppings: flaky sea salt, chopped peanuts, drizzle of melted chocolate
Instructions
- Line an 8×8-inch baking dish with parchment paper, leaving extra paper on the sides for easy lifting later.
- In a microwave-safe bowl, combine the chocolate chips, peanut butter, maple syrup, and coconut oil. Microwave in 30-second intervals, stirring after each, until smooth, melted, and glossy.
- Place the crispy rice cereal in a large mixing bowl. Pour the warm chocolate mixture over it and stir gently until every piece is evenly coated.
- Transfer the mixture into the prepared baking dish. Press down firmly and evenly with a spatula or the back of a spoon to create a smooth surface.
- Refrigerate for 60–90 minutes until fully set and firm.
- Lift the bars out using the parchment paper, place on a cutting board, and slice into squares or rectangles. Serve chilled.
Notes
- For extra flavor, lightly toast the crispy rice cereal in a dry skillet for 2–3 minutes before mixing.
- Sprinkle flaky sea salt on top before chilling to balance the sweetness.
- Mix in chopped peanuts or almonds for added crunch.
- Chocolate type can be varied: dark chocolate for a richer taste, milk chocolate for sweeter flavor, or white chocolate for a creamy twist.
- Store in an airtight container in the refrigerator for up to 7 days. For longer storage, wrap each bar individually and freeze for up to 3 months; thaw in the refrigerator before serving.
- Natural peanut butter can be used if well stirred so the oil is fully incorporated.
- For a dairy-free version, use dairy-free chocolate chips.
- Honey or a sugar-free syrup can replace the maple syrup.
- If bars turn out soft, allow more chilling time or mix in a bit of extra cereal to firm up the base.
- Nutrition per serving: 250 kcal, 14g total fat, 6g saturated fat, 0mg cholesterol, 80mg sodium, 13g carbohydrates, 1g fiber, 12g sugar, 5g protein.
Disclaimer: This recipe is provided for general informational purposes only and does not constitute medical or dietary advice. Nutritional values are estimates based on a 2,000-calorie diet and may vary depending on specific ingredients and brands used. Individuals with food allergies, dietary restrictions, or specific health conditions (including but not limited to peanut or tree nut allergies, and dairy sensitivities) should consult a qualified healthcare provider or registered dietitian before preparing or consuming this recipe. Neither the author nor the publisher assumes responsibility for any adverse effects resulting from the preparation or consumption of this recipe.