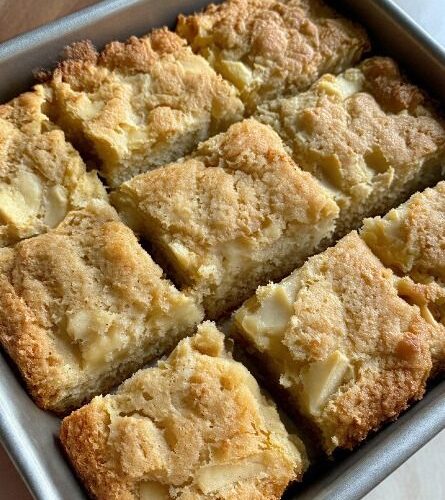
This cake is built around a simple, layered idea: soft, buttery batter alternating with thin slices of fresh apple, baked until the top turns golden and a toothpick comes out clean. There’s no frosting, no elaborate decoration, and no complicated technique — the appeal comes entirely from getting the basics right: a tender crumb, juicy fruit, and a warm hit of cinnamon running through it all.
It’s the kind of dessert that leans on balance rather than richness. The batter itself is light, the apples bring natural sweetness and a bit of tartness, and the two together create a texture that feels both homey and a little bit bakery-style — soft cake against tender, slightly caramelized fruit.
Because the ingredient list is short and the method is straightforward, this is a good cake to have in your regular rotation. It works for an everyday craving just as easily as it does for a holiday table, and it doesn’t ask for any specialty equipment beyond a round cake pan.
Prep and Setup
Getting organized before you start creaming the butter and sugar makes the whole process move more smoothly:
- Oven: preheat to 350°F (175°C) before you begin mixing, so it’s ready the moment your pan is filled.
- Cake pan: a round cake pan, greased well ahead of time — this is what prevents sticking and gives you a clean release once the cake is baked.
- Apples: peeled, cored, and thinly sliced. Crisp varieties like Granny Smith or Honeycrisp are called for specifically. If you’re combining two apple varieties for a more complex flavor, have both prepped and ready before you start on the batter.
- Butter and eggs: pulled out ahead of time so they can come to room temperature — this helps them blend into a smoother batter than cold ingredients would.
- Dry ingredients: flour, baking powder, cinnamon, and salt, ready to be sifted together once the wet ingredients are mixed.
- Optional add-ins: brown sugar, nutmeg or cardamom, lemon juice, chopped nuts, or raisins — measured and set aside if you’re using any of them.
Workflow: How the Steps Actually Flow
1. Preheat and grease first. The oven needs to be at temperature and the pan ready before the batter comes together, since this batter doesn’t benefit from sitting around waiting on the oven.
2. Prep the apples early. Peeling, coring, and thinly slicing the apples is its own small task — doing it before you start the batter means you’re not scrambling to slice fruit while butter and sugar wait on the counter. A splash of lemon juice on the sliced apples at this stage prevents browning and adds a bit of extra flavor.
3. Cream butter and sugar until light and fluffy. This step incorporates air into the fat, which is part of what gives the finished cake its soft, tender crumb rather than a dense one.
4. Add eggs one at a time. Mixing well after each addition keeps the batter emulsified — adding all the eggs at once risks the batter looking curdled or separated rather than smooth.
5. Sift in the dry ingredients and mix gently. Flour, baking powder, cinnamon, and salt go in together, and the instruction here is to mix only until combined. This is one of the most important steps in the whole recipe: overmixing at this stage develops gluten and makes the finished cake dense rather than soft.
6. Build the cake in layers. Spread half the batter into the pan first, then add a layer of apple slices, then repeat with the remaining batter and apples. This layering is what distributes the fruit evenly through the cake instead of having it all sink to the bottom or sit only on top.
7. Bake until a toothpick comes out clean. 40–45 minutes is the given range, but the real test is the toothpick — every oven runs slightly differently.
8. Cool slightly before serving. Letting the cake rest for a few minutes makes it easier to slice cleanly, whether you’re serving it warm or at room temperature.
Component Organization: What Each Ingredient Is Doing
- Structure: flour, baking powder, eggs. Flour and baking powder give the cake its rise and body; eggs bind the batter together and add structure as the cake bakes.
- Richness and flavor: butter, sugar, cinnamon, salt. Butter and sugar, creamed together, are the base of the cake’s texture and sweetness; cinnamon adds the warm spice note that defines the flavor; salt balances the sweetness.
- The fruit layer: fresh apples, distributed through the batter in layers rather than mixed in — this is what gives the cake its juicy bite and bakery-style contrast against the soft crumb.
- Optional extras: brown sugar, nutmeg or cardamom, lemon juice, chopped nuts, or raisins. These sit on top of the base recipe as flavor and texture add-ins, without changing the core method.
Choosing the Best Apples
Apple choice has a real effect on the finished cake:
- Granny Smith – tart and firm, holds its shape well during baking.
- Honeycrisp – sweet and juicy, softer bite.
- Fuji – naturally sugary and soft.
- Golden Delicious – balanced flavor, not too tart or too sweet.
Combining two varieties in the same cake is a way to get a more complex flavor — a mix of tartness and sweetness in the same bite, similar to what’s often done in more elaborate bakery-style versions of this cake.
Approved Variations and Swaps (Based Strictly on the Recipe)
- Flour swaps: whole wheat flour for added fiber, or almond flour for a gluten-free version.
- Sugar swaps: brown sugar or coconut sugar in place of white sugar; reduce the amount for a lighter version; or use natural sweeteners like honey or maple syrup.
- Spice additions: a pinch of nutmeg or cardamom alongside the cinnamon for extra warmth.
- Texture additions: chopped walnuts or almonds for crunch; raisins or dried cranberries mixed in.
- Flour texture swap: replacing part of the flour with cornmeal for a different texture.
- Flavor infusion: infusing the butter with cinnamon sticks before mixing it into the batter.
- Apple prep: lemon juice on the sliced apples, both to prevent browning and to add flavor.
All of these sit within the recipe as explicitly offered options — none of them require changing the core method of creaming, layering, and baking.
Pro Baking Tips for Best Results
- Don’t overmix the batter — mix just until the ingredients combine, to keep the cake soft rather than dense.
- Use room temperature butter and eggs — they blend into a smoother batter than cold ingredients.
- Slice apples evenly — thin, uniform slices bake more evenly and give a better texture throughout the cake.
- Add lemon juice to the apple slices — prevents browning and adds a touch of flavor.
- Grease the pan well — makes for a clean release once the cake is baked and cooled.
Serving Ideas
- With freshly whipped cream.
- Paired with vanilla ice cream.
- Drizzled with caramel sauce.
- Sprinkled with powdered sugar.
- Served warm with tea or coffee.
For a restaurant-style presentation, serve the cake slightly warm with a scoop of ice cream on the side — the contrast of warm cake against cold ice cream is part of the appeal.
Storage and Make-Ahead Tips
- Store at room temperature in an airtight container for up to 3 days.
- Refrigerate for up to 5 days.
- Freeze for up to 3 months, wrapped tightly.
- The flavor actually improves the next day, as the apple juices have time to blend further into the cake.
Step-by-Step Assembly Strategy
- Preheat the oven to 350°F (175°C) and grease a round cake pan.
- Peel, core, and thinly slice the apples.
- Cream the butter and sugar until light and fluffy.
- Add the eggs one at a time, mixing well after each.
- Sift in flour, baking powder, cinnamon, and salt, mixing gently.
- Spread half the batter into the pan.
- Add a layer of apple slices.
- Repeat with the remaining batter and apples.
- Bake 40–45 minutes, or until a toothpick comes out clean.
- Let cool slightly and serve warm or at room temperature.
Classic French Apple Cake
Description: A beautifully simple yet incredibly flavorful French apple cake with a rustic, elegant look and a soft, buttery crumb. This traditional cake highlights the natural sweetness of fresh apples with a subtle hint of warm cinnamon, resulting in a moist cake that melts in your mouth with every bite. Perfect for a comforting family dessert, an afternoon tea cake, or a show-stopping homemade treat.
Duration: Bake time 40–45 minutes (total time not otherwise specified in source)
Ingredients:
- Fresh crisp apples (such as Granny Smith or Honeycrisp)
- All-purpose flour
- Granulated sugar
- Unsalted butter
- Eggs
- Baking powder
- Ground cinnamon
- Salt
Optional Additions:
- Brown sugar (for deeper flavor)
- Nutmeg or cardamom
- Lemon juice (for apples)
- Chopped nuts or raisins
Instructions:
- Preheat oven to 350°F (175°C) and grease a round cake pan.
- Peel, core, and thinly slice the apples.
- Cream butter and sugar until light and fluffy.
- Add eggs one at a time, mixing well after each addition.
- Sift in flour, baking powder, cinnamon, and salt. Mix gently.
- Spread half the batter into the pan.
- Add a layer of apple slices.
- Repeat with remaining batter and apples.
- Bake for 40–45 minutes or until a toothpick comes out clean.
- Let cool slightly and serve warm or at room temperature.
Notes:
- Avoid overmixing for a soft texture.
- Add lemon juice to apples for extra flavor.
- Dust with powdered sugar before serving.
Medical Disclaimer: This recipe and the accompanying content are provided for general informational and culinary purposes only and are not intended as medical, nutritional, or dietary advice. Nutritional needs vary from person to person, and individuals with food allergies, intolerances, medical conditions, or specific dietary requirements should consult a qualified healthcare professional or registered dietitian before preparing or consuming this recipe. Cooking times and temperatures may vary depending on individual equipment; always ensure food is cooked to a safe internal temperature before serving. The creator of this content assumes no liability for any adverse reactions, allergic responses, or health outcomes resulting from the preparation or consumption of this recipe.