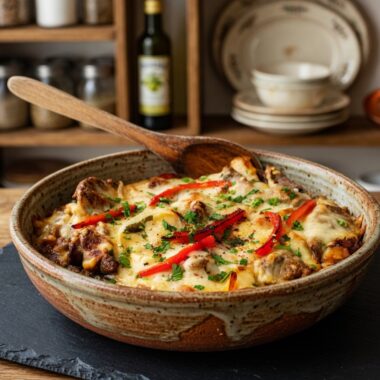
These cheese balls combine three types of cheese — cheddar, mozzarella, and Parmesan — with almond flour and eggs to create a snack that’s crispy on the outside and cheesy on the inside, with just 2 grams of net carbs per serving. Unlike many crispy snacks that rely on breadcrumbs or traditional flour, this recipe uses almond flour as the binding, gluten-free alternative, making the whole snack keto-friendly without sacrificing texture.
What makes this recipe so approachable is its simplicity: everything mixes together in a single bowl, gets rolled into balls, and bakes in the oven. There’s no separate breading station or multi-step coating process — the almond flour, baking powder, and shredded cheeses are simply mixed directly with beaten eggs into a dough-like consistency that holds its shape once rolled and baked.
Below is a full breakdown of the workflow, ingredient roles, and technique for building a properly textured, crispy cheese ball, along with the health-related notes on the key ingredients.
Kitchen Workflow: How the Process Is Organized
This recipe breaks into four stages: preparing the eggs, mixing the dry ingredients in, shaping, and baking.
Stage 1 — Prepare the Eggs. The oven is preheated to 400°F (200°C) to ensure even baking. In a large bowl, two eggs are cracked and whisked until lightly beaten. Whisking the eggs first, before adding the other ingredients, helps them incorporate evenly throughout the mixture rather than leaving streaks of unmixed egg.
Stage 2 — Mix the Dry Ingredients. Shredded cheddar, mozzarella, and Parmesan cheese, along with almond flour, baking powder, and black pepper, are added to the bowl with the whisked eggs. Everything is mixed together until fully incorporated, forming a mixture that’s slightly sticky but firm enough to roll into balls. This single-bowl mixing approach is what keeps the recipe so quick — there’s no need for separate wet and dry ingredient bowls combined later, since the eggs are already in the bowl before the rest of the ingredients join them.
Stage 3 — Shape the Cheese Balls. The mixture is divided into 8 equal portions, each rolled into a ball and placed on a baking sheet lined with parchment paper or a silicone baking mat. Spacing the balls out evenly on the sheet ensures they each have room to bake properly without touching or steaming against one another.
Stage 4 — Bake. The baking sheet goes into the preheated oven, and the cheese balls bake for 10–12 minutes, until golden brown and crispy on the outside. Keeping an eye on them toward the end of baking helps avoid over-baking, since the exact timing can vary slightly depending on the oven and the size of each ball.
Component Breakdown
It’s useful to think of this recipe in terms of four functional components.
1. The Cheese Blend — Cheddar, Mozzarella, and Parmesan Sharp cheddar cheese provides a strong, bold, slightly tangy flavor and melts beautifully. Mozzarella adds a creamy, melty texture that balances cheddar’s boldness with its own mild flavor. Parmesan contributes a nutty, salty punch that rounds out the overall flavor profile. Together, these three cheeses create a layered, savory flavor that a single cheese alone wouldn’t achieve.
2. The Binder — Eggs and Almond Flour Eggs serve as the primary binder, holding everything together while adding protein to the dish. Almond flour, a keto-friendly, gluten-free alternative to traditional flour, provides the right consistency to help the cheese balls hold their shape once rolled and baked.
3. The Rise — Baking Powder Baking powder gives the cheese balls a slight rise during baking, contributing to a texture that’s fluffy on the inside while remaining crispy on the outside.
4. The Seasoning — Black Pepper A pinch of freshly ground black pepper adds a bit of spice and enhances the overall savory flavor of the cheese balls without overpowering the cheese itself.
Approved Variations and Customizations
Based strictly on the details provided, this recipe is described as customizable in the following ways:
- Spices and herbs – garlic powder, onion powder, or cayenne pepper can be added to give the cheese balls extra flavor and a kick of heat.
- Cheese variety – different types of cheese can be experimented with to find a preferred flavor combination beyond the cheddar, mozzarella, and Parmesan blend used here.
Step-by-Step Assembly Strategy
To build a properly textured, crispy batch of cheese balls, follow this sequence:
- Preheat the oven to 400°F (200°C) to ensure even baking.
- In a large bowl, whisk the 2 eggs until lightly beaten.
- Add the shredded cheddar, mozzarella, and Parmesan cheeses, along with the almond flour, baking powder, and black pepper. Mix well until fully combined into a slightly sticky, dough-like mixture.
- Divide the mixture into 8 equal portions. Roll each portion into a ball and place them on a baking sheet lined with parchment paper, spaced out evenly.
- Bake for 10–12 minutes, until golden brown and crispy on the outside, watching closely toward the end to avoid over-baking.
- Allow the cheese balls to cool for a few minutes before serving warm.
Nutritional Benefits and Ingredient Notes
Cheddar cheese is an excellent source of calcium, supporting strong bones and teeth, and is also rich in protein that helps build and repair tissue, with healthy fats that provide sustained energy.
Mozzarella cheese is a great source of protein and calcium, and is lower in fat compared to some other cheeses, making it a solid choice for a high-protein, low-carb diet.
Parmesan cheese is packed with vitamins and minerals, including Vitamin A and zinc, and is high in protein, contributing a salty, flavorful punch to the dish.
Almond flour is a fantastic gluten-free substitute for traditional flour, rich in healthy fats, fiber, and protein, and lower in carbs compared to other flour options.
Eggs provide high-quality protein, essential amino acids, and healthy fats, along with vitamins and minerals like Vitamin B12 and choline.
Serving Suggestions
These cheese balls can be enjoyed as-is, or paired with a low-carb dipping sauce like ranch or marinara for extra flavor.
Part 2: Recipe Card
Low-Carb Crispy Cheese Balls
Description: Crispy on the outside, cheesy on the inside — these keto-friendly cheese balls combine three types of cheese with almond flour for a gluten-free, low-carb snack with just 2 grams of net carbs per serving.
Duration:
- Prep Time: 5 minutes
- Cook Time: 12 minutes
- Total Time: 17 minutes
- Servings: 4 (2 balls per serving)
- Calories per Serving: 213
Ingredients:
- 2 large eggs
- 1/2 cup shredded cheddar cheese
- 1/4 cup shredded mozzarella cheese
- 1/4 cup shredded Parmesan cheese
- 1/2 cup almond flour
- 1/2 tsp baking powder
- Black pepper, to taste
Instructions:
- Preheat the oven to 400°F (200°C).
- In a large bowl, whisk the 2 eggs until lightly beaten.
- Add the shredded cheddar, mozzarella, and Parmesan cheeses, almond flour, baking powder, and black pepper. Mix well until fully combined.
- Divide the mixture into 8 portions and roll each into a ball. Place them on a baking sheet lined with parchment paper.
- Bake for 10–12 minutes, or until golden brown and crispy.
- Allow the cheese balls to cool for a few minutes, then serve warm.
Notes:
- Add garlic powder, onion powder, or cayenne pepper for extra flavor and heat.
- Experiment with different cheese combinations to find your favorite flavor profile.
- Serve with a low-carb dipping sauce like ranch or marinara.
- Nutrition (per serving of 2 balls, approximate): Calories: 213, Total Fat: 16g, Saturated Fat: 6g, Cholesterol: 106mg, Sodium: 263mg, Carbohydrates: 3g, Net Carbs: 2g, Fiber: 1g, Protein: 13g.
Medical and Nutritional Disclaimer
The information provided in this recipe and guide is intended for general informational and educational purposes only and does not constitute medical, dietary, or nutritional advice. Nutritional values listed are automatically calculated estimates and should be used as an approximation only; actual values may vary based on specific ingredient brands, substitutions, and portion sizes used. This recipe is not intended to diagnose, treat, cure, or prevent any disease or health condition. Individuals with food allergies, dietary restrictions, or specific medical conditions should consult with a qualified healthcare provider or registered dietitian before making dietary changes or preparing this recipe. The author and publisher assume no responsibility for any adverse effects resulting from the use or application of the information contained herein.