Crispy Keto Fried Chicken is a flavorful low-carb version of classic fried chicken, made for anyone who wants a crunchy coating without traditional wheat flour. The chicken is soaked in a creamy, seasoned marinade before being coated with unflavored protein powder and a bold homemade spice blend. Once fried at the correct temperature, the outside becomes crisp and deeply seasoned while the chicken remains tender and juicy inside. This method creates satisfying keto fried chicken without relying on breadcrumbs, regular flour, almond flour, or crushed pork rinds.
One of the best things about this low-carb fried chicken recipe is its combination of texture and flavor. The marinade contains heavy cream, unsweetened almond milk, vinegar, eggs, and a generous portion of the spice mixture. Allowing the chicken to sit in this mixture for several hours gives the seasoning time to reach beyond the surface. The protein powder coating then forms a crisp outer layer during frying, creating the familiar contrast between crunchy breading and moist chicken that makes homemade fried chicken so appealing.
Is Fried Chicken Keto-Friendly?
Traditional fried chicken is generally not considered keto-friendly because the coating is commonly prepared with wheat flour or breadcrumbs. Chicken itself contains very little carbohydrate, but breading can significantly increase the carb content. This Crispy Keto Fried Chicken takes a different approach by replacing conventional flour with unflavored protein powder. The result is a low-carb fried chicken coating that can provide crunch and texture while keeping the carbohydrate level lower than a typical flour-breaded version.
This recipe is particularly useful when you want the comfort-food experience of fried chicken while following a low-carb or ketogenic eating plan. Instead of simply removing the coating, which would completely change the character of fried chicken, this method creates an alternative crust. The coating also carries the paprika, garlic, mustard, ginger, pepper, salt, and cinnamon, so every bite has plenty of seasoning rather than tasting like plain chicken covered with a substitute breading.
What Makes This Keto Fried Chicken Crispy?
The secret to crispy keto fried chicken is not one ingredient alone. Good results come from the combination of the marinade, protein powder coating, small lumps of breading, correct frying temperature, and careful batch cooking. A small amount of marinade liquid is mixed into the protein powder and seasoning. This creates little irregular pieces in the coating that become crisp when they hit the hot oil, producing a more textured crust instead of a completely smooth exterior.
Temperature control is equally important. The oil should be around 300°F before the chicken goes into the pot. Adding cold chicken naturally lowers the temperature, so the recipe recommends keeping the oil between approximately 275°F and 300°F while cooking. If the temperature falls too much, the coating can absorb excess oil and become heavy. If the temperature becomes too high, the outside may darken before the chicken has enough time to cook safely in the center.
A Flavorful Keto Fried Chicken Spice Mix
A good coating needs more than crunch, which is why this keto chicken recipe uses a strong spice mixture. Paprika provides warm flavor and color, while garlic powder gives the coating a familiar savory character. Black pepper adds gentle heat, mustard powder contributes another layer of sharpness, and ground ginger adds subtle warmth. Even the small pinch of cinnamon plays a useful role by adding depth without making the chicken taste sweet.
Pink Himalayan salt is also included in the original spice blend. Half of the prepared seasoning mixture goes into the wet marinade, while the remaining half is combined with the protein powder for the coating. Dividing the seasoning this way means the chicken is flavored at two stages rather than only on the surface. It helps create a seasoned interior and a flavorful crispy crust, making the finished low-carb fried chicken more satisfying from the first bite to the last.
Why Marinating the Chicken Matters
Marinating is an important part of this homemade keto fried chicken recipe. The chicken is placed in a mixture of unsweetened almond milk, heavy cream, white vinegar, eggs, and half of the prepared spice blend. It should remain refrigerated in this marinade for at least four hours and can be left for as long as twelve hours. Giving the chicken adequate marinating time allows the flavors to develop before the pieces are coated and fried.
The marinade serves another purpose as well. When the chicken is removed from the bowl, its moist surface helps the protein powder mixture adhere to each piece. A small quantity of the same marinade is also intentionally mixed into the dry coating. This produces small clumps that fry into extra-crispy edges. Because the marinade performs several jobs in the recipe, it is worth allowing enough time for this stage rather than rushing directly into frying.
Choosing Chicken for Keto Fried Chicken
This recipe uses a mixture of boneless, skinless chicken breasts, bone-in chicken thighs, and bone-in, skin-on drumsticks. Using different chicken cuts provides a variety of textures, but it also means cooking times will differ. Boneless breast meat generally cooks more quickly, while thighs and drumsticks need additional frying time because they are thicker and contain bones. Keeping these differences in mind is essential when cooking several types of chicken in the same session.
Dark meat, particularly thighs and drumsticks, is a practical choice for fried chicken because it tends to remain juicy during longer cooking. Chicken breast can also produce excellent results, especially when cut into strips, but it should be watched closely because lean breast meat can become dry when overcooked. Whatever pieces you choose from the ingredients provided, checking the internal temperature is more dependable than relying only on frying time or the color of the coating.
Preparing the Low-Carb Fried Chicken Coating
The keto breading in this recipe is refreshingly simple. Unflavored protein powder is combined with the remaining half of the prepared spice mix. Instead of leaving the mixture completely dry, one to two tablespoons of marinade liquid are stirred into it with a fork. The goal is not to create a smooth batter. You want small, uneven lumps because these pieces attach themselves to the chicken and form crunchy areas as the coating fries.
Each marinated piece should be thoroughly covered with the protein powder mixture before frying. Working with only a few pieces at a time makes this process easier and helps prevent the coating from becoming excessively wet. Tongs can also be useful for moving the chicken between the marinade and breading. Once coated, make sure each piece has an even layer around the surface so that you get flavorful keto breading in every bite.
How to Fry Keto Chicken Correctly
Deep frying requires careful temperature management. Heat approximately two to three cups of a suitable high-smoke-point oil in a deep frying pot, Dutch oven, or deep fryer. The oil needs to be deep enough to cover the chicken properly. Bring it to approximately 300°F and use a food thermometer to monitor the temperature throughout cooking rather than estimating the heat based only on how vigorously the oil bubbles.
Do not overcrowd the frying pot. Cooking too many pieces simultaneously can rapidly reduce the oil temperature, which can interfere with crisping and lead to an oily coating. Smaller batches allow the oil to circulate around the chicken and make it easier to maintain the recommended temperature range. Giving hot oil your full attention is also safer than trying to prepare another batch of coating while chicken is actively frying.
Keto Fried Chicken Cooking Times
Cooking time depends heavily on the cut and thickness of the chicken. Chicken strips generally require about 8 to 10 minutes. Drumsticks need approximately 15 to 18 minutes, while chicken thighs may require around 17 to 20 minutes. These times should be treated as useful guides rather than the only test for doneness because chicken pieces naturally vary in size, thickness, starting temperature, and bone structure.
The most dependable check is the internal temperature. Chicken should reach at least 165°F in the center. Insert a food thermometer into the thickest part without touching the bone when checking thighs or drumsticks. Once cooked, carefully remove each piece from the oil and place it on paper towels to drain excess oil. Proper draining helps preserve the crisp exterior rather than allowing the finished chicken to sit in a pool of hot oil.
What to Do If the Coating Darkens Too Quickly
Different brands and types of protein powder may react differently to high heat. If you notice that your keto fried chicken coating is becoming dark before the center of the chicken has finished cooking, remove the pieces from the frying oil promptly. Continuing to fry simply to cook the center could burn the outside, leaving you with an unpleasantly dark crust while trying to reach a safe internal temperature.
The recipe provides a useful oven-finishing method for this situation. Place the partially fried chicken on a tray, cover it well with aluminum foil, and bake at 350°F for about 20 minutes. Remove the foil and allow the chicken to crisp for roughly another five minutes. Continue checking doneness with a thermometer because exact cooking time can vary depending on the thickness and type of chicken pieces being prepared.
Can You Make Keto Fried Chicken in an Air Fryer?
An air fryer can be used as an alternative method, although the finished texture may differ from chicken cooked in deep oil. For the air-fryer variation, cook the coated chicken at 350°F for approximately 8 to 18 minutes, depending on the cut and thickness. Chicken breast and other smaller boneless pieces will normally finish sooner than thick thighs or drumsticks, so different cuts should not automatically be given the same cooking time.
Avoid using excessively high heat because the protein-based coating may brown before the center of the chicken is fully cooked. Lightly coating the air-fryer basket with cooking spray can also help prevent the breading from sticking when the chicken is turned or removed. Most importantly, use a meat thermometer to confirm that the center reaches at least 165°F. Air fryers vary considerably, so temperature is more reliable than appearance alone.
How to Keep Keto Fried Chicken Crispy
Crispy fried chicken depends on controlling moisture and temperature from beginning to end. Start with oil that has reached the recommended temperature before adding any chicken. Fry in manageable batches and allow the oil to recover between batches when necessary. After cooking, drain the chicken properly instead of stacking hot pieces immediately. Stacking can trap steam between pieces, and that trapped moisture can soften a coating that was perfectly crisp when it left the fryer.
The coating technique also matters. Make sure each chicken piece receives enough protein powder mixture to create an even crust, but avoid pressing on an unnecessarily thick layer. The small clumps created by mixing marinade liquid into the coating provide extra crunchy texture. When these techniques are combined with controlled frying temperatures, the finished chicken develops a crisp surface without the traditional flour or breadcrumbs found in standard fried chicken.
Storing and Reheating Keto Fried Chicken
Leftover keto fried chicken can be kept in an airtight container in the refrigerator for up to five days. Before storing it, allow the chicken to cool appropriately rather than sealing it while it is still producing large amounts of steam. Refrigeration naturally softens fried coatings over time, but reheating the chicken with dry heat can help restore some of the original crispness better than microwaving it.
For oven reheating, place the chicken on an aluminum-lined baking sheet and heat at 375°F for approximately 10 to 15 minutes, or until thoroughly hot and crisp. An air fryer offers another convenient option. Reheat the chicken at 375°F for approximately 5 to 6 minutes, checking that it is heated through before serving. The exact reheating time can vary with the size and thickness of the leftover chicken pieces.
What to Serve with Low-Carb Fried Chicken
Crispy Keto Fried Chicken works well with low-carb side dishes that complement its rich, savory coating. Mashed cauliflower is an especially suitable option because its smooth texture provides contrast with the crunchy chicken. Low-carb biscuits or keto-style cornbread can create a more traditional comfort-food meal. A fresh green salad or simply prepared low-carb vegetables can provide a lighter contrast when you want the fried chicken to remain the main focus of the plate.
When choosing accompaniments, remember that the chicken already contains plenty of seasoning, richness, and texture. A simple side can therefore work just as well as an elaborate one. Keeping sauces and side dishes low in carbohydrates is particularly important when the goal is to maintain the keto-friendly nature of the overall meal. Check packaged condiments carefully because some sauces can contain significant amounts of added sugar or carbohydrates.
Notes for the Best Crispy Keto Fried Chicken
Maintain the Correct Oil Temperature
Keeping the frying oil between approximately 275°F and 300°F after the chicken has been added is one of the most important steps. Oil that is too cool can leave the coating greasy, while excessive heat can darken the protein powder before the meat has cooked through. A kitchen thermometer removes much of the guesswork and makes it easier to adjust the burner whenever the temperature rises or falls during batch cooking.
Bread the Chicken Before Frying
Prepare and coat the chicken pieces before becoming fully occupied with the hot frying oil. This makes the process more organized and allows you to concentrate on temperature and doneness once frying begins. Hot oil deserves your full attention, so avoiding unnecessary multitasking is useful. Arrange coated pieces on a suitable tray until they are ready to enter the fryer, keeping the cooking area organized and easy to manage.
Work in Small Batches
Frying a few chicken pieces at a time helps keep the oil temperature stable and gives every piece enough room to cook properly. Overcrowding a pot can lower the oil temperature quickly and make it more difficult to achieve a crisp exterior. Smaller batches also make individual pieces easier to turn, monitor, and remove at the right moment, particularly when cooking breasts, thighs, and drumsticks with different cooking times.
Always Check the Internal Temperature
The appearance of the crust cannot confirm whether chicken is fully cooked inside. This is especially important with thick bone-in thighs and drumsticks, which require longer cooking than strips of chicken breast. Use a meat thermometer and make sure the thickest part reaches at least 165°F. If the coating is already dark but the meat needs additional cooking, use the oven-finishing method rather than continuing to over-brown the exterior.
Why This Low-Carb Fried Chicken Recipe Works
This Crispy Keto Fried Chicken combines several techniques that help reproduce the qualities people enjoy in classic fried chicken without using conventional flour breading. A seasoned dairy-and-egg marinade adds flavor and moisture, while unflavored protein powder creates the low-carb coating. Small clumps in the breading provide extra crunch, and controlled frying helps the coating become crisp while allowing the chicken to cook properly inside.
The finished dish offers juicy chicken, bold spices, and a crunchy exterior in one satisfying recipe. Whether you prepare breast strips, bone-in thighs, drumsticks, or a combination of all three, careful marinating, breading, temperature control, and batch frying make the biggest difference. For anyone looking for homemade keto fried chicken with a flour-free coating and classic comfort-food character, this recipe provides a practical method that can be repeated whenever a crispy low-carb chicken meal is on the menu.
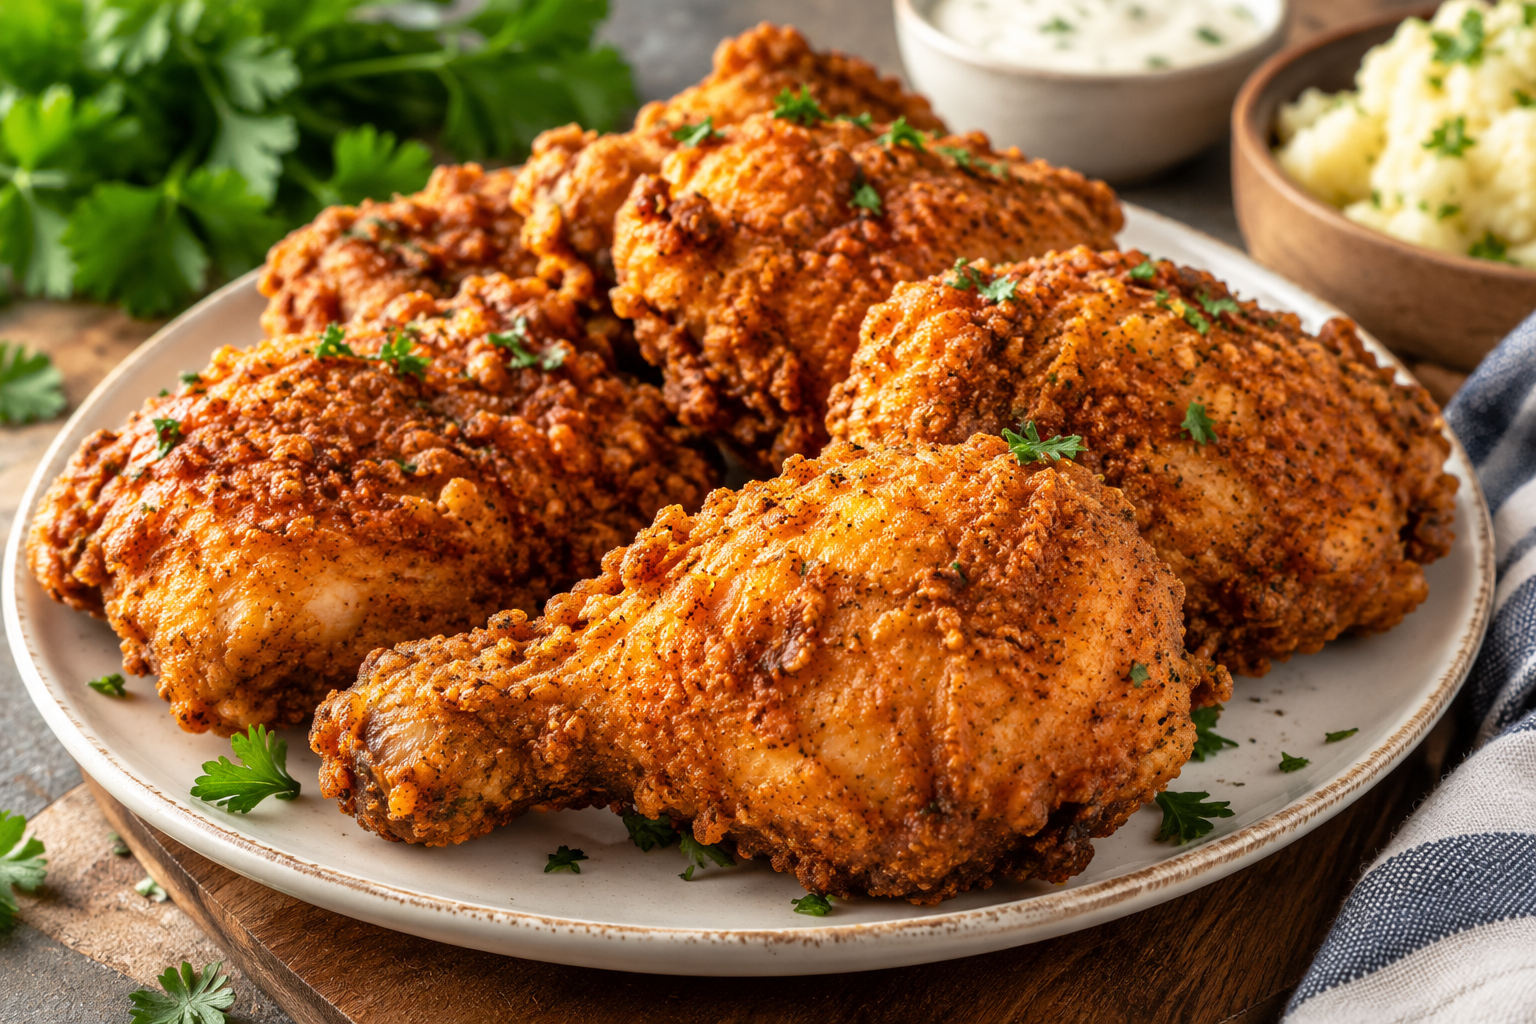
Keto Fried Chicken
Crispy, juicy keto fried chicken coated with seasoned unflavored protein powder instead of traditional flour or breadcrumbs.
3
servings10
minutes20
minutes169
kcal240
minutes4
hours30
minutesIngredients
- Spice Mix
1 tbsp paprika
1 tbsp garlic powder
2 tsp black pepper
1 tbsp Pink Himalayan salt
1 tsp mustard powder
1/4 tsp ground ginger
1 pinch ground cinnamon
- Marinade and Chicken
2 boneless/skinless chicken breasts, about 1 lb
2–3 bone-in chicken thighs
2–3 bone-in/skin-on chicken drumsticks
1/4 cup heavy cream
2 cups unsweetened almond milk
1/4 cup white vinegar
2 large eggs
1/2 the prepared spice mix
- Breading/Coating
2 cups unflavored protein powder
2 tbsp marinade liquid
1/2 the prepared spice mix
- For Frying
2–3 cups high-smoke-point oil
Instructions
- Combine paprika, garlic powder, black pepper, salt, mustard powder, ginger, and cinnamon.
- Whisk almond milk, heavy cream, vinegar, eggs, and half the spice mix in a large bowl.
- Add chicken, cover, and refrigerate for 4–12 hours.
- Heat 2–3 cups frying oil to about 300°F in a deep pot or Dutch oven.
- Combine protein powder with the remaining spice mix. Stir in 1–2 tbsp marinade liquid to form small lumps.
- Remove 2–3 chicken pieces from the marinade and coat completely in the protein powder mixture.
- Fry in batches, keeping the oil between 275°F and 300°F.
- Cook chicken strips for 8–10 minutes, drumsticks for 15–18 minutes, and thighs for 17–20 minutes.
- Check that the internal temperature reaches at least 165°F.
- Remove the cooked chicken and drain on paper towels before serving.
Nutrition Facts
3 servings per container
- Amount Per ServingCalories169
- % Daily Value *
- Total Fat
13g
17%
- Total Carbohydrate
4g
2%
- Protein 7g 15%
* The % Daily Value tells you how much a nutrient in a serving of food contributes to a daily diet. 2,000 calories a day is used for general nutrition advice.