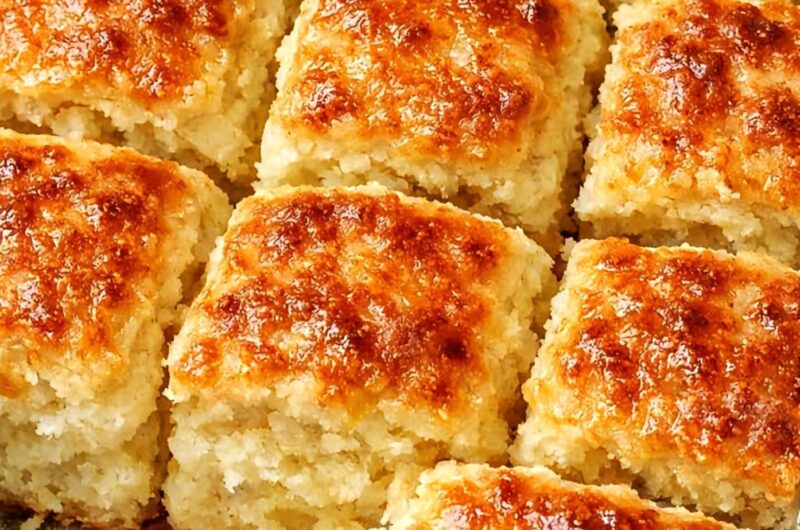
Butter dip biscuits are about as low-effort as homemade biscuits get — no yeast, no rolling pin, no biscuit cutter, and no kneading. The whole method comes down to one bowl of batter poured directly over a pool of melted butter in the baking pan. As it bakes, the bottom of the biscuits crisps up in that butter while the inside stays soft and fluffy. It’s a Southern-style approach that trades the usual biscuit-making fuss for something almost as easy as making a batter and pouring it into a pan.
With only four ingredients — self-rising flour, milk, sugar, and butter — this is a genuinely quick recipe, ready in about 30 minutes start to finish. It works equally well as a breakfast side, a dinner accompaniment for soups and roasted meats, or a base for a quick breakfast sandwich.
Mise en Place: Organizing Your Components
This recipe is refreshingly simple to prep for — there are only four ingredients, and no separate components to manage beyond the batter and the butter it bakes in.
Ingredients:
- 1/2 cup unsalted butter
- 2 1/2 cups self-rising flour
- 1 3/4 cups whole milk
- 1 tablespoon granulated sugar
Equipment:
- 8×8-inch baking pan
- Foil (to line the pan, with overhang for easy removal)
- Medium mixing bowl
- Spoon or spatula
- Knife or spatula, for scoring
Since the butter needs to melt in the oven before the batter goes in, have your oven preheating and the pan lined and ready before you start mixing the dry ingredients.
Understanding the Role of Each Ingredient
Self-rising flour is doing double duty here — it already contains the leavening (baking powder) and salt needed, which is part of why this recipe needs so few ingredients and no extra steps. Whole milk hydrates the flour into a batter and keeps the crumb soft. Sugar adds a light sweetness that balances the richness of the butter, without making the biscuits taste like dessert. And the unsalted butter isn’t mixed into the batter at all — instead, it’s melted directly in the baking pan first, so the batter bakes sitting in a pool of it. That’s what gives these biscuits their crisp, buttery bottom while the inside stays tender.
Easy Variations
Based strictly on what this recipe outlines, here’s where you can adjust it:
- Cheesy version: Stir 1 cup shredded cheddar cheese and 1 teaspoon garlic powder into the flour before adding the milk.
- Sweet honey butter version: Increase the sugar to 2 tablespoons, and after baking, brush the warm biscuits with melted butter and honey.
- Richer texture: Replace part of the milk with buttermilk or heavy cream, keeping the total liquid amount the same.
Workflow: From Batter to Golden Biscuits
Step 1 — Preheat and prep the pan. Preheat the oven to 425°F (220°C). Line an 8×8-inch baking pan with foil, leaving enough overhang on the sides to lift the biscuits out easily once baked.
Step 2 — Melt the butter in the pan. Add the butter directly to the prepared pan and place it in the oven for 5 to 7 minutes, until the butter has fully melted and begins to bubble.
Step 3 — Mix the dry ingredients. While the butter melts, combine the self-rising flour and sugar in a medium bowl, stirring to combine.
Step 4 — Bring the batter together. Pour in the milk and mix gently with a spoon or spatula, just until a thick batter forms. A few small lumps are fine — don’t overmix.
Step 5 — Combine batter and butter. Carefully remove the hot pan from the oven. Pour the batter directly over the melted butter and spread it gently into an even layer.
Step 6 — Score the batter. Lightly score the batter into 9 squares using a knife or spatula. This makes it easy to separate the biscuits cleanly once they’re baked.
Step 7 — Bake. Bake for 20 to 25 minutes, until the tops are a deep golden brown, the edges are crisp, and the biscuits are cooked through.
Step 8 — Rest and serve. Let the biscuits rest for 5 to 10 minutes before slicing along the scored lines. Serve warm with honey, jam, extra butter, or alongside a savory meal.
Serving Suggestions
These biscuits pair naturally with scrambled eggs, omelets, soups, chili, roasted chicken, grilled vegetables, or creamy casseroles. For a quick breakfast sandwich, split a warm biscuit and fill it with egg, cheese, chicken sausage, or turkey slices.
Storage Tips
Store leftover biscuits in an airtight container at room temperature for up to 1 day. Reheat in a 350°F (175°C) oven for 5 to 8 minutes to bring back their warm, crispy texture.
Easy Butter Dip Biscuits
Description: Soft, fluffy, golden biscuits made with just four pantry ingredients — self-rising flour, milk, sugar, and butter — baked directly in a pool of melted butter for a crispy, buttery bottom and a tender center. No kneading, rolling, or biscuit cutter required.
Duration: Ready in about 30 minutes.
Ingredients
- 1/2 cup unsalted butter
- 2 1/2 cups self-rising flour
- 1 3/4 cups whole milk
- 1 tablespoon granulated sugar
Instructions
- Preheat the oven to 425°F (220°C). Line an 8×8-inch baking pan with foil, leaving overhang for easy removal.
- Add the butter to the prepared pan and bake for 5 to 7 minutes, until fully melted and bubbling.
- In a medium bowl, stir together the self-rising flour and sugar.
- Pour in the milk and mix gently until a thick batter forms. Do not overmix; small lumps are fine.
- Remove the hot pan from the oven. Pour the batter over the melted butter and spread into an even layer.
- Lightly score the batter into 9 squares using a knife or spatula.
- Bake for 20 to 25 minutes, until the tops are deep golden brown, the edges are crisp, and the biscuits are cooked through.
- Let rest for 5 to 10 minutes before slicing. Serve warm.
Notes
- For cheesy biscuits, stir in 1 cup shredded cheddar cheese and 1 teaspoon garlic powder before adding the milk.
- For sweet honey butter biscuits, increase the sugar to 2 tablespoons and brush warm biscuits with melted butter and honey after baking.
- For a richer texture, substitute part of the milk with buttermilk or heavy cream, keeping the total liquid the same.
- Store leftovers in an airtight container at room temperature for up to 1 day; reheat in a 350°F oven for 5 to 8 minutes.
Medical Disclaimer: This content is provided for general informational and culinary purposes only and is not intended as medical, dietary, or nutritional advice. Individuals with food allergies, dietary restrictions, or specific health conditions (including but not limited to cardiovascular concerns, gluten sensitivities, or dietary sodium restrictions) should consult a qualified physician, registered dietitian, or other licensed healthcare professional before preparing or consuming this recipe. Ingredient substitutions, portion sizes, and cooking methods should be adjusted according to individual health needs. The information provided does not constitute a guarantee of any specific health outcome, and reliance on this content is at the reader’s own discretion and risk.