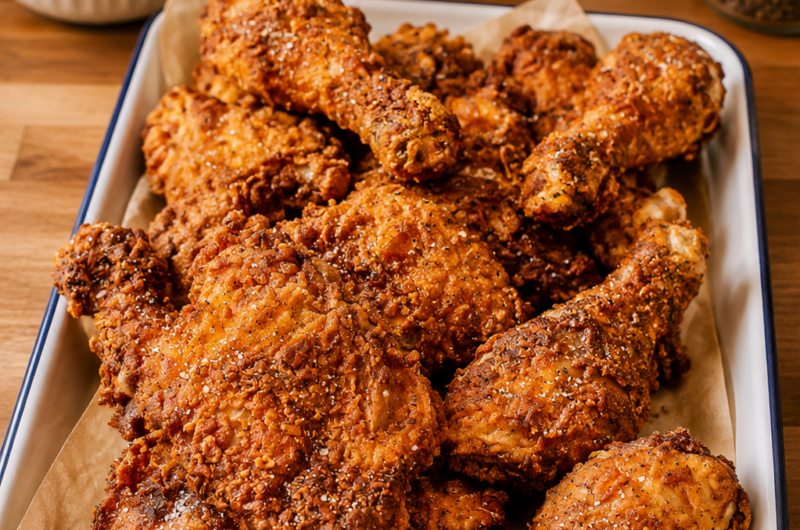
This crispy air fryer KFC chicken recipe gives you crunchy, golden chicken without deep frying it in a large amount of oil. The chicken is soaked in buttermilk first, which helps keep the meat tender and gives the coating something to cling to. The air fryer then cooks the chicken until the outside is crisp and browned while the inside stays juicy.
Why Make KFC Chicken in the Air Fryer
Making KFC-style chicken in an air fryer is a simple way to enjoy crispy fried chicken at home. Instead of using a deep pot filled with oil, this method needs only enough oil spray to help the flour coating brown properly. The result is a homemade air fryer chicken recipe with a crunchy coating and less oil than traditional fried chicken.
Buttermilk Makes the Chicken Tender
Buttermilk is an important part of this recipe because it helps create tender and flavorful chicken. The chicken pieces are soaked in buttermilk overnight, allowing the coating to cling more easily later. This step also helps prevent boneless chicken thighs and bone-in chicken legs from becoming dry during air frying.
Choosing the Chicken Pieces
This recipe uses four boneless chicken thighs with the skin on and four chicken legs with the bone and skin intact. Chicken thighs are naturally flavorful and remain moist during cooking, while chicken legs benefit from the longer cooking time. Keeping the skin on also helps create a more satisfying crispy surface.
Preparing the Buttermilk Marinade
Start by placing the chicken pieces into a large bowl containing the buttermilk. Make sure the chicken is well covered before covering the bowl with plastic wrap. Place it in the refrigerator and allow it to sit overnight. Preparing the chicken the night before makes the cooking process easier the next day.
Preparing the Crispy Coating
When you are ready to cook, combine the flour with all the listed spices, salt, and nutritional yeast if you are using it. Use a large bowl or baking dish so there is enough room to coat each chicken piece properly. The seasoned flour creates the crunchy outer layer that gives this chicken its KFC-style appearance.
Creating Craggy Crispy Bits
One useful trick is to add about one-quarter cup of the leftover buttermilk to the flour mixture. Mix it through the flour with your fingers or a spoon. Small damp pieces will form throughout the seasoned flour. These little pieces stick to the chicken and become extra crispy during air frying.
Coating the Chicken Legs
If you are preparing both chicken legs and thighs, begin with the bone-in legs because they require more cooking time. Remove each leg from the buttermilk and place it into the seasoned flour. Coat every side thoroughly, then gently tap off excess flour so the coating stays attached without becoming excessively thick.
Preheating the Air Fryer
Preheat your air fryer before adding the chicken legs. A properly heated basket helps the coating begin cooking immediately and can improve the final texture. Once preheated, arrange the coated chicken legs in the basket without overcrowding them. Good air circulation is important for achieving an even crispy coating.
Cooking the Chicken Legs
Set the air fryer to 370°F and cook the chicken legs for about 22 to 24 minutes. Spray the coated chicken well with oil before cooking. Check the chicken halfway through the cooking time. If you notice areas where the flour still looks dry, lightly spray those spots with more oil.
No Need to Flip
The chicken legs do not need to be flipped during cooking in this method. The circulating hot air cooks the exposed coating while the oil helps the flour become crisp and golden. Avoid opening the basket repeatedly because doing so can release heat and make it harder to maintain a steady cooking temperature.
Keeping Cooked Chicken Warm
While the remaining chicken cooks, you can keep the finished chicken legs warm. Place a wire rack over a parchment-lined baking sheet for easier cleanup. Transfer the cooked chicken to the rack and immediately sprinkle the listed topping over it. Keep the chicken warm in an oven set to its lowest setting.
Air Frying the Chicken Thighs
The boneless chicken thighs use a slightly different temperature and cooking time. Coat each thigh in the same seasoned flour mixture, making sure the surface is evenly covered. Place the coated thighs in the air fryer and cook them at 350°F for 15 minutes, checking halfway through the cooking process.
Checking for Dry Flour
During the first stage of cooking the chicken thighs, look for areas where the flour remains pale, dry, or powdery. Lightly spray these spots with oil. This helps the coating cook evenly and reduces the chance of leaving dry patches on the finished chicken. There is no need to turn the thighs over.
Finishing the Chicken Thighs
After the first 15 minutes, increase the air fryer temperature to 360°F. Continue cooking the thighs for another four to five minutes, or until the coating is browned and crispy on top. Once cooked, immediately sprinkle the listed topping over the chicken while the surface is still hot.
Getting a Crispy Coating
The key to crispy air fryer chicken is balancing moisture and oil. The buttermilk keeps the chicken moist, while the seasoned flour provides the crunchy outer layer. Oil spray helps the flour brown instead of remaining pale. Avoid soaking the coating with oil because too much can make it heavy rather than crisp.
Avoiding an Overcrowded Basket
Do not pack too many chicken pieces into the air fryer basket at once. The hot air needs space to move around each piece. If the basket is overcrowded, some areas may remain soft or pale. Cooking in batches takes a little longer, but it can give you a more evenly browned and crispy result.
Why the Chicken Is Cooked in Batches
The chicken legs and thighs have different shapes, sizes, and cooking requirements, so cooking them separately makes sense. The bone-in legs need more time, while the boneless thighs cook more quickly. Following the separate temperature settings also helps prevent the smaller pieces from becoming overcooked while the legs finish.
Keeping the Chicken Crunchy
A wire rack is useful when keeping cooked chicken warm because it allows air to circulate around the coating. Placing hot chicken directly on a flat plate can trap steam underneath and soften the crispy crust. The rack helps preserve more of the texture while you finish cooking the remaining pieces.
Serving Air Fryer KFC Chicken
Once all the chicken is cooked, arrange the legs and thighs together and serve immediately. The chicken is best enjoyed while the coating is hot and crisp. You can serve it as a main dinner with your favorite side dishes. It also works well for casual family meals when you want homemade fried chicken without deep frying.
Easy Dinner for the Family
This air fryer chicken recipe can make a satisfying dinner using simple cooking equipment and familiar ingredients. The overnight buttermilk step requires advance planning, but most of the active preparation happens shortly before cooking. Once the chicken is coated, the air fryer handles most of the cooking with little hands-on work.
How to Get Better Results
For the best coating, make sure each chicken piece is well covered with the seasoned flour mixture. The small flour clumps created with buttermilk are especially useful for producing a rough, crunchy surface. Lightly spray any dry-looking areas during cooking, but do not repeatedly turn or disturb the chicken.
Air Fryer Temperature Matters
The recipe uses different temperatures for the two chicken cuts. The legs begin at 370°F, while the thighs start at 350°F and finish at 360°F. These temperature changes are part of the cooking method and should be followed rather than using one temperature for every piece.
Checking Chicken Before Serving
Cooking times can vary slightly depending on the size of the chicken pieces and the air fryer model. The coating should be browned and crisp when the chicken is ready. Always make sure chicken is fully cooked before serving. For food safety, checking the internal temperature with a kitchen thermometer is the most reliable method.
Making the Recipe Ahead
The chicken can be placed in the buttermilk the night before, making this a practical dinner for the following day. The seasoned flour can also be prepared shortly before cooking. Having these components ready reduces the amount of preparation needed when it is time to start the air fryer.
Storing Leftover Chicken
If you have leftover chicken, allow it to cool before storing it in the refrigerator in a covered container. Reheating in an air fryer can help bring back some of the crisp texture that may be lost during refrigeration. Avoid keeping cooked chicken at room temperature for extended periods.
Reheating for a Crispier Texture
An air fryer is useful for reheating leftover crispy chicken because circulating hot air can warm the meat while helping the coating regain some crunch. Reheating time depends on the amount and size of the chicken pieces. Watch the coating carefully so it does not become overly dark or dry.
Notes for the Best Air Fryer Chicken
The overnight buttermilk soak is an important preparation step, so plan ahead before making this recipe. Adding a small amount of buttermilk to the flour creates crispy pieces in the coating. Spray dry flour patches lightly with oil during cooking, and avoid overcrowding the air fryer basket for better air circulation.
Common Cooking Questions
A common question is whether the chicken needs to be flipped. For this method, the chicken legs and thighs do not need to be flipped. Another useful point is that the chicken pieces cook at different temperatures and times. Following those separate instructions helps each cut reach the desired browned and crispy finish.
Can You Use the Same Method for Both Cuts?
You can use the same buttermilk and seasoned flour coating for both chicken legs and thighs, but the cooking process is different. The legs cook first at a higher temperature for longer, while the thighs start at a lower temperature and finish with a short increase in heat.
Why Add Buttermilk to the Flour?
Adding some of the buttermilk to the seasoned flour is a simple way to create small clusters in the coating. These clusters attach to the chicken and become crisp during air frying. This technique gives the surface more texture than a completely smooth flour coating.
What Makes This Recipe Different?
This homemade KFC-style chicken focuses on the combination of a buttermilk soak, seasoned flour coating, and air fryer cooking. It creates a crispy chicken dinner without the need for deep frying. Using chicken thighs and legs also provides two different textures while keeping the preparation straightforward.
Recipe Category
For the requested recipe categories, this recipe fits best under Healthy Recipes because it uses an air fryer and considerably less oil than traditional deep-fried chicken. It can also be useful for readers searching for easy air fryer chicken recipes, crispy chicken recipes, homemade fried chicken, and healthier dinner ideas.
Serving Suggestions
Serve the crispy chicken as soon as possible after cooking for the best texture. It pairs naturally with simple dinner sides such as vegetables, potatoes, salad, or other favorite accompaniments. Because the chicken already has a seasoned coating, you can keep the side dishes simple and let the crispy chicken remain the main part of the meal.
Simple Preparation Routine
For an easier cooking routine, marinate the chicken overnight, prepare the seasoned flour the next day, and then coat the chicken shortly before air frying. Cook the legs first, followed by the thighs. Keep the finished pieces warm on a wire rack while the remaining chicken cooks.
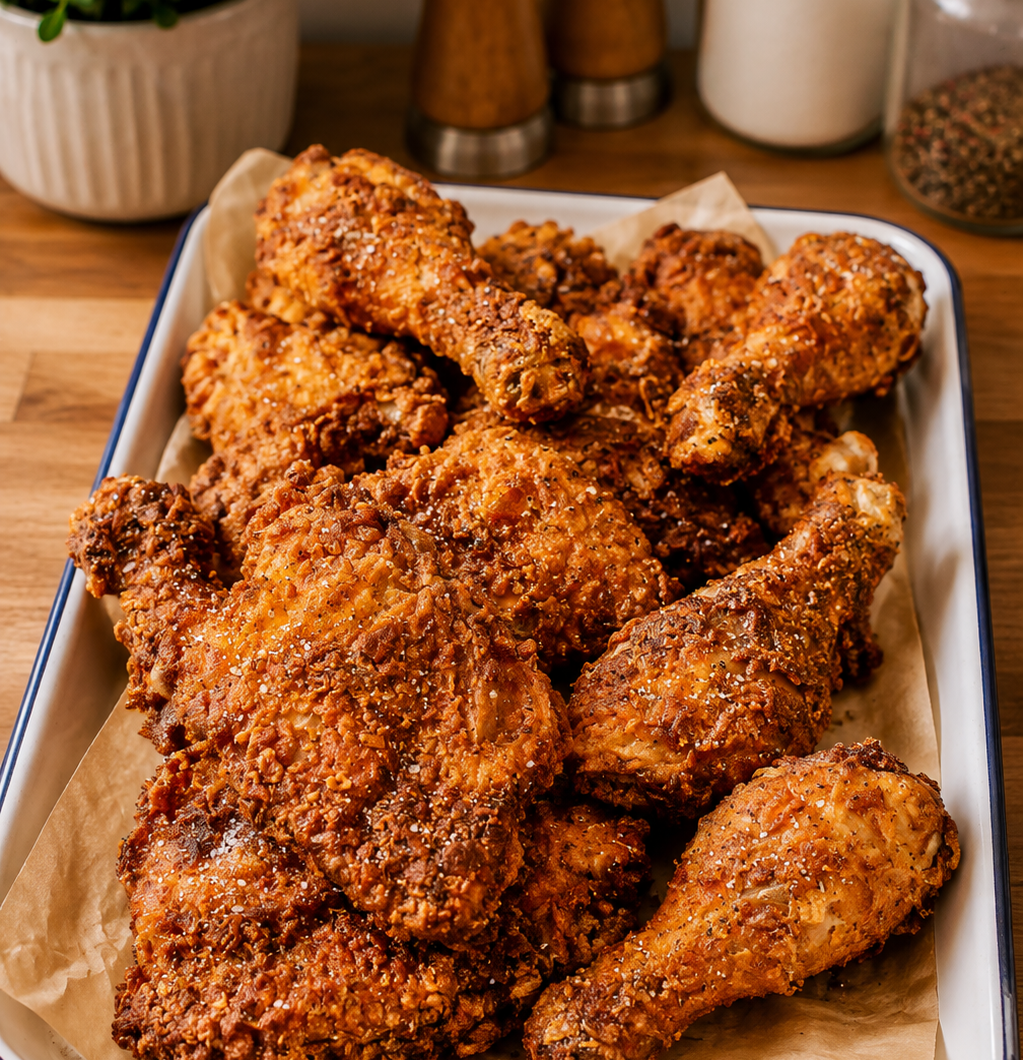
KFC Air Fryer Chicken
Crispy air fryer KFC chicken made with buttermilk-marinated chicken, seasoned flour, and a light spray of oil. Chicken legs and boneless thighs are cooked separately to create a browned, crunchy coating with tender chicken inside.
8
pieces15
minutes29
minutes44
minutesIngredients
2 cups buttermilk
4 boneless chicken thighs, skin on
4 chicken legs, bone-in and skin on
1 1/4 cups all-purpose flour
1/2 cup potato starch
2 1/2 teaspoons smoked paprika
1 1/2 teaspoons garlic powder
1 teaspoon chili powder
1 teaspoon onion powder
1 teaspoon dried oregano
1 teaspoon dried thyme
1 1/4 teaspoons white pepper
1 1/2 teaspoons mustard powder
2 teaspoons kosher salt
2 teaspoons nutritional yeast, optional
Avocado oil spray
Flaky salt, for topping
Instructions
- Pour the buttermilk into a large bowl and add the chicken thighs and chicken legs. Cover with plastic wrap and refrigerate overnight.
- Combine the all-purpose flour, potato starch, smoked paprika, garlic powder, chili powder, onion powder, oregano, thyme, white pepper, mustard powder, kosher salt, and nutritional yeast if using. Add about 1/4 cup of the buttermilk from the chicken to the flour mixture and mix until small clumps form.
- Coat the chicken legs thoroughly in the seasoned flour, tapping off excess coating. Preheat the air fryer, then cook the legs at 370°F for 22 to 24 minutes. Spray the coated chicken with avocado oil before cooking and spray any dry floury spots halfway through. There is no need to flip.
- Transfer the cooked chicken legs to a wire rack over a parchment-lined baking sheet. Sprinkle with flaky salt. Keep warm in an oven set to its lowest temperature while preparing the thighs.
- Coat the thighs in the seasoned flour mixture and place them in the air fryer. Cook at 350°F for 15 minutes, checking halfway through and spraying any dry areas with avocado oil. Increase the temperature to 360°F and cook for another 4 to 5 minutes, until browned and crispy.
- Remove the thighs from the air fryer and immediately sprinkle them with flaky salt. Serve the chicken thighs and legs together while hot and crisp. Check that the chicken has reached a safe internal temperature before serving.
Notes
- Marinate the chicken in buttermilk overnight.
- Add about 1/4 cup of buttermilk to the flour to create crispy coating pieces.
- Do not overcrowd the air fryer basket.
- Spray dry flour patches lightly with avocado oil.
- Cook the chicken legs and thighs separately according to their stated temperatures and times.
- Use a wire rack to help keep cooked chicken crispy.