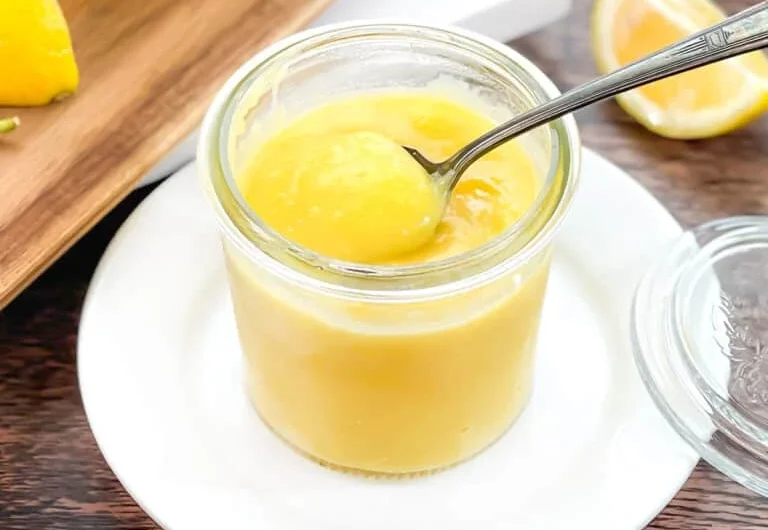
This lemon curd relies on the Instant Pot’s controlled, even heat to eliminate the constant stirring and careful monitoring that traditional stovetop lemon curd requires. Rather than standing over a pot watching for the first signs of curdling, the mixture is blended, sealed in a bowl, and cooked under pressure, which produces a smooth, creamy curd with far less hands-on effort than the classic method.
What makes this technique reliable is the combination of pressure cooking and a natural release period. Cooking under pressure sets the eggs and thickens the curd evenly, while the natural release afterward allows the curd to finish setting gently rather than being shocked by a sudden pressure drop. The curd looks jiggly and slightly curdled straight out of the pot, but a vigorous whisk brings it together into the smooth, glossy texture expected of a good lemon curd.
Below is a full breakdown of the workflow, ingredient roles, and technique for getting a consistently smooth curd, along with the customizations for adjusting thickness, flavor, and batch size.
Kitchen Workflow: How the Process Is Organized
This recipe breaks into four stages: blending the ingredients, setting up the Instant Pot, pressure cooking with a natural release, and whisking to finish.
Stage 1 — Blend the Ingredients. All the ingredients — butter, sugar, egg, egg yolk, lemon zest, and lemon juice — are combined in a blender and blended until smooth and free of lumps. This ensures the curd starts from a completely uniform base before any cooking begins. The mixture is then transferred to a heatproof bowl or liquid measuring cup, which is covered tightly with aluminum foil to prevent water from seeping in during the pressure cooking process.
Stage 2 — Set Up the Instant Pot. The trivet is placed inside the Instant Pot, and 1 1/2 cups of water are added to the pot. The trivet keeps the bowl elevated above the water, ensuring the curd cooks evenly via steam rather than coming into direct contact with the boiling water below.
Stage 3 — Pressure Cook and Release. The covered bowl is placed carefully on the trivet, the lid is secured, and the valve is set to sealing. The pot is set to pressure cook on high for 10 minutes. Once the cooking time ends, the pressure is allowed to release naturally for 10 minutes — this natural release period is essential, giving the curd time to continue setting gently rather than being disturbed by an abrupt pressure release. After the 10-minute natural release, any remaining pressure is released using a quick release.
Stage 4 — Whisk to Finish. The bowl is carefully removed from the Instant Pot and uncovered. At this point, the curd will look slightly jiggly, similar to a custard or gelatin, and may even appear somewhat curdled. Whisking vigorously at this stage is what brings the curd together into a smooth, creamy consistency — the curdled appearance is temporary and resolves with enough whisking.
Component Breakdown
It’s useful to think of this recipe in terms of four functional components.
1. The Rich Base — Butter Melted butter provides a rich, creamy foundation for the curd. Salted butter is used in this version, though unsalted butter with a pinch of added salt works as a substitute if preferred.
2. The Sweetener — Granulated Sugar Sugar sweetens the curd, balancing the natural tartness of the lemon juice so the finished product isn’t overwhelmingly sour.
3. The Structure — Egg and Egg Yolk A whole egg contributes to the curd’s silky texture, while an additional egg yolk enhances richness and depth. Together, these are what set during the pressure cooking process, thickening the curd into its final consistency.
4. The Citrus Flavor — Lemon Zest and Lemon Juice Fresh lemon zest adds a burst of citrus aroma and flavor, adjustable based on how zesty you prefer the curd. Fresh lemon juice, ideally squeezed from 3–4 lemons rather than bottled, provides the brightness and tang that defines the dish — bottled juice won’t deliver the same fresh flavor.
Approved Variations and Swaps
Based strictly on the details provided, the following adjustments can be made to this recipe:
- Butter – unsalted butter can be used in place of salted butter, with a pinch of salt added to balance the flavor.
- Batch size – this recipe doubles well; when doubling, increase the cooking time by 2–3 minutes to ensure the larger quantity sets properly.
- Thickness – for a thicker curd, reduce the lemon juice to 1/3 cup, or add an extra egg yolk.
- Citrus flavor – some of the lemon juice can be swapped with lime, orange, or grapefruit juice for a different citrus twist on the classic recipe.
Step-by-Step Assembly Strategy
To make a smooth, properly set batch of lemon curd, follow this sequence:
- Combine all the ingredients in a blender — butter, sugar, egg, egg yolk, lemon zest, and lemon juice. Blend until smooth and free of lumps.
- Transfer the mixture to a heatproof bowl or liquid measuring cup. Cover tightly with aluminum foil to prevent water from seeping in during cooking.
- Place the trivet inside the Instant Pot and add 1 1/2 cups of water.
- Carefully place the covered bowl on the trivet. Secure the lid and set the valve to sealing.
- Select the pressure cook setting and cook on high pressure for 10 minutes.
- Allow the pressure to release naturally for 10 minutes once the cooking time ends — this is essential for the curd to set properly. After 10 minutes, perform a quick release for any remaining pressure.
- Carefully remove the bowl from the Instant Pot and uncover it. The curd will look slightly jiggly and possibly curdled at this stage — this is normal.
- Whisk vigorously until smooth and creamy. Don’t be alarmed by the initial curdled appearance; thorough whisking brings the curd together.
- For an ultra-smooth finish, strain the curd through a fine-mesh sieve to remove any bits of zest. This step is optional but recommended for a silkier texture.
- Transfer the curd to a clean container and let it cool to room temperature. Cover and refrigerate until ready to use — the curd will continue to thicken as it cools, developing a spreadable consistency.
Serving Suggestions
This lemon curd can be enjoyed spread on toast, layered into desserts, or eaten straight by the spoonful. It also makes a thoughtful homemade gift for loved ones.
Part 2: Recipe Card
Instant Pot Lemon Curd
Description: A foolproof, creamy, tangy lemon curd made with minimal hands-on effort using the Instant Pot, delivering a fresh, homemade flavor without the constant stirring of a stovetop method.
Duration:
- Prep Time: 15 minutes
- Cook Time: 10 minutes
- Additional Time: 20 minutes
- Total Time: 45 minutes
Ingredients:
- 1/4 cup (57 g) salted butter, melted
- 1/2 cup (106 g) granulated sugar
- 1 large egg
- 1 large egg yolk
- 1–2 tsp fresh lemon zest
- 1/2 cup fresh lemon juice (from about 3–4 lemons)
Instructions:
- Blend all ingredients until smooth. Transfer to a heatproof bowl and cover tightly with foil.
- Place the trivet in the Instant Pot with 1 1/2 cups water. Set the bowl on the trivet.
- Cook on high pressure for 10 minutes. Let the pressure release naturally for 10 minutes, then quick release any remaining pressure.
- Remove the bowl and whisk the curd until smooth. Optional: strain for a finer texture.
- Cool and refrigerate. Enjoy spread on toast, as a dessert filling, or by the spoonful.
Notes:
- This recipe doubles well; increase the cooking time by 2–3 minutes when doubling to ensure it sets properly.
- For a thicker curd, reduce the lemon juice to 1/3 cup or add an extra egg yolk.
- Swap some of the lemon juice with lime, orange, or grapefruit juice for a different citrus flavor.
- Use unsalted butter with a pinch of added salt if salted butter isn’t available.
Medical and Nutritional Disclaimer
The information provided in this recipe and guide is intended for general informational and educational purposes only and does not constitute medical, dietary, or nutritional advice. This recipe is not intended to diagnose, treat, cure, or prevent any disease or health condition. Individuals with egg allergies, dietary restrictions, or specific medical conditions should consult with a qualified healthcare provider or registered dietitian before making dietary changes or preparing this recipe. Proper food safety practices should always be followed when handling and cooking eggs. The author and publisher assume no responsibility for any adverse effects resulting from the use or application of the information contained herein.