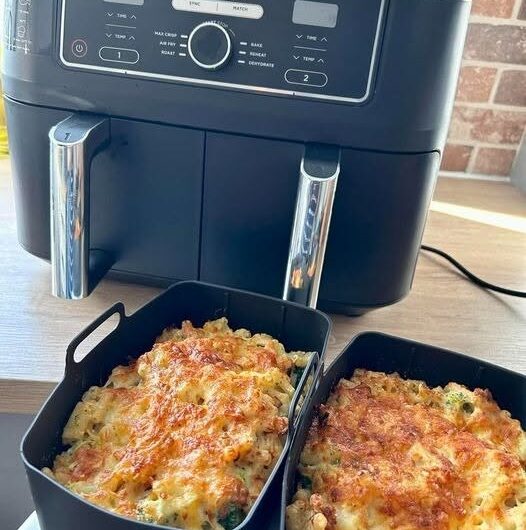
This is a from-scratch macaroni and cheese built around a proper roux-based cheese sauce rather than a shortcut version, made with a blend of sharp cheddar, mozzarella or Monterey Jack, and Parmesan. The pasta cooks separately, and the sauce is built in stages — butter and flour first, then milk, then cheese — before the two come together. It can be served straight from the stovetop, or transferred to a baking dish with a breadcrumb topping for a golden, baked finish.
The recipe works equally well as a main dish or a side, and it’s built to be extended easily with vegetables, chicken, or turkey if you want to turn it into a more complete meal.
Using three different cheeses rather than just one is part of what gives this version its depth — the sharp cheddar carries most of the flavor, the mozzarella or Monterey Jack contributes meltiness and stretch, and the Parmesan adds a savory finish. Together they create a sauce that’s both flavorful and smooth, rather than relying on a single cheese to do all the work.
Getting Everything Ready
Because the sauce depends on precise timing between the roux, the milk, and the cheese, having everything shredded and measured before you start cooking keeps the sauce-making stage moving smoothly.
Equipment to have ready:
- A large pot, for boiling the pasta
- A medium saucepan, for the cheese sauce
- A whisk
- A greased baking dish, if making the baked version
Ingredients to have ready, for the pasta:
- 2 cups elbow macaroni
- Water, for boiling
- 1 tablespoon salt
For the cheese sauce:
- 3 tablespoons butter
- 3 tablespoons all-purpose flour
- 2½ cups milk, warm
- 1 cup shredded sharp cheddar cheese
- ½ cup shredded mozzarella or Monterey Jack cheese
- ¼ cup grated Parmesan cheese
- ½ teaspoon salt, adjust to taste
- ½ teaspoon black pepper
- ¼ teaspoon paprika or mustard powder (optional)
For the optional topping:
- ½ cup breadcrumbs
- 1 tablespoon melted butter
- 2 tablespoons grated Parmesan cheese
Shredding all the cheese in advance and keeping it at room temperature is worth doing before you start the roux — freshly shredded cheese melts more smoothly than pre-shredded, though pre-shredded can still be used.
Workflow: How the Process Comes Together
This recipe moves through two components that come together at the end:
- Cook the pasta first, to al dente, then set aside.
- Build the roux with butter and flour.
- Add the milk gradually, whisking until thickened.
- Season the sauce.
- Melt in the cheese slowly, off high heat.
- Combine the pasta and sauce.
- Optionally transfer to a baking dish with a breadcrumb topping and bake until golden.
Because the cheese needs low heat to melt smoothly, having the pasta already cooked and waiting before you get to that stage means you’re not rushing the final, most heat-sensitive step of the sauce. The baked version simply adds two more steps onto the end of this same sequence — mixing the topping and baking — rather than changing anything about how the sauce itself is made.
Approved Variations & Swaps
Based strictly on what’s built into this recipe, here are the adjustments it already allows for:
- Cheese blend: mozzarella or Monterey Jack can be used interchangeably in the sauce.
- Seasoning: paprika or mustard powder are both optional and interchangeable for a bit of extra depth.
- Baked vs. stovetop: the recipe can be served directly from the stovetop, or baked with a breadcrumb topping for a golden, crisp finish.
- Add-ins for a full meal: cooked vegetables, chicken, or turkey can be added to turn the dish into a more complete meal.
- Finishing touches: extra cheese or herbs can be sprinkled on top before serving.
No other ingredient substitutions are specified in the source recipe, so changes beyond these listed swaps would go beyond what’s actually described here. Between the stovetop and baked versions, the choice mostly comes down to whether you want the dish ready to eat as soon as the sauce and pasta are combined, or whether you’d rather take the extra 20 to 25 minutes for a crisp, golden topping.
Step-by-Step Sauce-Making Strategy
Warm the milk before adding it to the roux. This is specifically called out as what helps prevent a lumpy sauce — cold milk added to a hot roux is more likely to seize or clump.
Whisk the roux for 1 to 2 minutes, until smooth and slightly bubbly but not browned. This cooks out the raw flour taste without darkening the roux, which would change the sauce’s flavor and color.
Add the milk slowly while whisking continuously. A gradual pour, rather than dumping it in all at once, is what prevents lumps from forming in the sauce.
Continue whisking for 3 to 5 minutes, until the sauce coats the back of a spoon. This is the visual cue for proper thickness, more reliable than guessing by time alone.
Reduce the heat before adding cheese. Melting the cheese in gradually over low heat, stirring constantly, keeps the sauce smooth — letting it boil at this stage can make the cheese turn grainy instead of silky.
Slightly undercook the pasta if baking. Since it will continue cooking in the oven, starting it a touch underdone prevents it from turning mushy by the time the baked version is done.
Stir the pasta into the sauce gently, not vigorously. The goal is even coating without breaking apart the macaroni, so a gentle fold works better than aggressive stirring once the two are combined.
Classic Macaroni and Cheese
Description: A comforting, creamy macaroni and cheese made with tender pasta and a rich, smooth cheese sauce built from a blend of cheddar, mozzarella or Monterey Jack, and Parmesan. Serve straight from the stovetop, or bake with a breadcrumb topping for a golden finish.
Ingredients
Pasta:
- 2 cups elbow macaroni
- Water, for boiling
- 1 tablespoon salt
Cheese sauce:
- 3 tablespoons butter
- 3 tablespoons all-purpose flour
- 2½ cups milk, warm
- 1 cup shredded sharp cheddar cheese
- ½ cup shredded mozzarella or Monterey Jack cheese
- ¼ cup grated Parmesan cheese
- ½ teaspoon salt, adjust to taste
- ½ teaspoon black pepper
- ¼ teaspoon paprika or mustard powder (optional)
Optional topping:
- ½ cup breadcrumbs
- 1 tablespoon melted butter
- 2 tablespoons grated Parmesan cheese
Instructions
- Bring a large pot of water to a boil. Add the salt, then the macaroni, and cook according to package instructions until al dente. Drain and set aside.
- Shred all the cheeses in advance and keep at room temperature.
- In a medium saucepan, melt the butter over medium heat. Add the flour and whisk constantly for 1 to 2 minutes, until smooth and slightly bubbly but not browned.
- Slowly pour in the warm milk while whisking continuously. Continue whisking for 3 to 5 minutes, until thickened and coating the back of a spoon.
- Add the salt, black pepper, and paprika or mustard powder if using. Stir well.
- Reduce heat to low. Add the shredded cheeses gradually, stirring constantly until fully melted and smooth. Do not let the sauce boil.
- Add the cooked macaroni to the cheese sauce and stir gently until evenly coated.
Optional baked version: 8. Mix the breadcrumbs, melted butter, and Parmesan cheese in a small bowl. 9. Preheat the oven to 375°F (190°C). Transfer the macaroni and cheese to a greased baking dish and sprinkle the breadcrumb topping evenly over the top. Bake for 20 to 25 minutes, until golden brown and bubbling around the edges. Let rest for 5 minutes before serving.
Notes
- Serve hot as a main dish or side.
- Add cooked vegetables, chicken, or turkey for a complete meal.
- Sprinkle extra cheese or herbs on top before serving.
- Store leftovers in an airtight container in the refrigerator for up to 3 days.
- Reheat gently on the stove or in the oven with a splash of milk to loosen the sauce.
- Warm milk helps prevent a lumpy sauce.
- Use a blend of cheeses for better flavor and texture.
- Avoid high heat once the cheese is added.
- Slightly undercook the pasta if baking, as it will continue cooking in the oven.
Disclaimer: This recipe is provided for general informational purposes only and does not constitute medical or dietary advice. Individuals with food allergies, dietary restrictions, or specific health conditions (including but not limited to dairy or gluten sensitivities) should consult a qualified healthcare provider or registered dietitian before preparing or consuming this recipe. Neither the author nor the publisher assumes responsibility for any adverse effects resulting from the preparation or consumption of this recipe.