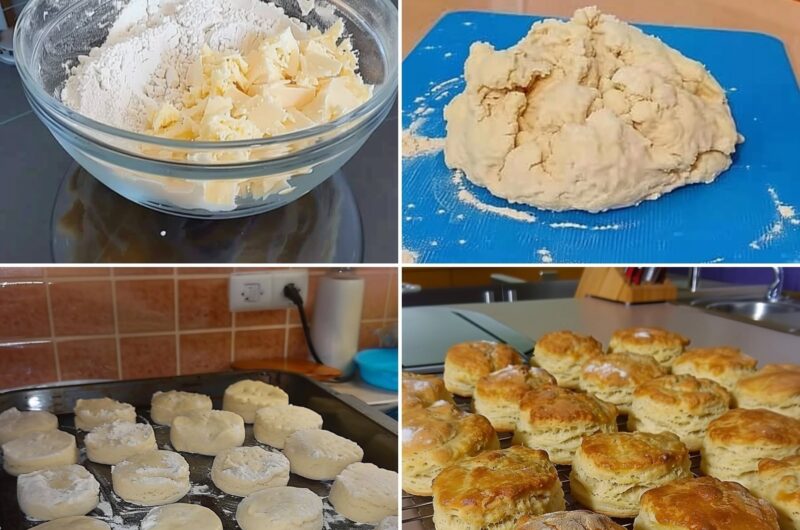
These Gluten-Free Biscuits bring the familiar texture of Southern-style buttermilk biscuits to a wheat-free recipe. They bake with tender centers, flaky layers, and lightly golden tops while using gluten-free all-purpose flour instead of traditional wheat flour. Cold butter, buttermilk, and careful handling of the dough are the most important elements for achieving biscuits that are soft rather than dense or hard.
This recipe is especially convenient because the biscuits take approximately 30 minutes from preparation to serving. There is no yeast, no rising period, and no complicated dough preparation. The dough is gently mixed, folded by hand, cut into rounds, and baked at a high temperature. The original recipe also provides dairy-free, egg-free, and vegan alternatives, making the basic method adaptable for different dietary requirements.
Why You Love This Recipe
A good homemade biscuit should be tender inside while having enough structure to split without falling apart. This gluten-free biscuit recipe uses cold butter to help create flaky layers and buttermilk to provide moisture and a traditional biscuit-style flavor. The preparation is intentionally simple, but the way the dough is handled has a significant effect on the finished texture.
Another benefit is speed. Preparation takes approximately 15 minutes, and baking takes around 15 to 20 minutes. The biscuits can therefore be made shortly before breakfast or dinner rather than several hours in advance. They are particularly enjoyable warm from the oven, when the exterior is lightly crisp and the inside remains tender.
What Makes Gluten-Free Buttermilk Biscuits Flaky?
The main secret to flaky gluten-free biscuits is keeping the butter cold. This recipe specifically instructs you to cut six tablespoons of unsalted butter into small pieces and freeze them for approximately 10 minutes before incorporating them into the flour. Those cold pieces should remain visible throughout the dough rather than disappearing completely.
As the biscuits enter the hot oven, the cold butter begins to melt and contributes to the formation of layers. This is also why excessive mixing should be avoided. Gentle handling preserves the dough’s structure and prevents the butter from becoming too warm before baking. The recipe relies more on technique than complicated ingredients.
Why Gluten-Free Flour Blends Matter
Gluten-free flour blends can behave quite differently from one another. Different brands use different combinations of rice flour, starches, sorghum flour, and binding ingredients, so a quantity that works perfectly with one blend may produce wetter or drier dough with another. The source recipe was developed around a Pillsbury-style gluten-free all-purpose flour blend.
The original notes specifically state that flour blends containing sorghum, including the named Bob’s Red Mill Cup for Cup, Great Value Gluten-Free, King Arthur, and Pamela’s products, can create wetter dough and less fluffy biscuits in this particular recipe. The source recommends increasing the total flour to 2½ cups when using one of those blends.
Understanding Xanthan Gum
The recipe lists half a teaspoon of xanthan gum, but this ingredient should be omitted when the gluten-free flour blend already contains it. Xanthan gum is frequently included in commercial gluten-free baking blends to provide some of the binding and structural properties that are missing when wheat gluten is removed.
Checking the ingredient label on your flour blend before beginning is therefore important. If xanthan gum is already included, do not automatically add the additional half teaspoon. Following the original recipe’s instruction on this point helps maintain the intended consistency instead of adding more binder than the formula requires.
Why Buttermilk Works Well in Biscuits
One cup of buttermilk provides the moisture needed to transform the dry ingredients and cold butter into a soft biscuit dough. It also contributes the slightly tangy flavor associated with classic Southern-style biscuits. The recipe allows either prepared buttermilk or a homemade alternative made from milk and white vinegar or lemon juice.
For homemade buttermilk, combine one tablespoon of white vinegar or lemon juice with one cup of milk. Allow the mixture to rest in the refrigerator for approximately five to ten minutes before using it. Keeping the liquid cold is useful because maintaining a cool dough helps prevent the butter from softening prematurely.
Homemade Buttermilk Option
If you do not have commercially prepared buttermilk, there is no need to abandon the recipe. The supplied instructions specifically allow one cup of milk combined with one tablespoon of white vinegar or lemon juice. Stir the ingredients together and refrigerate the mixture for five to ten minutes.
This preparation can conveniently be done while the chopped butter is spending its 10 minutes in the freezer. That way, both components are cold and ready at roughly the same time. Organizing these steps before combining the dough makes the entire process faster and reduces the amount of time the butter spends at room temperature.
The Importance of Cold Butter
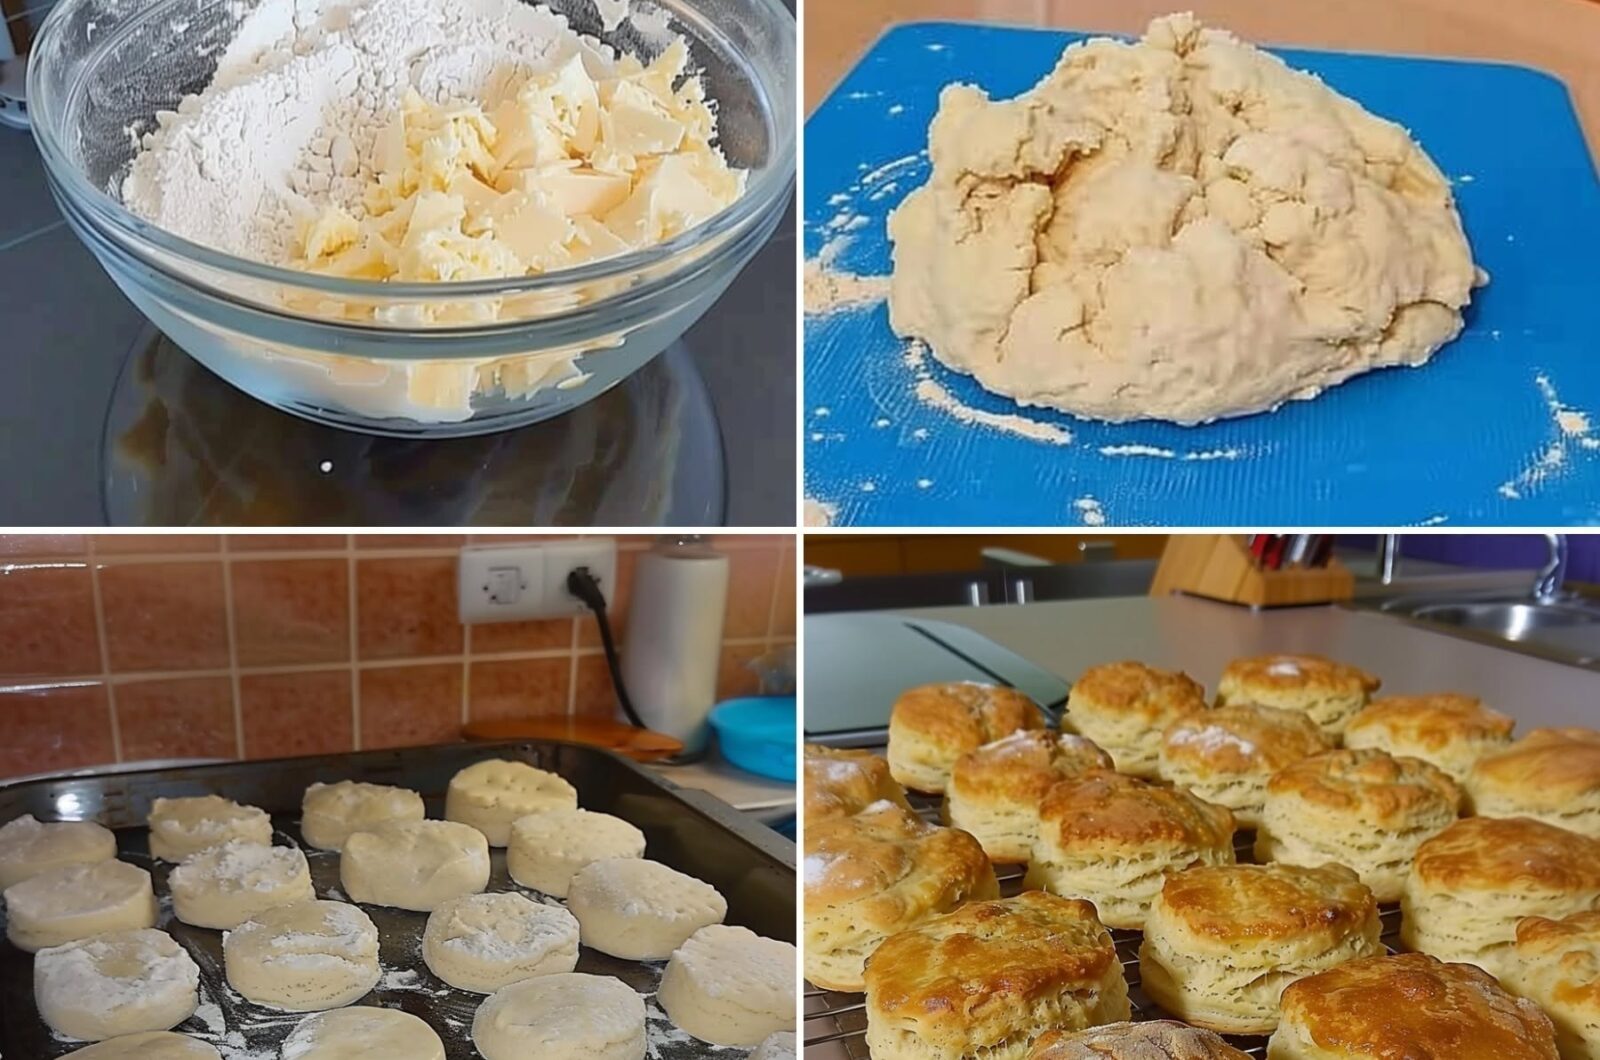
Cold butter is one of the most important ingredients in this recipe. Six tablespoons of unsalted butter are cut into small pieces and placed in the freezer for 10 minutes. After chilling, the butter is cut into the flour mixture using a pastry cutter or fork until the pieces are roughly the size of small peas.
Do not continue cutting the butter until the flour mixture becomes completely smooth. Small pieces of butter are desirable. They remain distributed throughout the dough and contribute to the layered biscuit structure as they melt during baking. If the butter becomes warm and fully blended into the flour before baking, the final texture can be less flaky.
Why the Egg Is Included
One large egg is mixed with the buttermilk before being incorporated into the dry ingredients. In gluten-free baking, eggs can contribute moisture, binding, and structure, helping the biscuit dough hold together despite the absence of wheat gluten.
The source also provides an egg-free alternative using Bob’s Red Mill Egg Replacer. Because this is an approved variation from the supplied recipe, readers who need an egg-free version can follow that substitution while maintaining the same basic method. When using the standard version, whisk the egg before adding it to the dough so it distributes evenly.
Sugar and Salt Balance the Flavor
Two tablespoons of granulated sugar are included in the biscuit dough. This is not enough to turn the recipe into a sweet biscuit; instead, the sugar provides a subtle sweetness that balances the tang of the buttermilk and complements the salt. One teaspoon of salt provides the savory seasoning.
The mild flavor makes these biscuits versatile. They can be served with breakfast foods, paired with savory meals, or enjoyed simply while warm. Because the ingredient quantities are carefully balanced, the rewritten recipe preserves them exactly rather than reducing the sugar or adjusting the salt.
Gluten-Free Baking Powder for Rise
One tablespoon of gluten-free baking powder provides the leavening needed for these biscuits. Unlike yeast bread, the dough does not need to rest for a long period before baking. Once shaped and cut, the biscuits can go directly into the preheated oven.
Make sure the baking powder you use is specifically suitable for your gluten-free needs. This is especially important for people who need to avoid gluten strictly. The recipe itself calls specifically for gluten-free baking powder, so maintaining that requirement is important rather than treating ordinary baking powder as automatically interchangeable.
How to Prepare the Dry Ingredients
Begin by preheating the oven to 450°F. A properly heated oven is important because the biscuits depend on high heat for quick baking and good rise. While the oven is heating, combine two cups of gluten-free all-purpose flour, one tablespoon of gluten-free baking powder, one teaspoon of salt, and two tablespoons of granulated sugar in a large mixing bowl.
If your flour blend does not already contain xanthan gum, include the specified half teaspoon. Whisk the dry ingredients just until they are evenly distributed. There is no need for prolonged mixing at this stage. Two additional tablespoons of gluten-free flour should remain separate because they will be used later for dusting and folding.
How to Cut Butter into the Flour
Once the butter has chilled for 10 minutes, add the cold pieces to the dry ingredients. Use a pastry cutter or fork to work the butter into the flour until the pieces are approximately pea-sized. The mixture should look rough rather than completely uniform.
This step is one of the foundations of the biscuit’s flaky texture. Visible pieces of butter are not a mistake. Avoid using warm hands excessively because body heat can soften the butter. Once the mixture has reached the intended consistency, move directly to adding the cold liquid ingredients.
How to Mix Gluten-Free Biscuit Dough
Add the cold buttermilk and whisked egg to the flour-and-butter mixture. Stir gently until a soft, sticky dough forms. The dough does not need to become perfectly smooth, and it should not be kneaded like conventional bread dough.
Stop mixing as soon as the ingredients have come together. The source specifically warns against overmixing. The goal is to preserve a soft dough and keep the butter as cold as practical. A somewhat sticky, rough appearance at this stage is normal and should not automatically be corrected by adding large quantities of flour.
Why You Should Not Roll the Dough
This gluten-free biscuit recipe specifically avoids using a rolling pin. Instead, the dough is shaped gently with your hands. The source warns that rolling the dough can lead to harder, flatter biscuits, which is the opposite of the tall and tender result intended here.
Avoid treating the dough like pie pastry or traditional rolled biscuit dough. Gentle hand shaping allows you to control the thickness without repeatedly compressing the mixture. The final round should measure approximately seven inches across and remain about one inch thick before cutting.
How Folding Creates Biscuit Layers
Place a large piece of parchment paper on your work surface and dust it with one tablespoon of the reserved gluten-free flour. Transfer the sticky dough onto the parchment and sprinkle the remaining tablespoon of flour over its surface.
Fold the dough in half, then fold it in half once more. These two gentle folds help create layers without kneading or rolling. The folding should be deliberate but light. Avoid repeatedly working the dough after the required folds, because unnecessary handling can warm the butter and compress the mixture.
Shaping the Biscuit Dough
After folding, use your hands to form the dough into a round approximately seven inches in diameter and one inch thick. Maintaining the one-inch thickness is important because making the dough too thin will naturally produce flatter biscuits.
Do not press aggressively or attempt to create perfectly smooth edges. Homemade biscuit dough can look slightly rustic. What matters more is keeping the thickness reasonably even so the biscuits bake at a similar rate. Once the round has been formed, it is ready to be cut into individual portions.
How to Cut Biscuits Properly
Use a two-inch biscuit cutter, the rim of a suitable glass, or a mason jar lid to cut rounds from the dough. Press the cutter straight downward and lift it directly back up. Do not twist the cutter. Twisting can seal or compress the edges and interfere with an even rise.
After cutting as many biscuits as possible, gently bring the scraps together, reform them into a round, and continue cutting. The recipe should yield approximately 12 biscuits. Handle the scraps lightly rather than repeatedly kneading them, since the same gentle-handling principle applies throughout the preparation.
Baking Gluten-Free Biscuits
Arrange the cut biscuits on a greased cast-iron pan or baking sheet and place them in the fully preheated 450°F oven. Bake for approximately 15 to 20 minutes. Start checking at the 15-minute mark because oven temperatures and baking performance can vary.
The biscuits are ready when the tops have developed a golden-brown appearance. The high oven temperature allows them to bake relatively quickly while encouraging good rise. Once removed from the oven, brush the warm biscuits with melted butter as directed and serve while they are still warm.
Dairy-Free Gluten-Free Biscuits
The original recipe provides a dairy-free path without changing the basic method. Instead of conventional buttermilk, almond, cashew, or coconut milk can be combined with vinegar or lemon juice. For the butter, the source lists Smart Balance, shortening, or Earth Balance as alternatives.
These options should be treated as approved variations rather than ingredients in the standard biscuit formula. Anyone preparing the dairy-free version should also check the labels of the gluten-free flour, baking powder, and other packaged ingredients to make sure they fit their individual dietary requirements.
Egg-Free and Vegan Biscuit Option
For an egg-free version, the supplied recipe allows Bob’s Red Mill Egg Replacer instead of the large egg. Combining this egg replacement with the dairy-free milk and butter alternatives creates the vegan variation described in the source recipe.
Because different replacement products can behave differently, the variation should follow the exact substitutions supplied rather than assuming every plant-based milk, butter substitute, or egg replacement will produce identical results. The primary recipe card below retains the standard ingredients while noting the supplied alternatives separately.
What to Do If the Dough Is Too Wet
Gluten-free flour blends absorb moisture differently, so the dough may look wetter depending on the brand. The supplied recipe specifically identifies sorghum-containing blends as producing wetter dough and less fluffy results in its testing.
When using the listed sorghum-containing flour blends, the source recommends adding an additional half cup of gluten-free flour, bringing the total to two and a half cups. This is a source-approved adjustment for those particular flour blends rather than a change to the standard recipe. With the standard recommended blend, begin with the original two-cup quantity.
Common Mistakes to Avoid
One of the biggest mistakes is allowing the butter to become too warm. Keep it chilled until needed and work efficiently after adding it to the flour. Another mistake is overmixing the dough. Stop stirring once a soft, sticky dough has formed rather than trying to make it completely smooth.
Do not roll the dough excessively, make the round too thin, or twist the biscuit cutter. These seemingly minor techniques can affect the final height and texture. Finally, make sure the oven is fully preheated before the biscuits go in so they immediately encounter the high temperature required by the recipe.
How to Store Gluten-Free Biscuits
These homemade gluten-free biscuits are best served fresh and warm, particularly shortly after they come out of the oven. If you have leftovers, place them in an airtight container once they have cooled. Proper storage helps prevent them from drying out too quickly.
The supplied recipe does not provide a specific number of storage days or detailed freezing instructions, so those details should not be invented. For the best experience based on the source, enjoy the biscuits warm and store any remaining portions in an airtight container.
Notes for the Best Gluten-Free Biscuits
For tall, flaky biscuits, chill the butter for the full 10 minutes before cutting it into the flour. Keep the homemade buttermilk refrigerated while it rests, mix the dough only until combined, and fold it twice instead of kneading or rolling. Shape the dough to approximately one inch thick and press the biscuit cutter straight down without twisting.
The flour blend is another important factor. Check whether your gluten-free flour already contains xanthan gum before adding the separate half teaspoon. Also remember that certain flour blends absorb liquid differently, so the results may vary even when every other ingredient and step remains exactly the same.
Why This Easy Gluten-Free Biscuit Recipe Works
For readers searching for gluten-free biscuits, easy gluten-free biscuits, gluten-free buttermilk biscuits, Southern gluten-free biscuits, fluffy gluten-free biscuits, flaky gluten-free biscuits, homemade gluten-free biscuits, dairy-free biscuits, or egg-free gluten-free biscuits, this recipe offers a practical homemade option with a short preparation time.
Cold butter provides the foundation for flaky layers, buttermilk creates moisture and tang, baking powder supplies lift, and gentle folding builds the biscuit structure without requiring a rolling pin. With approximately 15 minutes of preparation and 15 to 20 minutes in a hot oven, these golden gluten-free biscuits can move from mixing bowl to table in about half an hour.
Gluten Free Biscuits
Soft, flaky gluten-free buttermilk biscuits with tender centers and golden tops. Cold butter, buttermilk, and gentle folding help create traditional Southern-style biscuit texture without wheat flour.
12
servings15
minutes20
minutes143
kcal35
minutesIngredients
2 cups gluten-free all-purpose flour
½ teaspoon xanthan gum (omit if the flour blend already contains it)
1 tablespoon gluten-free baking powder
1 teaspoon salt
2 tablespoons granulated sugar
1 cup buttermilk
6 tablespoons unsalted butter
1 large egg
2 tablespoons gluten-free all-purpose flour, for dusting and folding
Instructions
- Preheat the oven to 450°F.
- Whisk flour, baking powder, salt, sugar, and xanthan gum if required.
- Cut the butter into small pieces and freeze for 10 minutes.
- Cut the cold butter into the dry mixture until the pieces are pea-sized.
- Add buttermilk and the whisked egg.
- Stir gently until a soft, sticky dough forms. Do not overmix.
- Dust parchment paper with 1 tablespoon of the reserved flour.
- Place the dough on the parchment and sprinkle the remaining tablespoon of flour over it.
- Fold the dough in half, then fold it in half again.
- Shape by hand into a 7-inch round about 1 inch thick.
- Cut biscuits with a 2-inch cutter, pressing straight down without twisting.
- Gently reshape the scraps and continue cutting until you have approximately 12 biscuits.
- Place the biscuits on a greased cast-iron pan or baking sheet.
- Bake at 450°F for 15–20 minutes, checking at 15 minutes.
- Remove when the tops are golden brown.
- Brush the warm biscuits with melted butter and serve.
Nutrition Facts
12 servings per container
- Amount Per ServingCalories143
- % Daily Value *
- Total Fat
7g
9%
- Total Carbohydrate
17g
7%
- Protein 3g 6%
* The % Daily Value tells you how much a nutrient in a serving of food contributes to a daily diet. 2,000 calories a day is used for general nutrition advice.