Introduction
There is nothing quite like the aroma of freshly baked bread filling your kitchen. Homemade bread has long been considered one of the most comforting and satisfying foods, but many people avoid making it because they assume it requires a traditional oven, special equipment, or years of baking experience. Fortunately, an air fryer makes bread baking easier, faster, and more accessible than ever. With its compact cooking chamber and circulating hot air, the air fryer creates a loaf with a beautifully golden crust and a soft, fluffy interior in a fraction of the time required by a conventional oven.
Air Fryer Bread is perfect for anyone who wants fresh bread without heating an entire kitchen. Whether you are preparing sandwiches for lunch, serving warm slices with soup at dinner, or enjoying a piece with butter and jam for breakfast, this versatile bread recipe is sure to become a household favorite.
This recipe uses simple pantry staples and straightforward techniques, making it ideal for both beginners and experienced bakers. Once you master the basic loaf, you can customize it with herbs, cheese, garlic, seeds, or whole grains to create countless delicious variations.
Why You Will Love This Recipe
- Requires only basic pantry ingredients.
- No conventional oven needed.
- Produces bakery-style bread at home.
- Easy enough for beginner bakers.
- Creates a soft and fluffy crumb.
- Features a delicious golden crust.
- Perfect for sandwiches, toast, and side dishes.
- Can be customized with various flavors and toppings.
- Uses less energy than traditional baking methods.
- Great for small households or limited kitchen spaces.
Preparation and Cooking Time
- Preparation Time: 20 minutes
- First Rise: 1 hour
- Second Rise: 30 minutes
- Air Frying Time: 20–25 minutes
- Cooling Time: 20 minutes
- Total Time: Approximately 2 hours 35 minutes
Yield
- Makes: 1 small loaf
- Servings: 8–10 slices
Ingredients
For the Dough
- 2½ cups all-purpose flour, plus extra for dusting
- 2¼ teaspoons active dry yeast (1 packet)
- 1 tablespoon granulated sugar
- 1 teaspoon fine salt
- ¾ cup warm water (105°F–110°F or 40°C–43°C)
- 2 tablespoons olive oil or melted unsalted butter
Optional Add-Ins
- 1 teaspoon garlic powder
- 1 tablespoon dried Italian herbs
- ½ cup shredded cheddar cheese
- 2 tablespoons grated Parmesan cheese
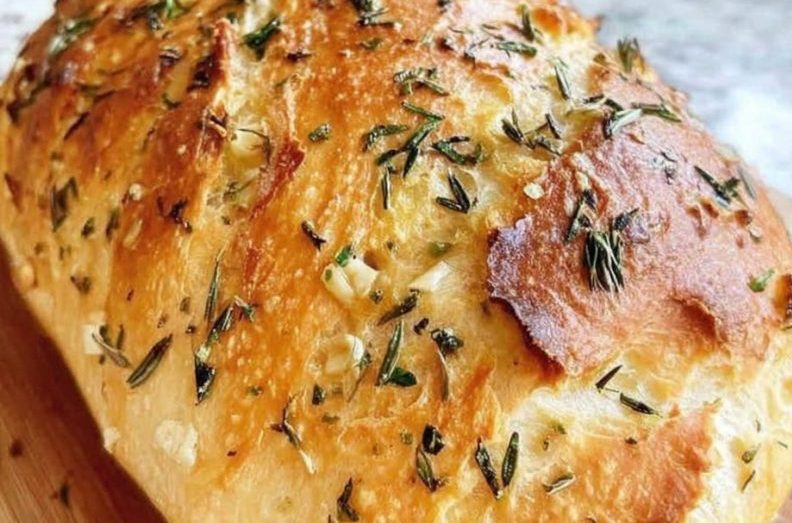
- 1 tablespoon fresh rosemary, finely chopped
- 1 tablespoon chopped chives
Optional Toppings
- Melted butter
- Sesame seeds
- Poppy seeds
- Oats
- Everything bagel seasoning
- Flaky sea salt
Equipment Needed
- Air fryer
- Large mixing bowl
- Measuring cups and spoons
- Wooden spoon or silicone spatula
- Clean kitchen towel
- Loaf pan or cake pan that fits inside the air fryer basket
- Wire cooling rack
Understanding the Ingredients
Flour
All-purpose flour creates a soft loaf with a tender texture. Bread flour can also be used for a slightly chewier texture and improved structure.
Yeast
Active dry yeast is responsible for making the dough rise. Proper activation is essential for light and airy bread.
Sugar
Sugar feeds the yeast and helps develop flavor while contributing to browning during baking.
Salt
Salt enhances flavor and strengthens the gluten structure, resulting in better texture.
Water
Warm water activates the yeast. The water should feel warm but not hot to the touch.
Oil or Butter
Fat enriches the dough, creating a softer crumb and helping the bread remain fresh longer.
Step-by-Step Instructions
Step 1: Activate the Yeast
- In a large mixing bowl, combine the warm water and sugar. Sprinkle the yeast over the surface and stir gently.
- Allow the mixture to sit undisturbed for 5 to 10 minutes. The yeast should become foamy and bubbly. This indicates that the yeast is active and ready to use.
- If the mixture remains flat or inactive, discard it and begin again with fresh yeast.
Step 2: Mix the Dough
- Add the olive oil and salt to the activated yeast mixture.
- Gradually add the flour, one cup at a time, stirring continuously with a wooden spoon until a rough dough forms.
- Once the dough becomes difficult to stir, transfer it to a lightly floured work surface.
Step 3: Knead the Dough
- Knead the dough for approximately 8 to 10 minutes.
- Push the dough away with the heel of your hand, fold it back toward yourself, rotate slightly, and repeat.
- Continue kneading until the dough becomes smooth, elastic, and slightly tacky but not sticky.
- If necessary, add small amounts of flour, one tablespoon at a time.
- Proper kneading develops gluten, which gives bread its structure and chew.
Step 4: First Rise
- Lightly grease a clean bowl with oil.
- Place the dough inside, turning it once so all sides are lightly coated.
- Cover the bowl with a damp kitchen towel or plastic wrap.
- Place in a warm location and allow the dough to rise for approximately 1 hour, or until doubled in size.
- The exact rising time may vary depending on room temperature.
Step 5: Deflate and Shape
- After the dough has doubled, gently press it down to release trapped air.
- Transfer the dough to a lightly floured surface.
- Shape it into a smooth ball or an oval loaf depending on the shape of your baking pan.
- Place the shaped dough into a greased loaf pan or cake pan suitable for air fryer use.
Step 6: Second Rise
- Cover the pan loosely with a towel.
- Allow the dough to rise for another 20 to 30 minutes until puffy.
- This second rise improves texture and creates a lighter loaf.
Step 7: Prepare for Baking
- Preheat the air fryer to 320°F (160°C) for 3 to 5 minutes.
- If desired, brush the top of the dough with melted butter and sprinkle with seeds or herbs.
Step 8: Air Fry the Bread
- Carefully place the pan into the preheated air fryer basket.
- Bake at 320°F (160°C) for 20 to 25 minutes.
- Check the bread after 15 minutes. If the top browns too quickly, loosely cover it with aluminum foil and continue cooking.
The bread is finished when:
- The crust is deep golden brown.
- The loaf sounds hollow when tapped.
- Internal temperature reaches 190°F–200°F (88°C–93°C).
Step 9: Cool Before Slicing
- Remove the bread from the air fryer.
- Allow it to rest in the pan for 5 minutes.
- Transfer to a wire rack and cool for at least 20 minutes before slicing.
- Cooling allows the crumb to set properly and prevents gummy texture.
Texture and Flavor
This Air Fryer Bread has a lightly crisp exterior and a soft, tender, fluffy interior. The flavor is mild, buttery, and slightly yeasty, making it suitable for countless sweet and savory uses.
Delicious Variations
Herb Bread
Add dried basil, oregano, thyme, and rosemary to the dough for a fragrant artisan-style loaf.
Garlic Bread
Incorporate garlic powder into the dough and brush with garlic butter immediately after baking.
Cheese Bread
Fold shredded cheddar, mozzarella, or Parmesan into the dough before shaping.
Whole Wheat Bread
Replace half of the all-purpose flour with whole wheat flour for extra fiber and nutty flavor.
Cinnamon Raisin Bread
Add cinnamon, raisins, and a little extra sugar for a breakfast-friendly loaf.
Serving Suggestions
Serve Air Fryer Bread:
- Warm with butter.
- Toasted with jam or honey.
- Alongside soups and stews.
- As sandwich bread.
- With olive oil and balsamic vinegar.
- As garlic toast.
- With scrambled eggs for breakfast.
- With cheese and charcuterie boards.
Storage Instructions
- Store completely cooled bread in an airtight container or bread bag at room temperature for up to 3 days.
- Refrigeration is not recommended because it can dry out the bread.
- For longer storage, wrap tightly and freeze for up to 3 months.
- To serve, thaw at room temperature and warm in the air fryer for a few minutes.
Tips for Success
- Always verify that yeast is fresh.
- Use warm, not hot, water.
- Measure flour accurately.
- Do not skip the second rise.
- Avoid adding too much flour during kneading.
- Preheat the air fryer for even baking.
- Cover loosely with foil if browning too quickly.
- Allow bread to cool completely before slicing.
Nutritional Benefits
Although homemade bread is a comfort food, it also offers several benefits:
- Contains fewer preservatives than store-bought bread.
- Provides carbohydrates for energy.
- Can be customized with whole grains and seeds.
- Offers control over sodium and sugar levels.
- Contains protein from flour.