Guide to Perfect Homemade French Bread
There’s something magical about the aroma of freshly baked bread wafting through your home. Whether you’re a seasoned baker or a beginner, this simple and quick French bread recipe will leave you with a crispy crust and soft, airy interior—a delightful addition to any meal. This guide will walk you through every detail of making this bread from scratch, ensuring your success every step of the way.
Why You’ll Love This Recipe
- Quick Turnaround: Ready in just a few hours, this recipe skips the long overnight rise.
- Perfect Texture: Achieve a golden crust and fluffy interior that rivals bakery bread.
- Versatile: Easily customize with herbs, spices, or sweet add-ins.
- Simple Ingredients: Uses pantry staples, making it accessible and cost-effective.
How to Store Your Homemade French Bread
- For Short-Term Use:
- Place cut loaves cut-side down on a cutting board at room temperature. No wrapping is needed, and the bread stays fresh for up to 24 hours.
- For Longer Storage:
- Store sliced bread in an airtight container and freeze for up to 3-4 months. Toast slices directly from frozen as needed.
- Wrap a full loaf in plastic wrap and freeze for the same duration. To defrost, leave it at room temperature for a few hours.
Can You Use Whole Wheat Flour?
Absolutely! Substitute up to 50% of the all-purpose flour with whole wheat flour to maintain a light, airy texture. Exceeding this ratio may result in denser bread.
Add Your Favorite Flavors
This recipe is a blank canvas for creativity! Add fresh or dried herbs, roasted garlic, shredded cheese, nuts, or dried fruit. If using ingredients that release moisture (like fresh fruit or olives), fold them in gently during the shaping process.
The Ingredients You’ll Need
- 2 1/4 teaspoons active dry yeast (9 grams)
- 1 teaspoon sugar (or honey for a natural sweetness)
- 1 1/4 cups warm water (300 grams)
- 1 1/4 teaspoons kosher salt (8 grams)
- 2 1/2 to 3 1/2 cups all-purpose flour (400 grams), plus extra for dusting
The Secret to Perfect Bread: Step-by-Step Instructions
1. Activate the Yeast
Start by combining yeast, sugar, and warm water in a large mixing bowl. Let it sit for about 5 minutes until the mixture turns foamy. This step ensures your yeast is active and ready to work.
2. Mix the Dough
- Add flour to the bowl and mix with a sturdy spatula until the dough starts to come together.
- Sprinkle in the salt and continue mixing until all ingredients are incorporated. The dough will appear shaggy and sticky at this stage, which is perfectly fine.
3. First Rise (1 Hour)
- Cover the bowl with a clean tea towel and let the dough rise at room temperature for 1 hour, or until it has doubled in size.
4. Shape the Dough
- Lightly flour a large cutting board. Tip the dough out gently without punching it down, preserving those precious air bubbles.
- Shape the dough into a round loaf by folding the edges into the center repeatedly until it feels tight and elastic. Flip it over for a smooth finish.
5. Second Rise (30 Minutes)
- Place the shaped dough seam-side down into a floured proofing basket or medium bowl lined with a linen napkin.
- Cover with a tea towel and let it rise for another 30 minutes while preheating the oven.
The Baking Process
Preheat the Oven
- Place an empty Dutch oven (with the lid on) into your oven and heat it to 460°F (240°C).
Prepare the Dough for Baking
- Lay a piece of parchment paper on a counter or cutting board. Tip the dough gently onto the parchment, seam-side up, to create natural cracks.
- Carefully lift the dough using the parchment paper and place it into the preheated Dutch oven.
Bake the Bread
- Cover the Dutch oven with the lid and bake for 30 minutes.
- Remove the lid and continue baking for an additional 10-15 minutes, allowing the crust to develop a rich golden-brown color.
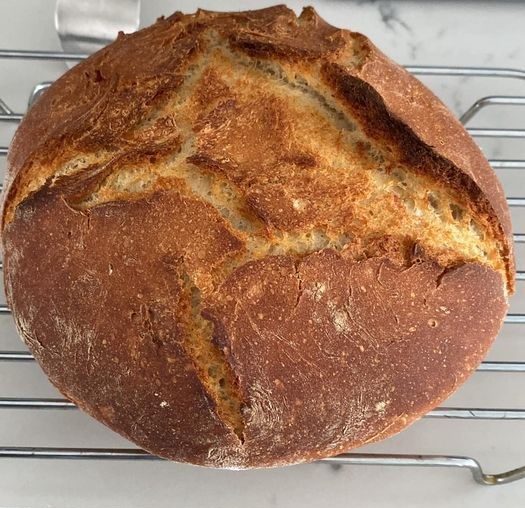
Cool and Serve
- Use oven mitts to remove the bread from the Dutch oven and transfer it to a cooling rack.
- Let it cool for at least 30 minutes before slicing. Serve with butter, jam, or your favorite toppings.
Helpful Tips for Success
- For Taller Loaves: Double the ingredient quantities and increase the dough thickness before baking.
- Troubleshooting Sticky Dough: Dust your hands and surface with flour as needed, but avoid over-flouring the dough to maintain its light texture.
Enjoy your homemade French bread—a perfect pairing for soups, salads, or as a delicious snack on its own!